new
Social Planner
Snapshot
Social Planner Now in Snapshots!!
Social Planner is now in Snapshots 😍. Bulk schedule posts from one location to another in just a few clicks.
How To Use Social Planner In Snapshots
In Parent Location:
1) Go to Marketing > Social Planner
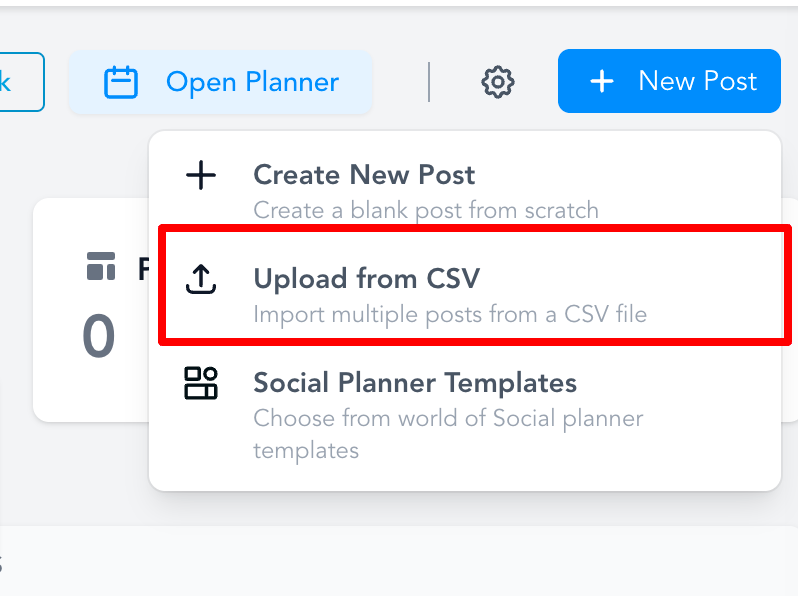
2) Create Post > Upload to CSV and import your CSV of social posts

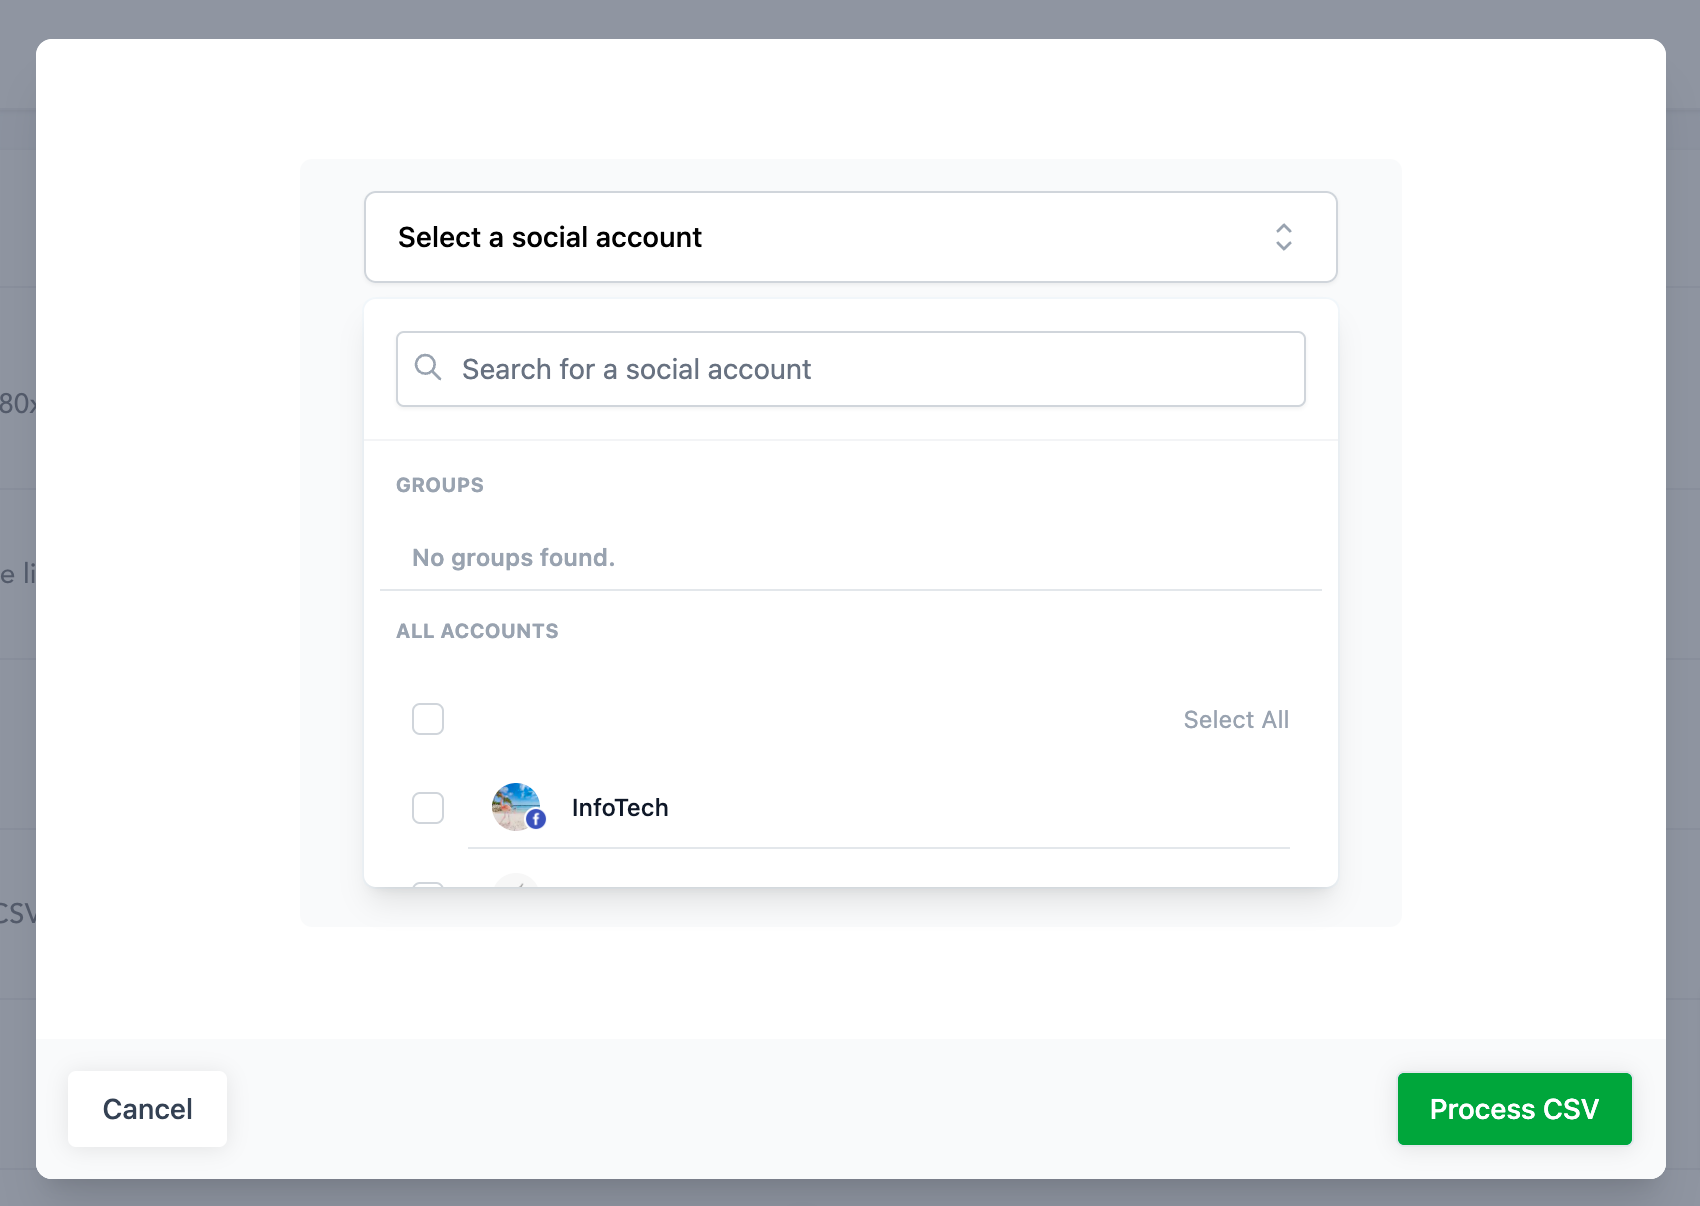
3) Select at least one Social Network (this has no bearing on the snapshot but is a required step in order to import a CSV)
4) Go to CSV tab where you will see either a status of "In Progress" or "Review and Schedule". Once the status becomes "Review and Schedule", the CSV will be available as an option when creating a snapshot.

In Agency Location:
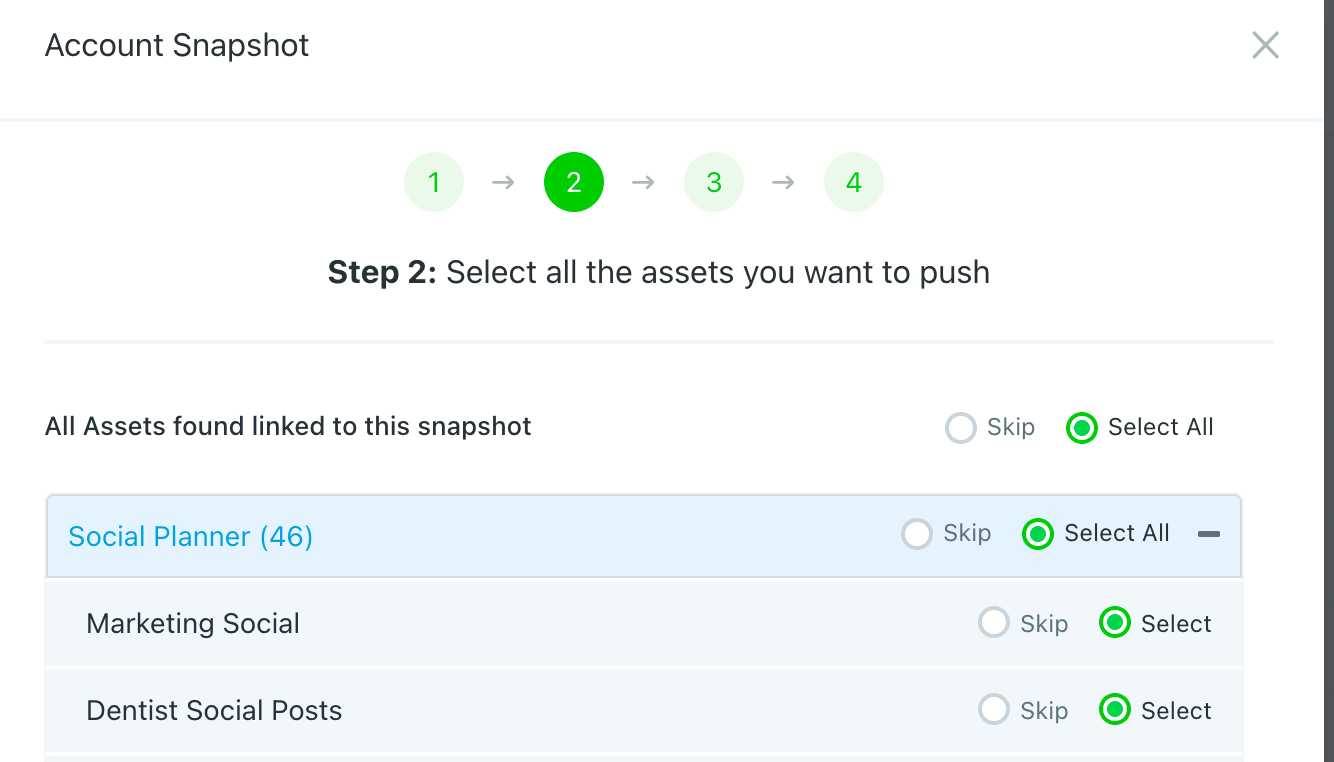
1) Go to Agency Settings > Snapshots
2) Open an existing Snapshot or create a new Snapshot and Social Planner will be an optional section. When expanded, any uploaded CSVs will display as selectable options.

In Receiving Location:
1) Go to Marketing > Social Planner > CSV (list view)
2) In the list view, the Social Planner CSVs of the snapshot location will show up with a status of "Select Socials"
3) Click "Select Socials" and choose the social networks to post to


4) The CSV will get processed for all the selected socials.
5) The status of the CSV will change to "Review and Schedule"
6) Click "Review and Schedule" to review and schedule all posts