
Changelog
Follow up on the latest improvements and updates.
RSS
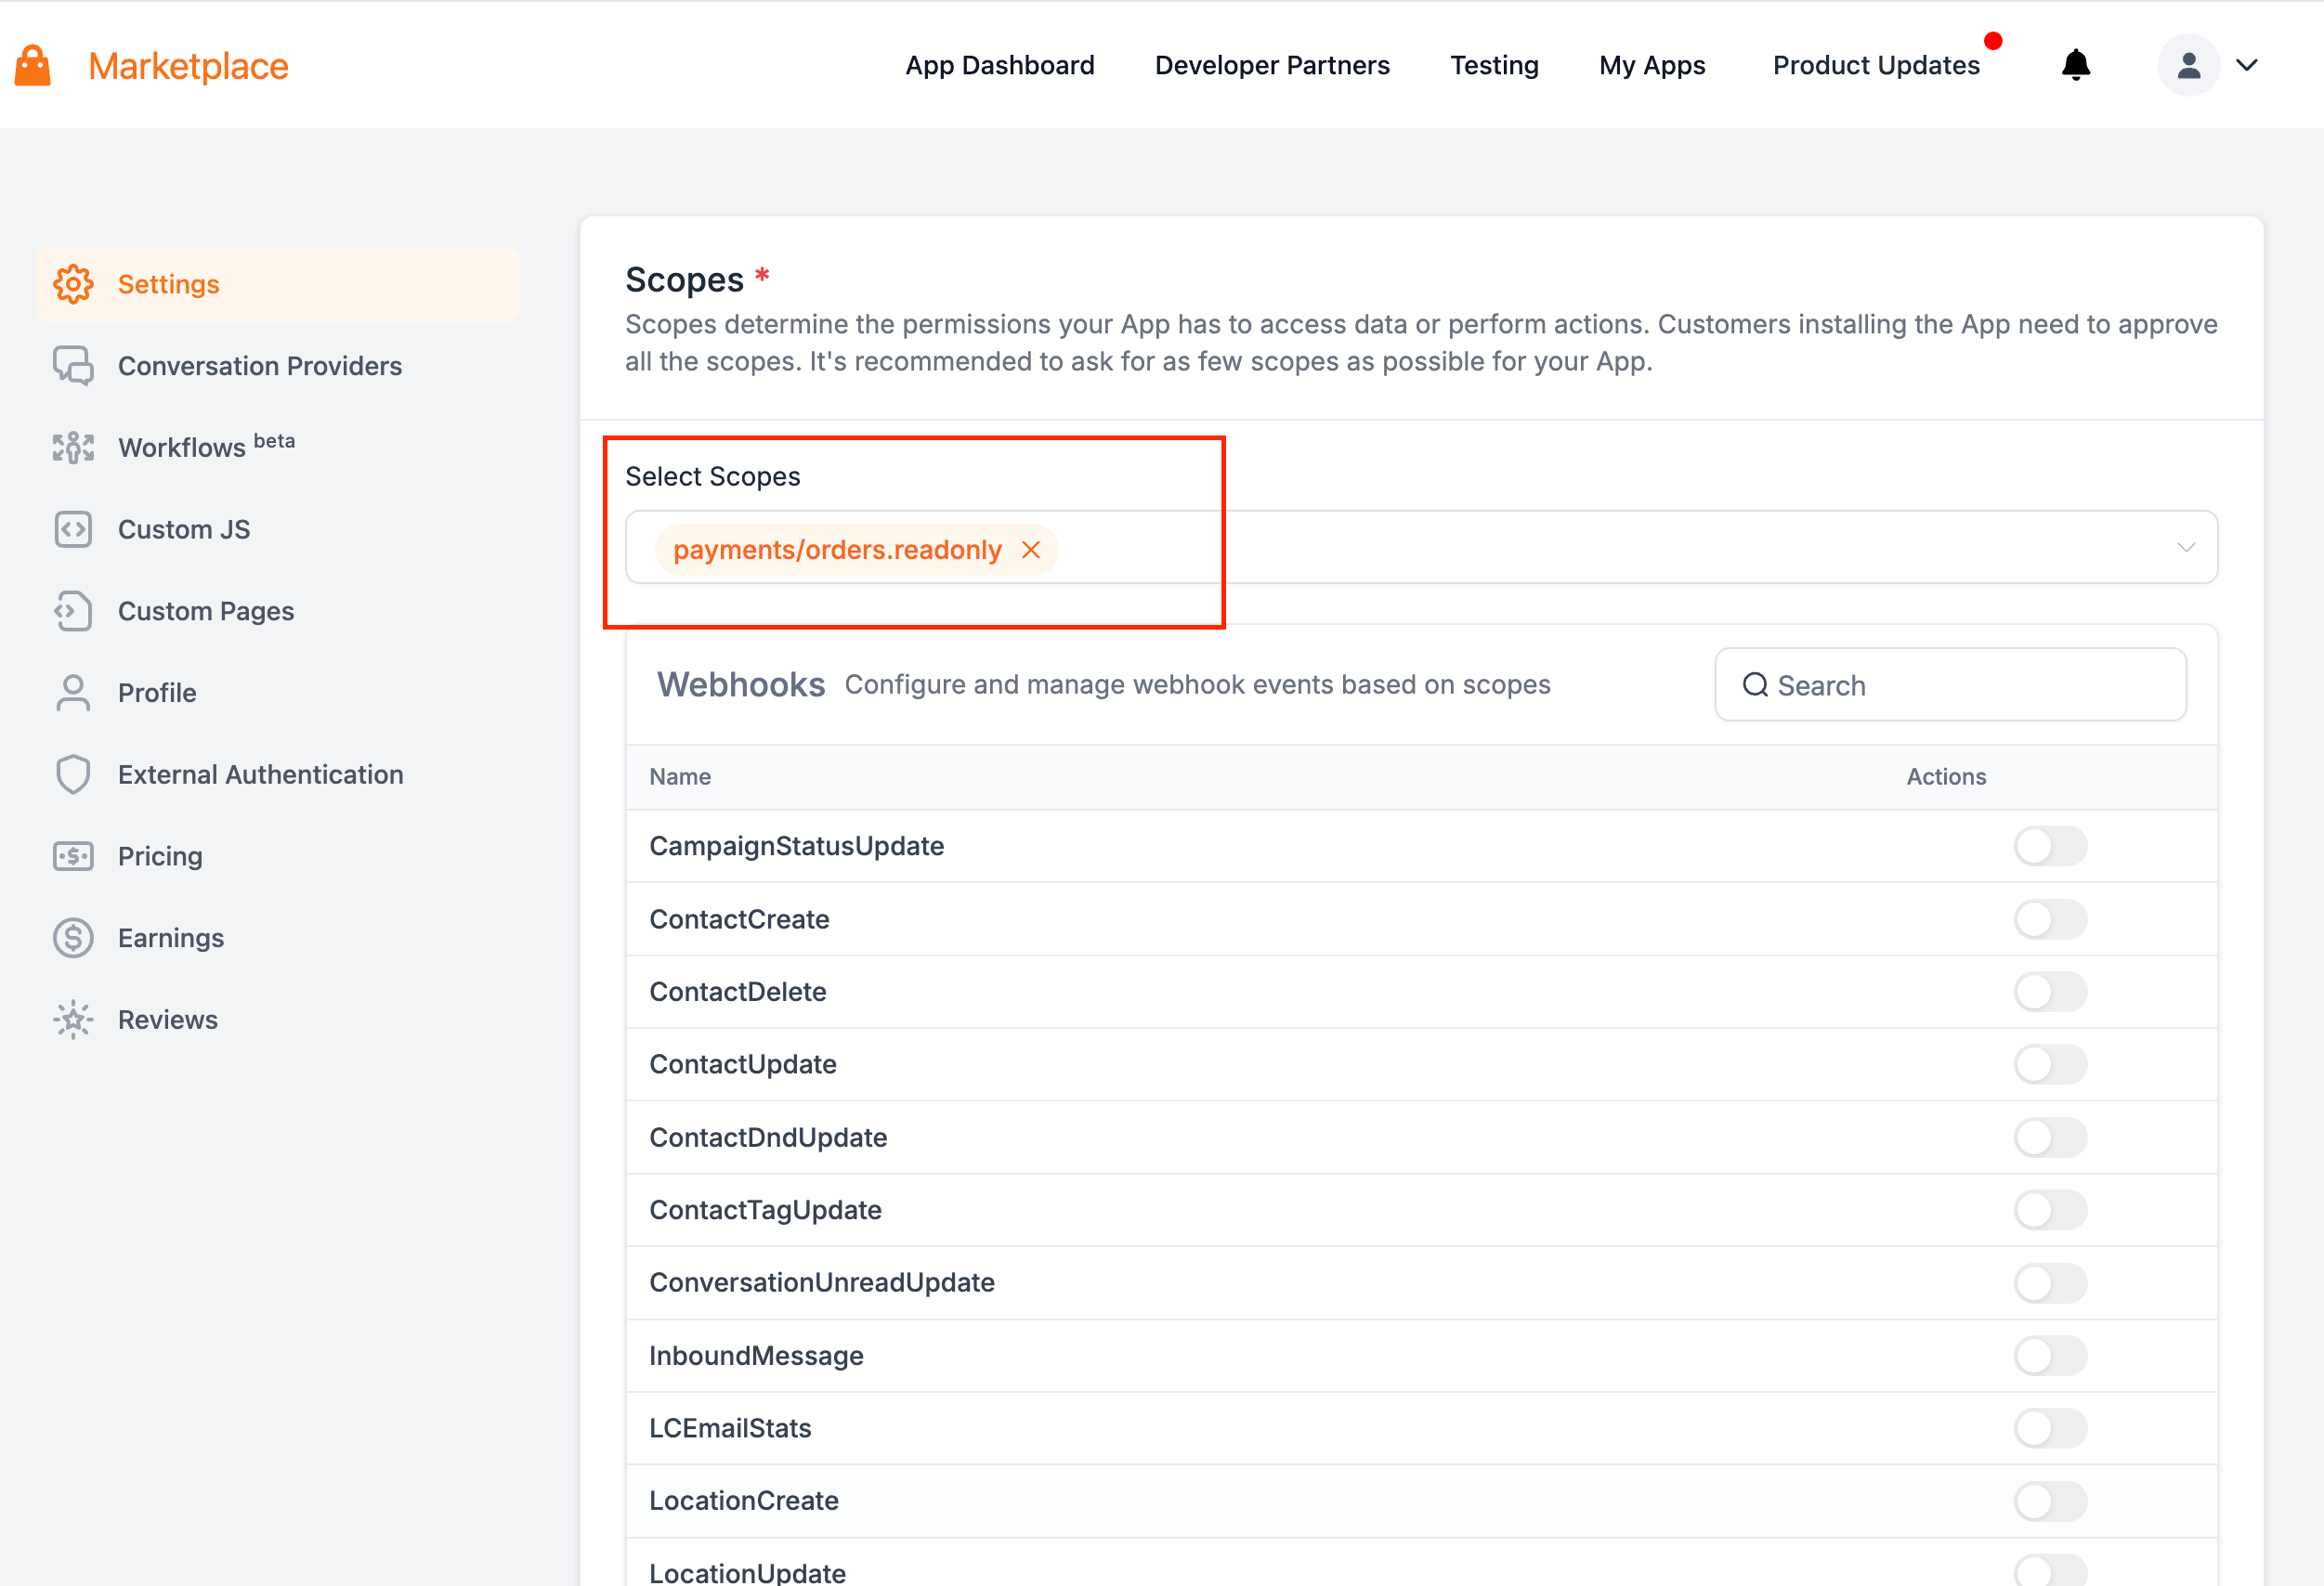
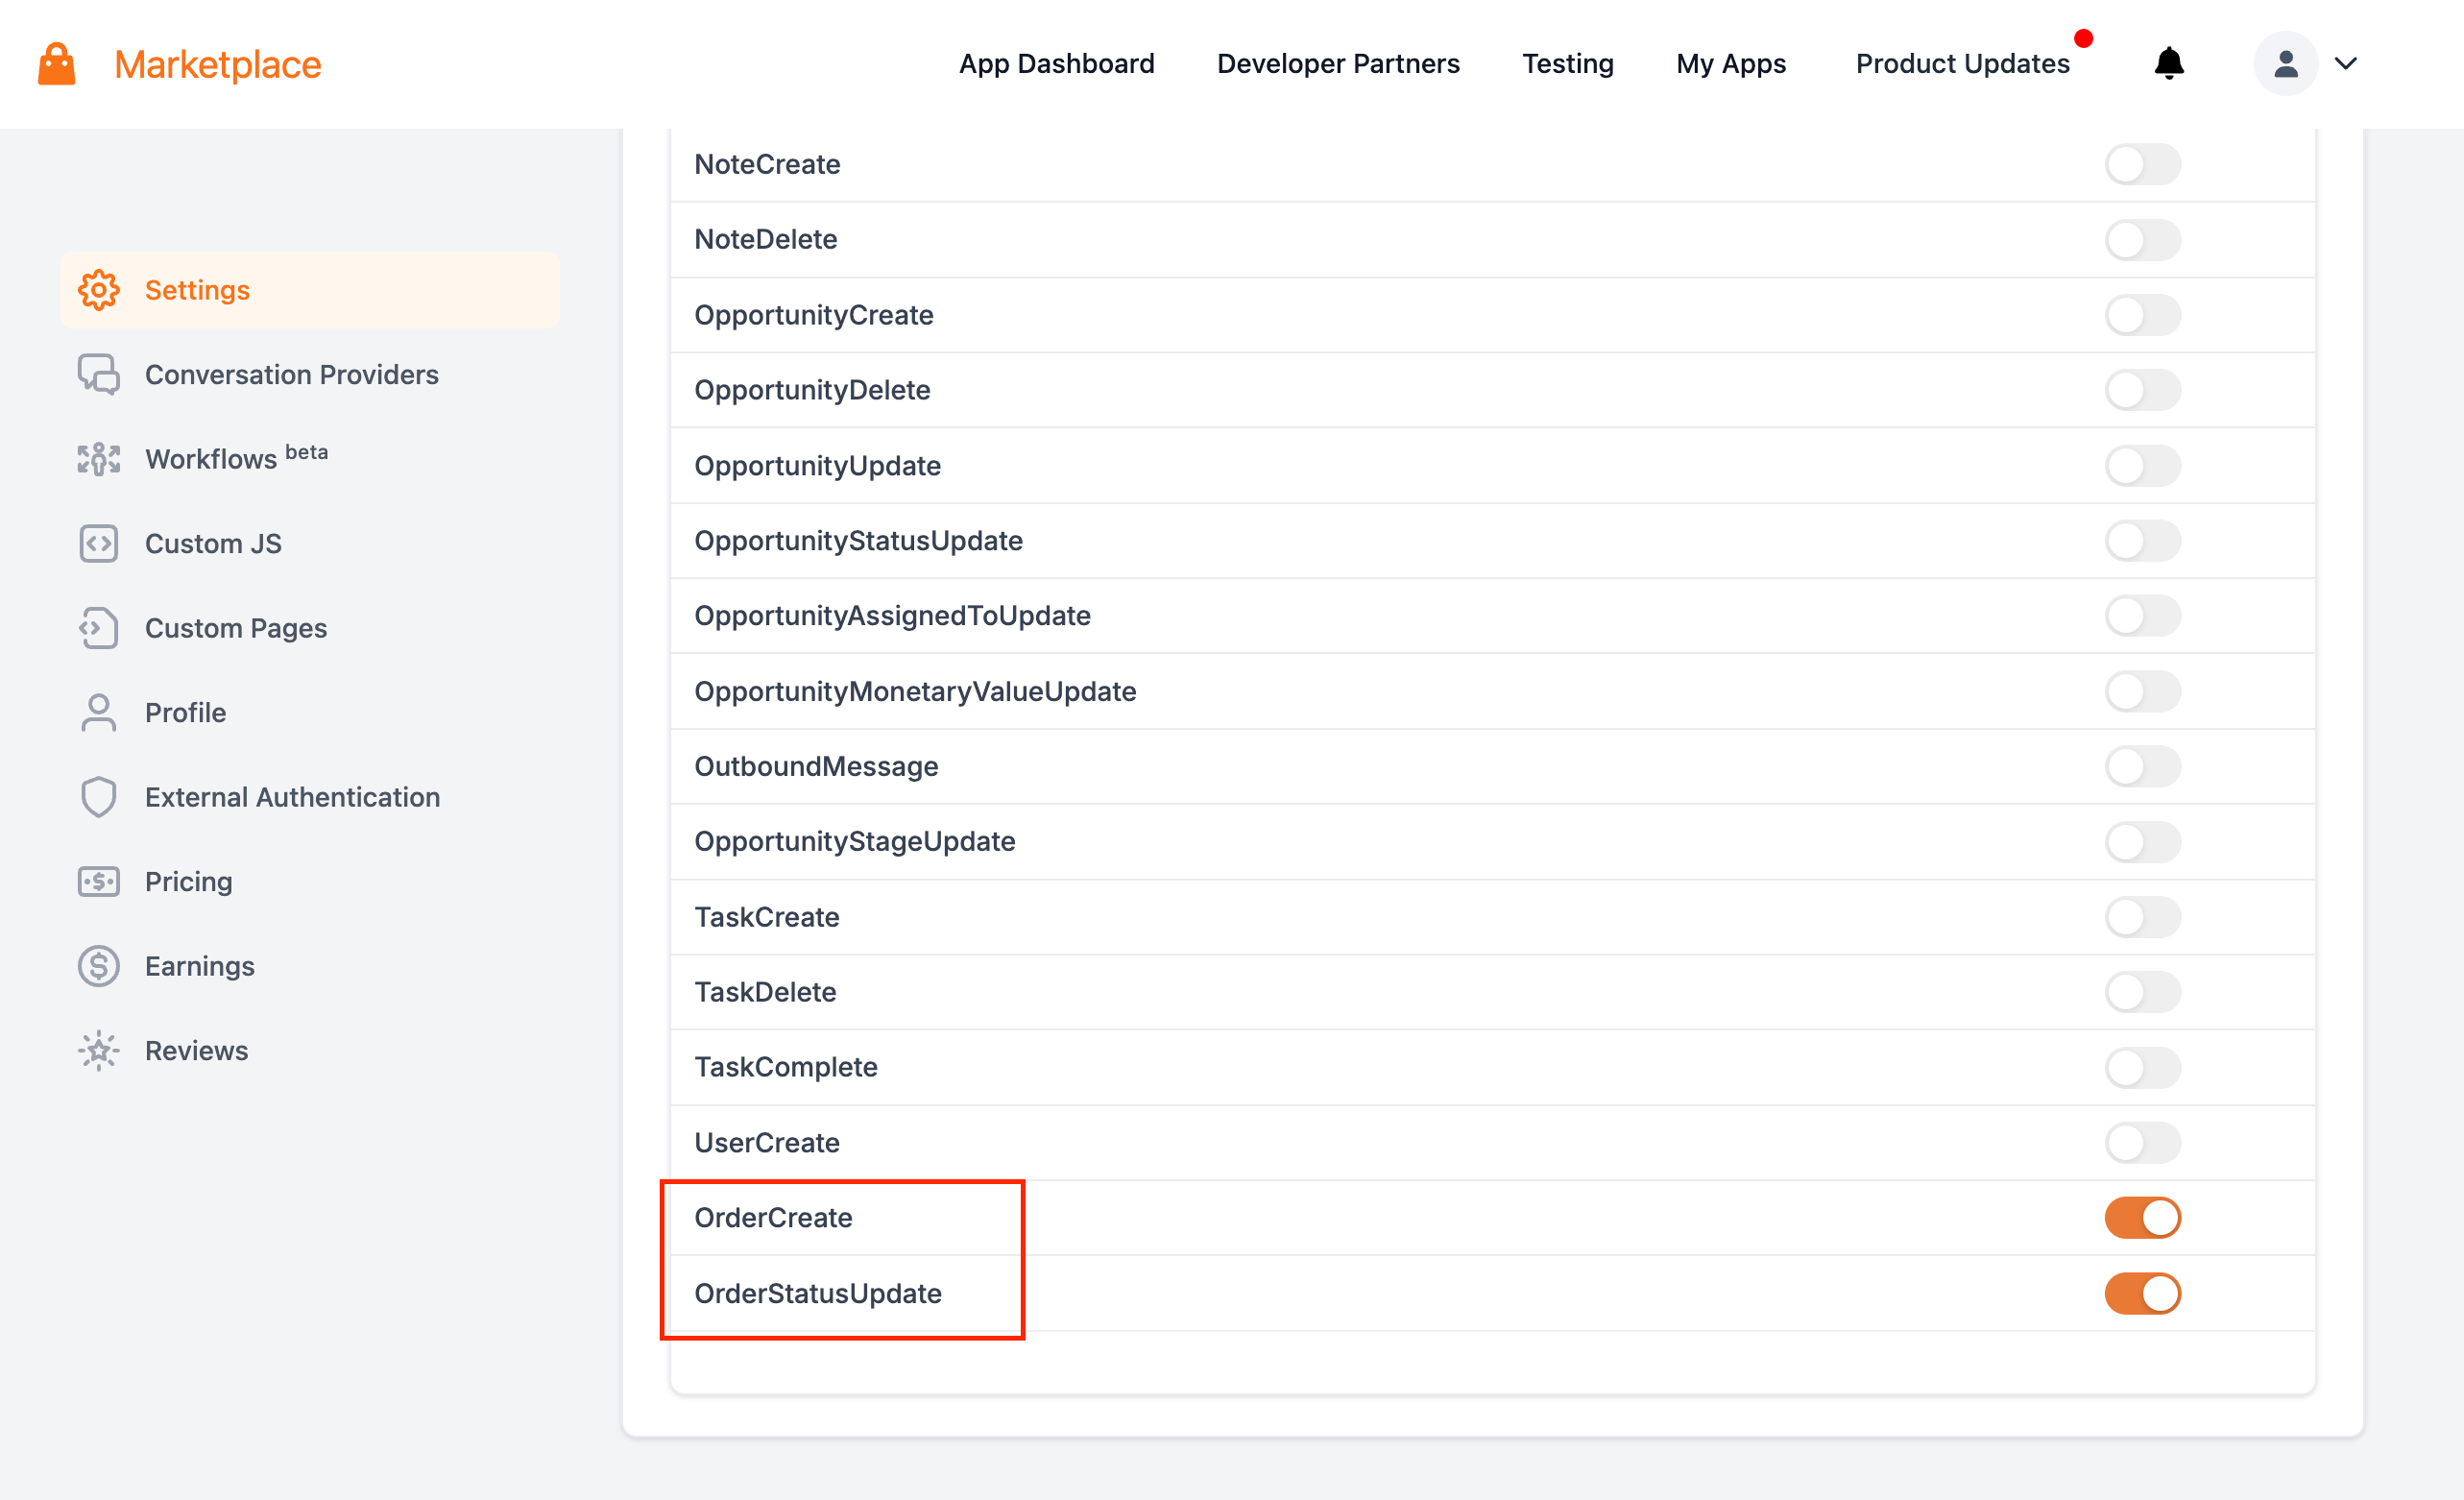
- Developers can now subscribe to OrderCreateandOrderStatusUpdatein the marketplace for their custom app development.
- This is available as OrderCreate&OrderStatusUpdatein app settings withpayments/orders.readonlyscope configurable at location level (Screenshot attached for reference)
- OrderCreate- This occurs whenever an order is created.
- OrderStatusUpdate- This occurs whenever an order status is changed. Possible order status arepending,completed, orcancelled
new
Affiliate Manager
Sub Account Affiliate Manager: Automated Affiliate Payouts using Paypal
We are thrilled to introduce Auto Affiliate Payouts using Paypal! Now effortlessly pay affiliates without leaving GHL
👀 What’s New?
- Enjoy a smoother payout experience. The process is now more intuitive and user-friendly, reducing the hassle of navigating to third party payment platforms or interfaces.
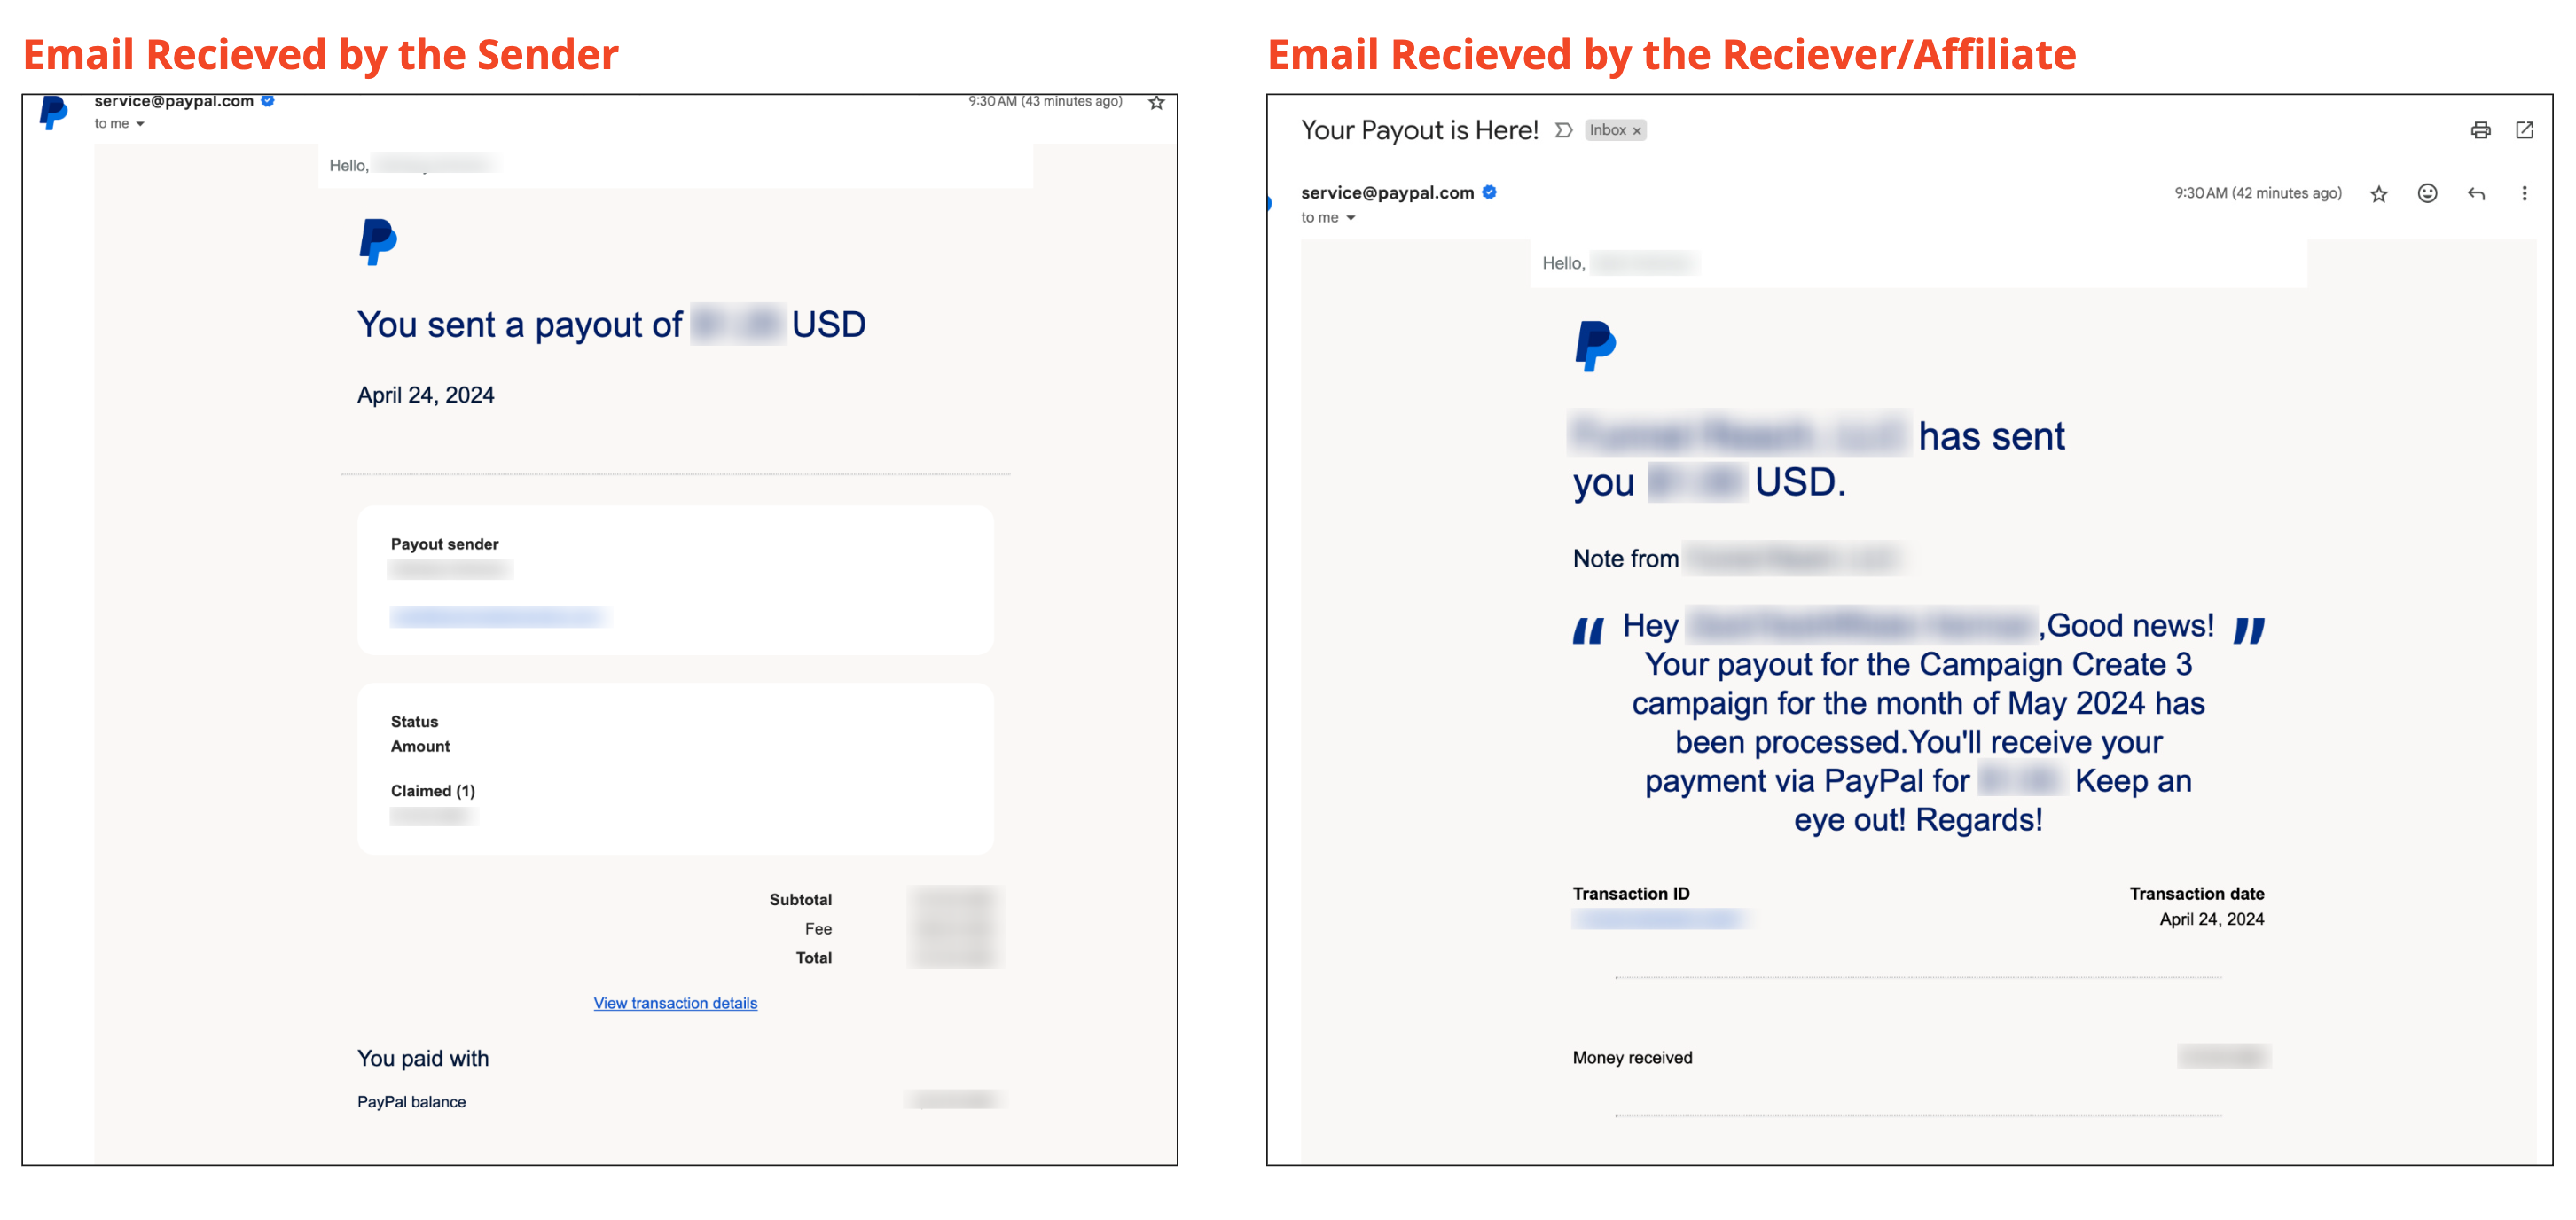
- Email Notifications for both the Sender and Receiver(Affiliate)
- Add/Edit/Manage Affiliate's Paypal Account details on both; Sub Account Affiliate Manager and Affiliate Portal
✅ Requirements:
- Integration with PayPal Business Account (Guide)
- Addition of PayPal email IDs for affiliates under affiliate's Payout Methods (Guide)
👷 How It Works:
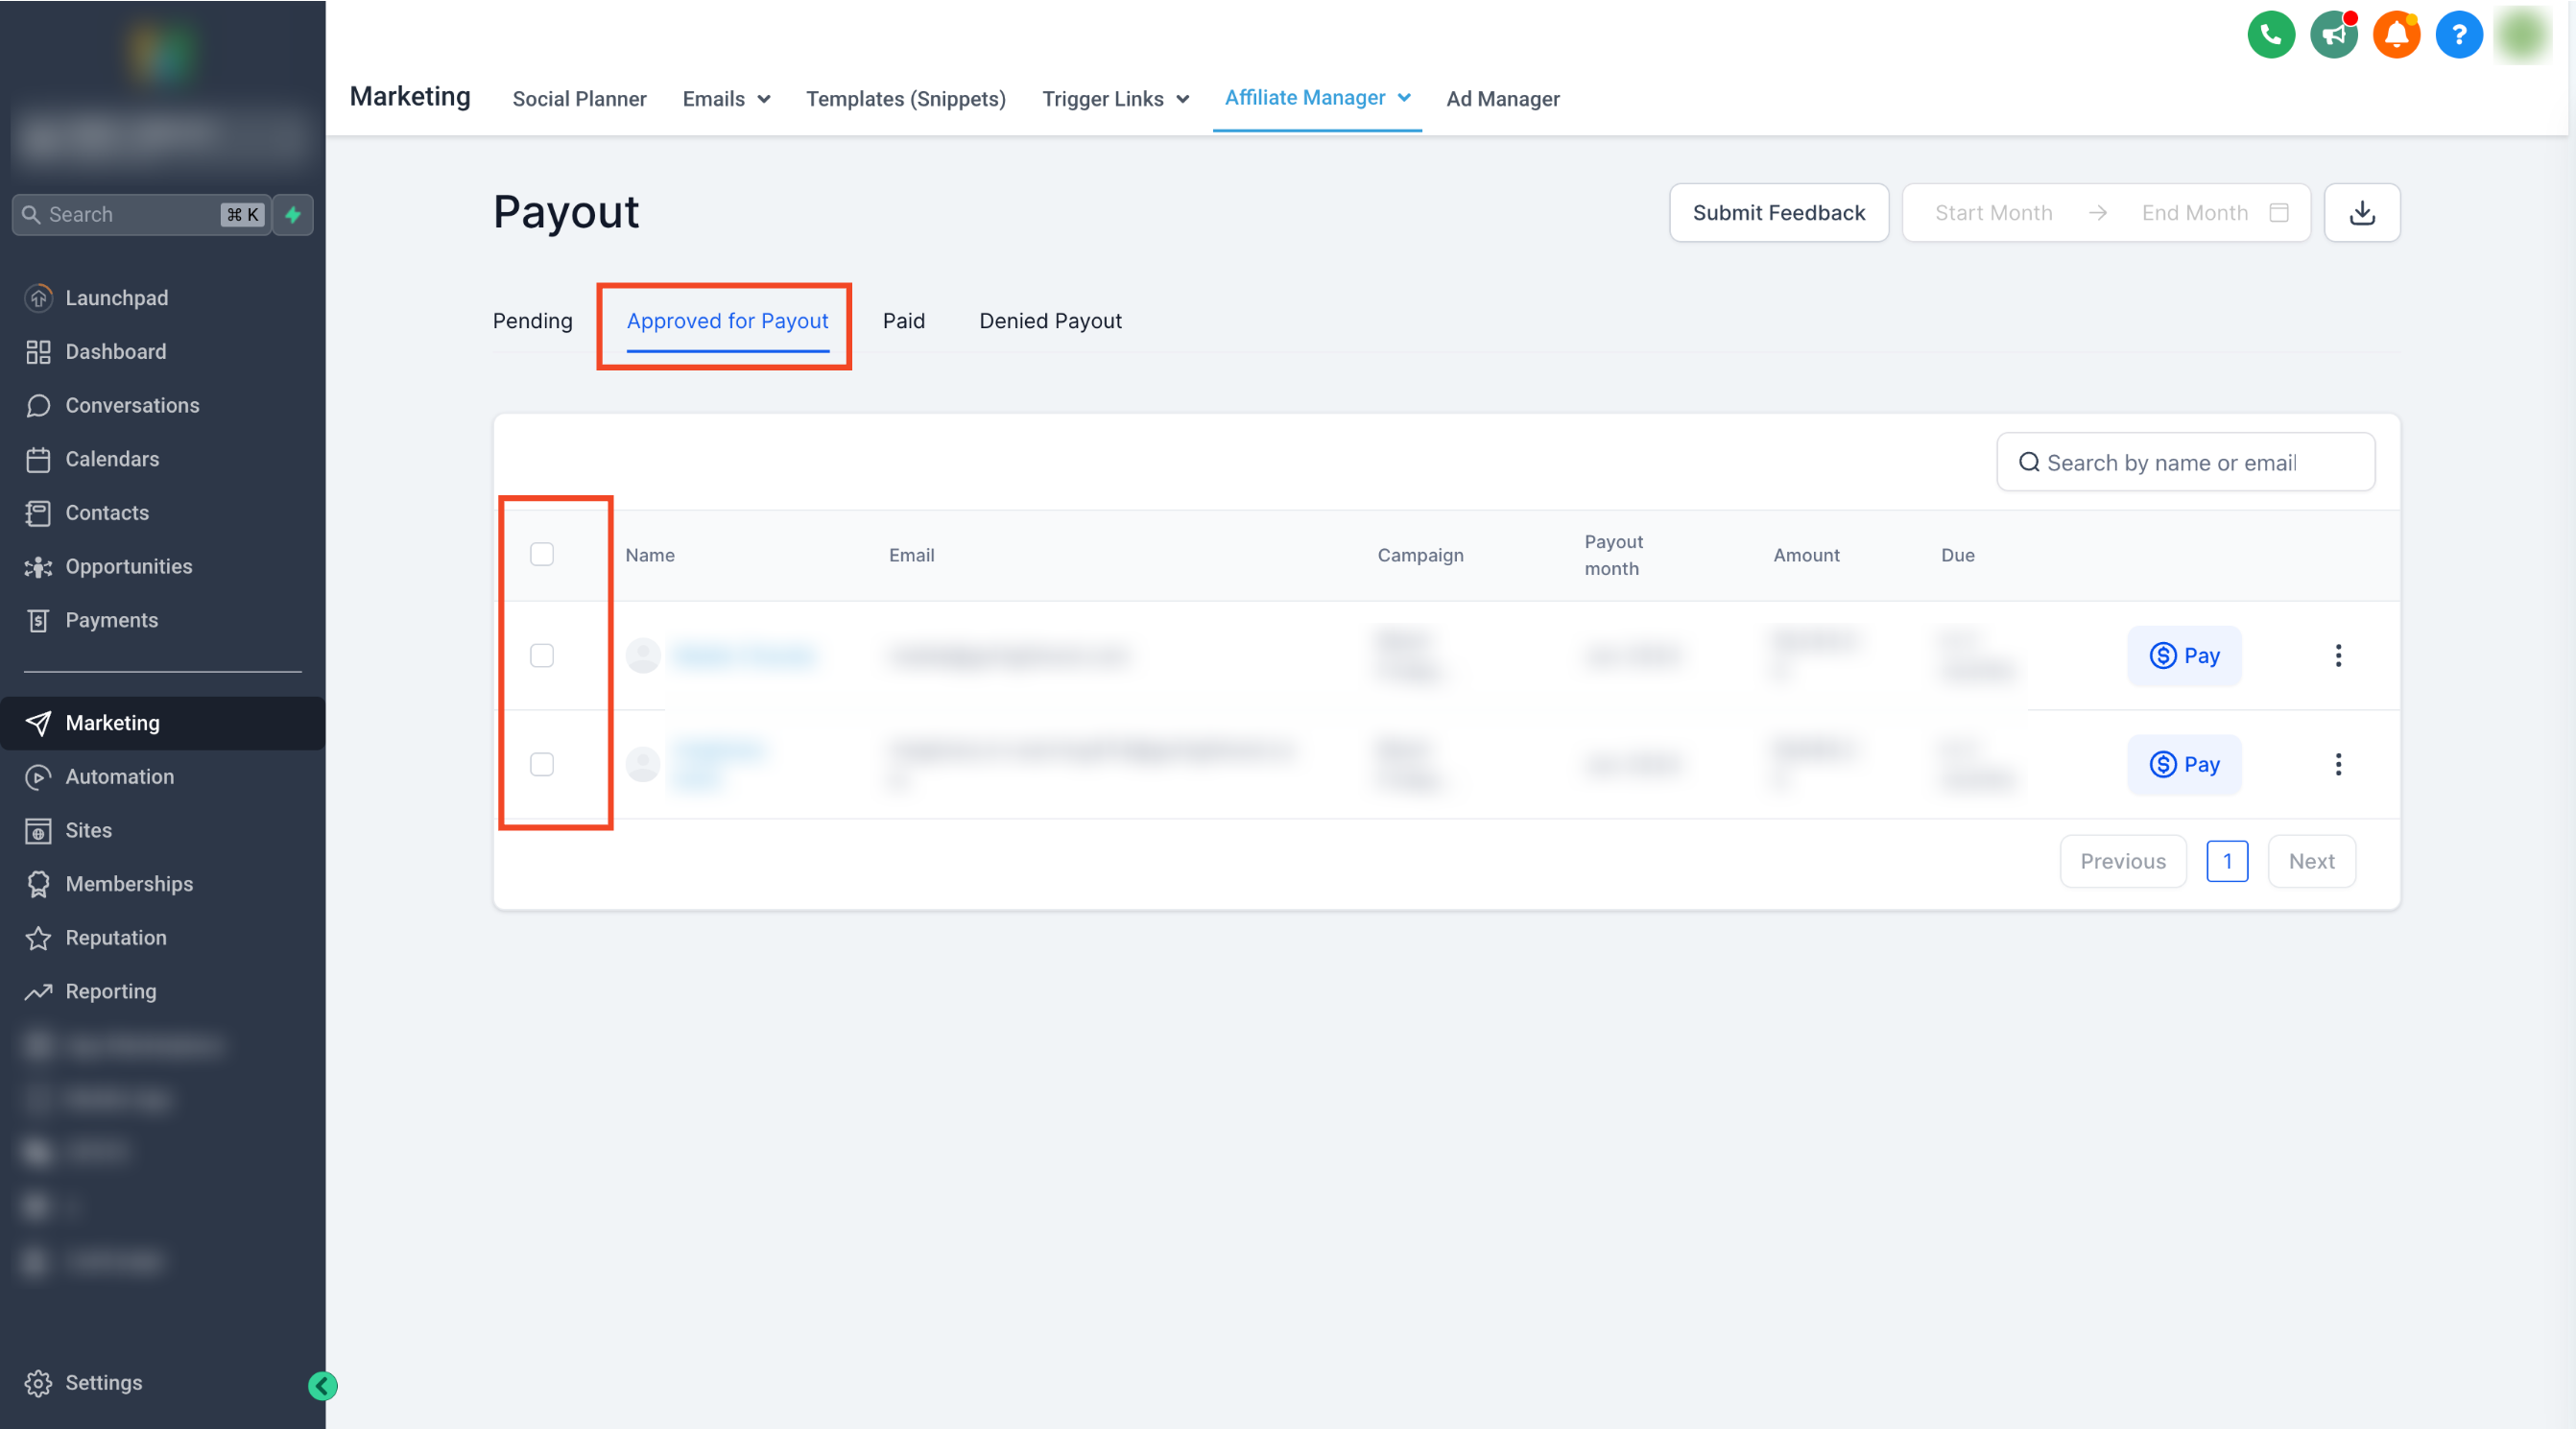
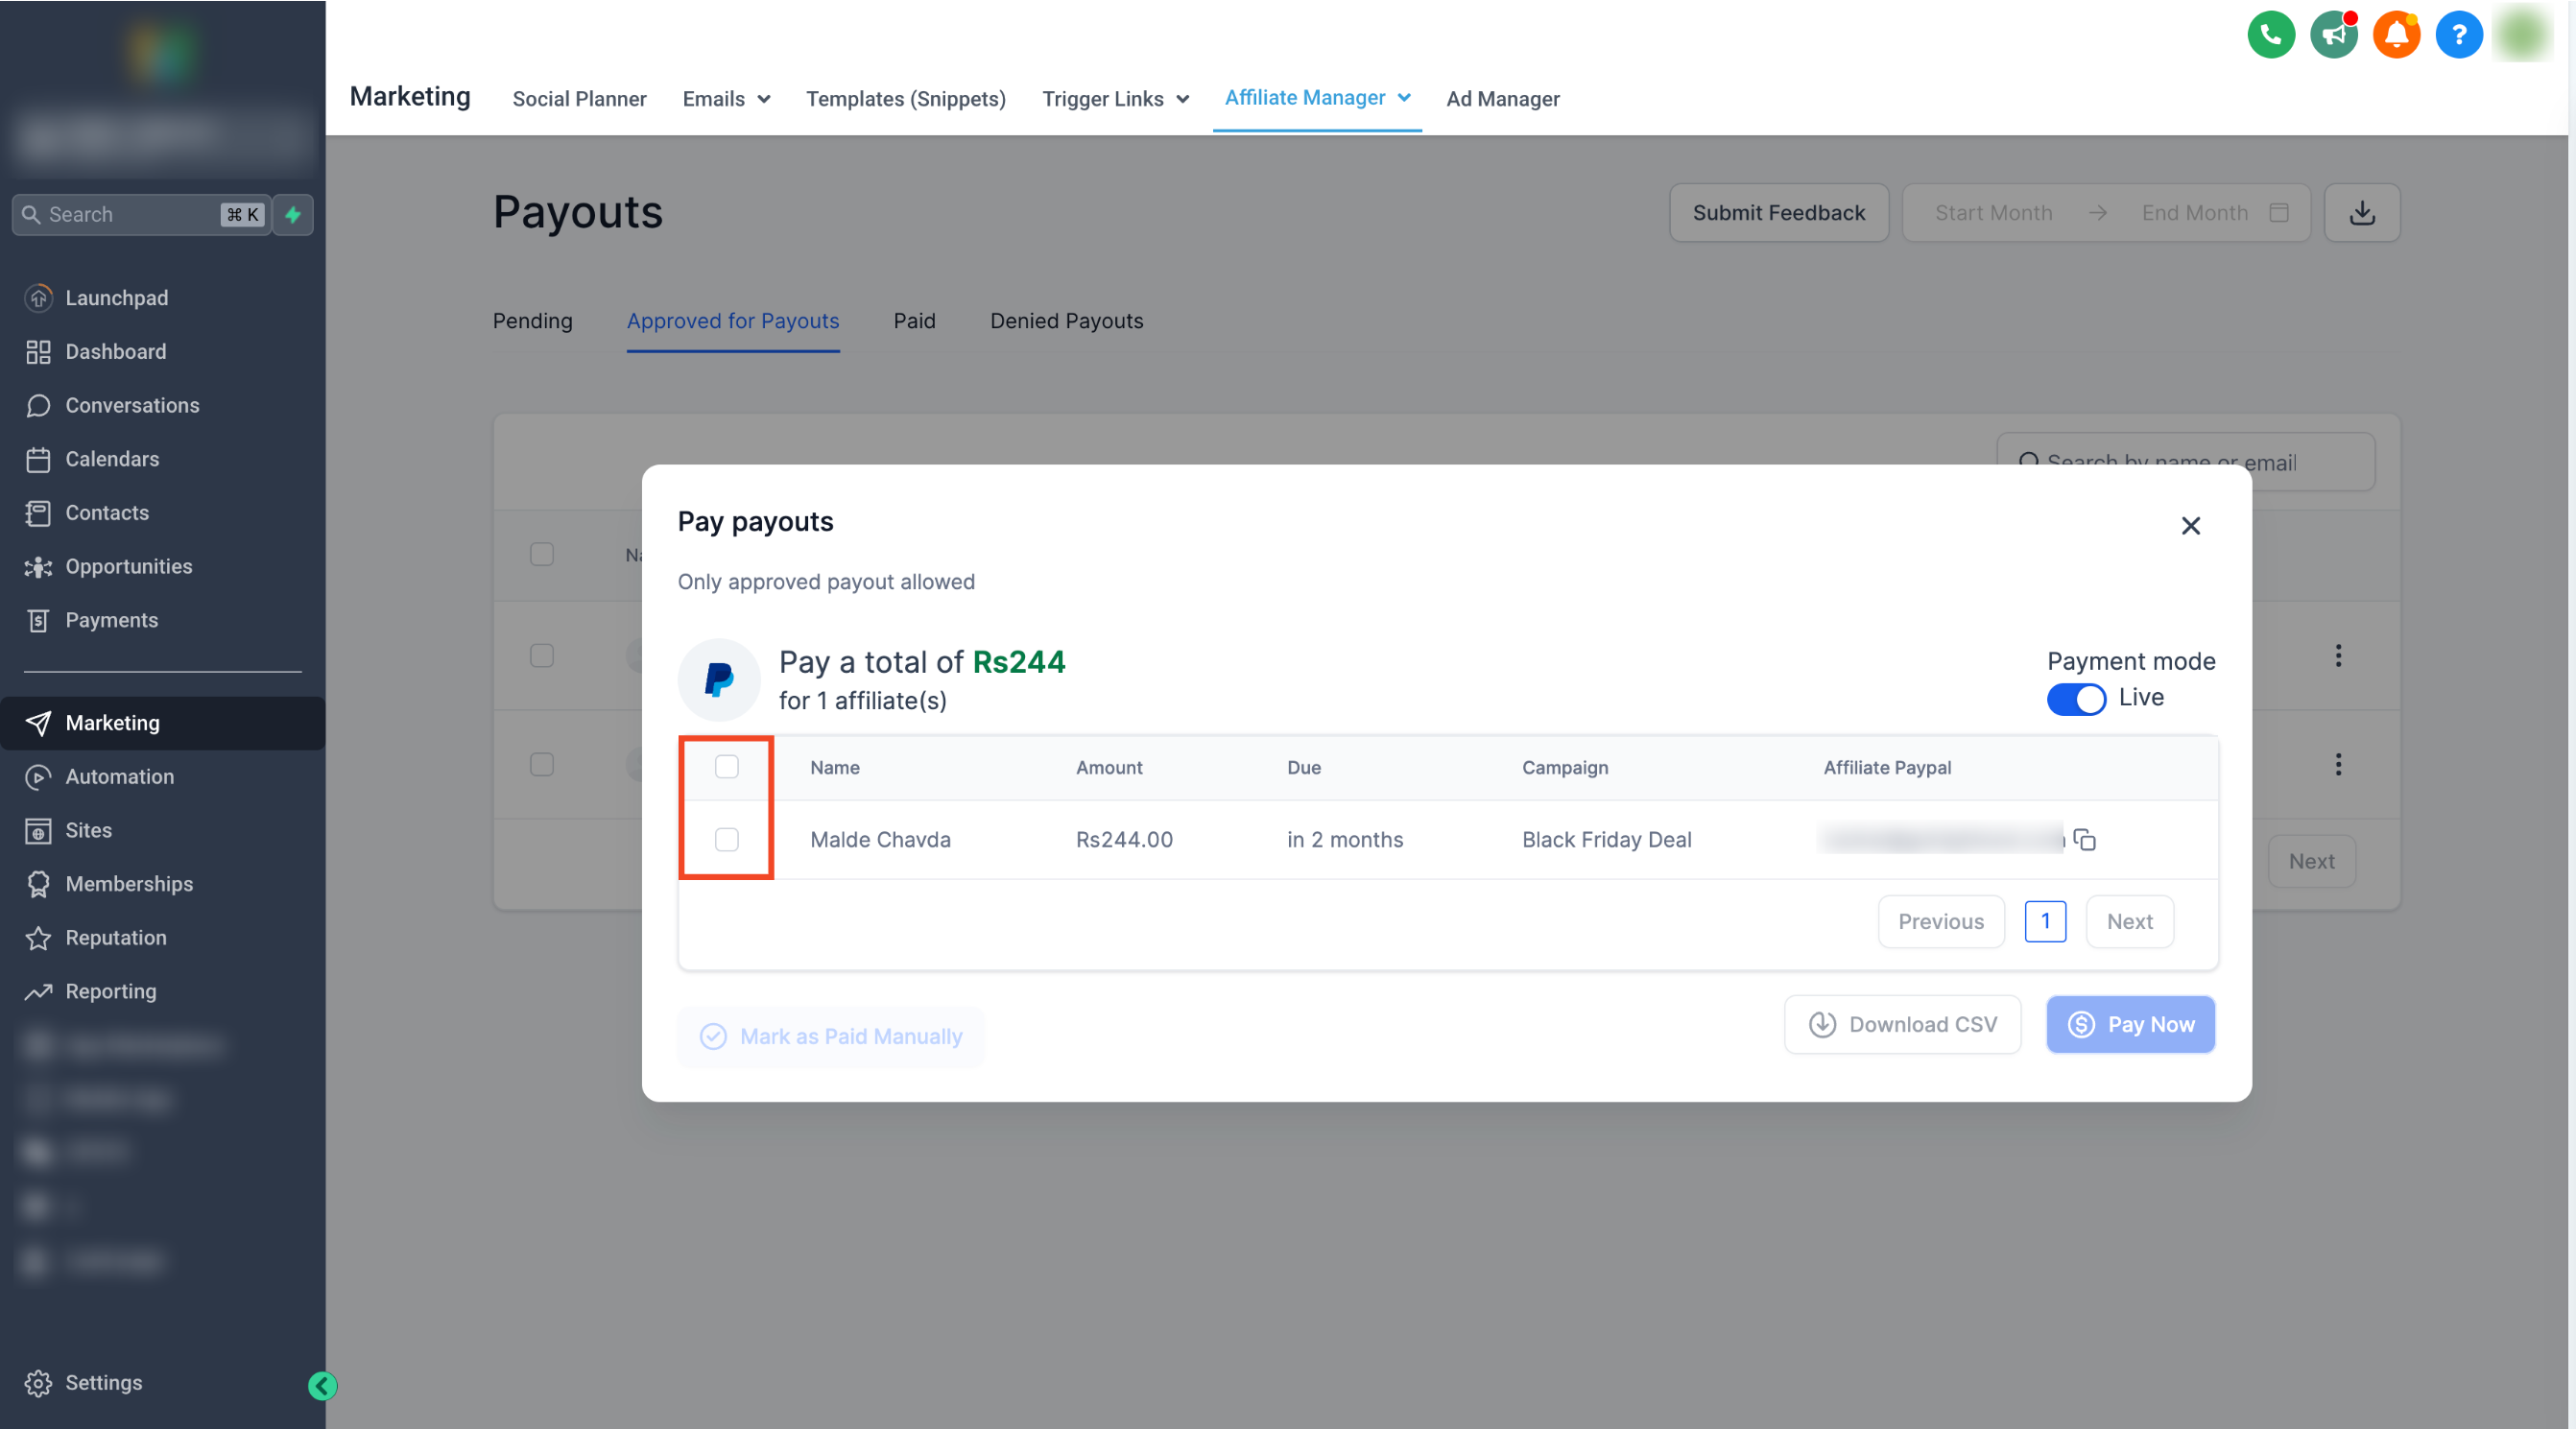
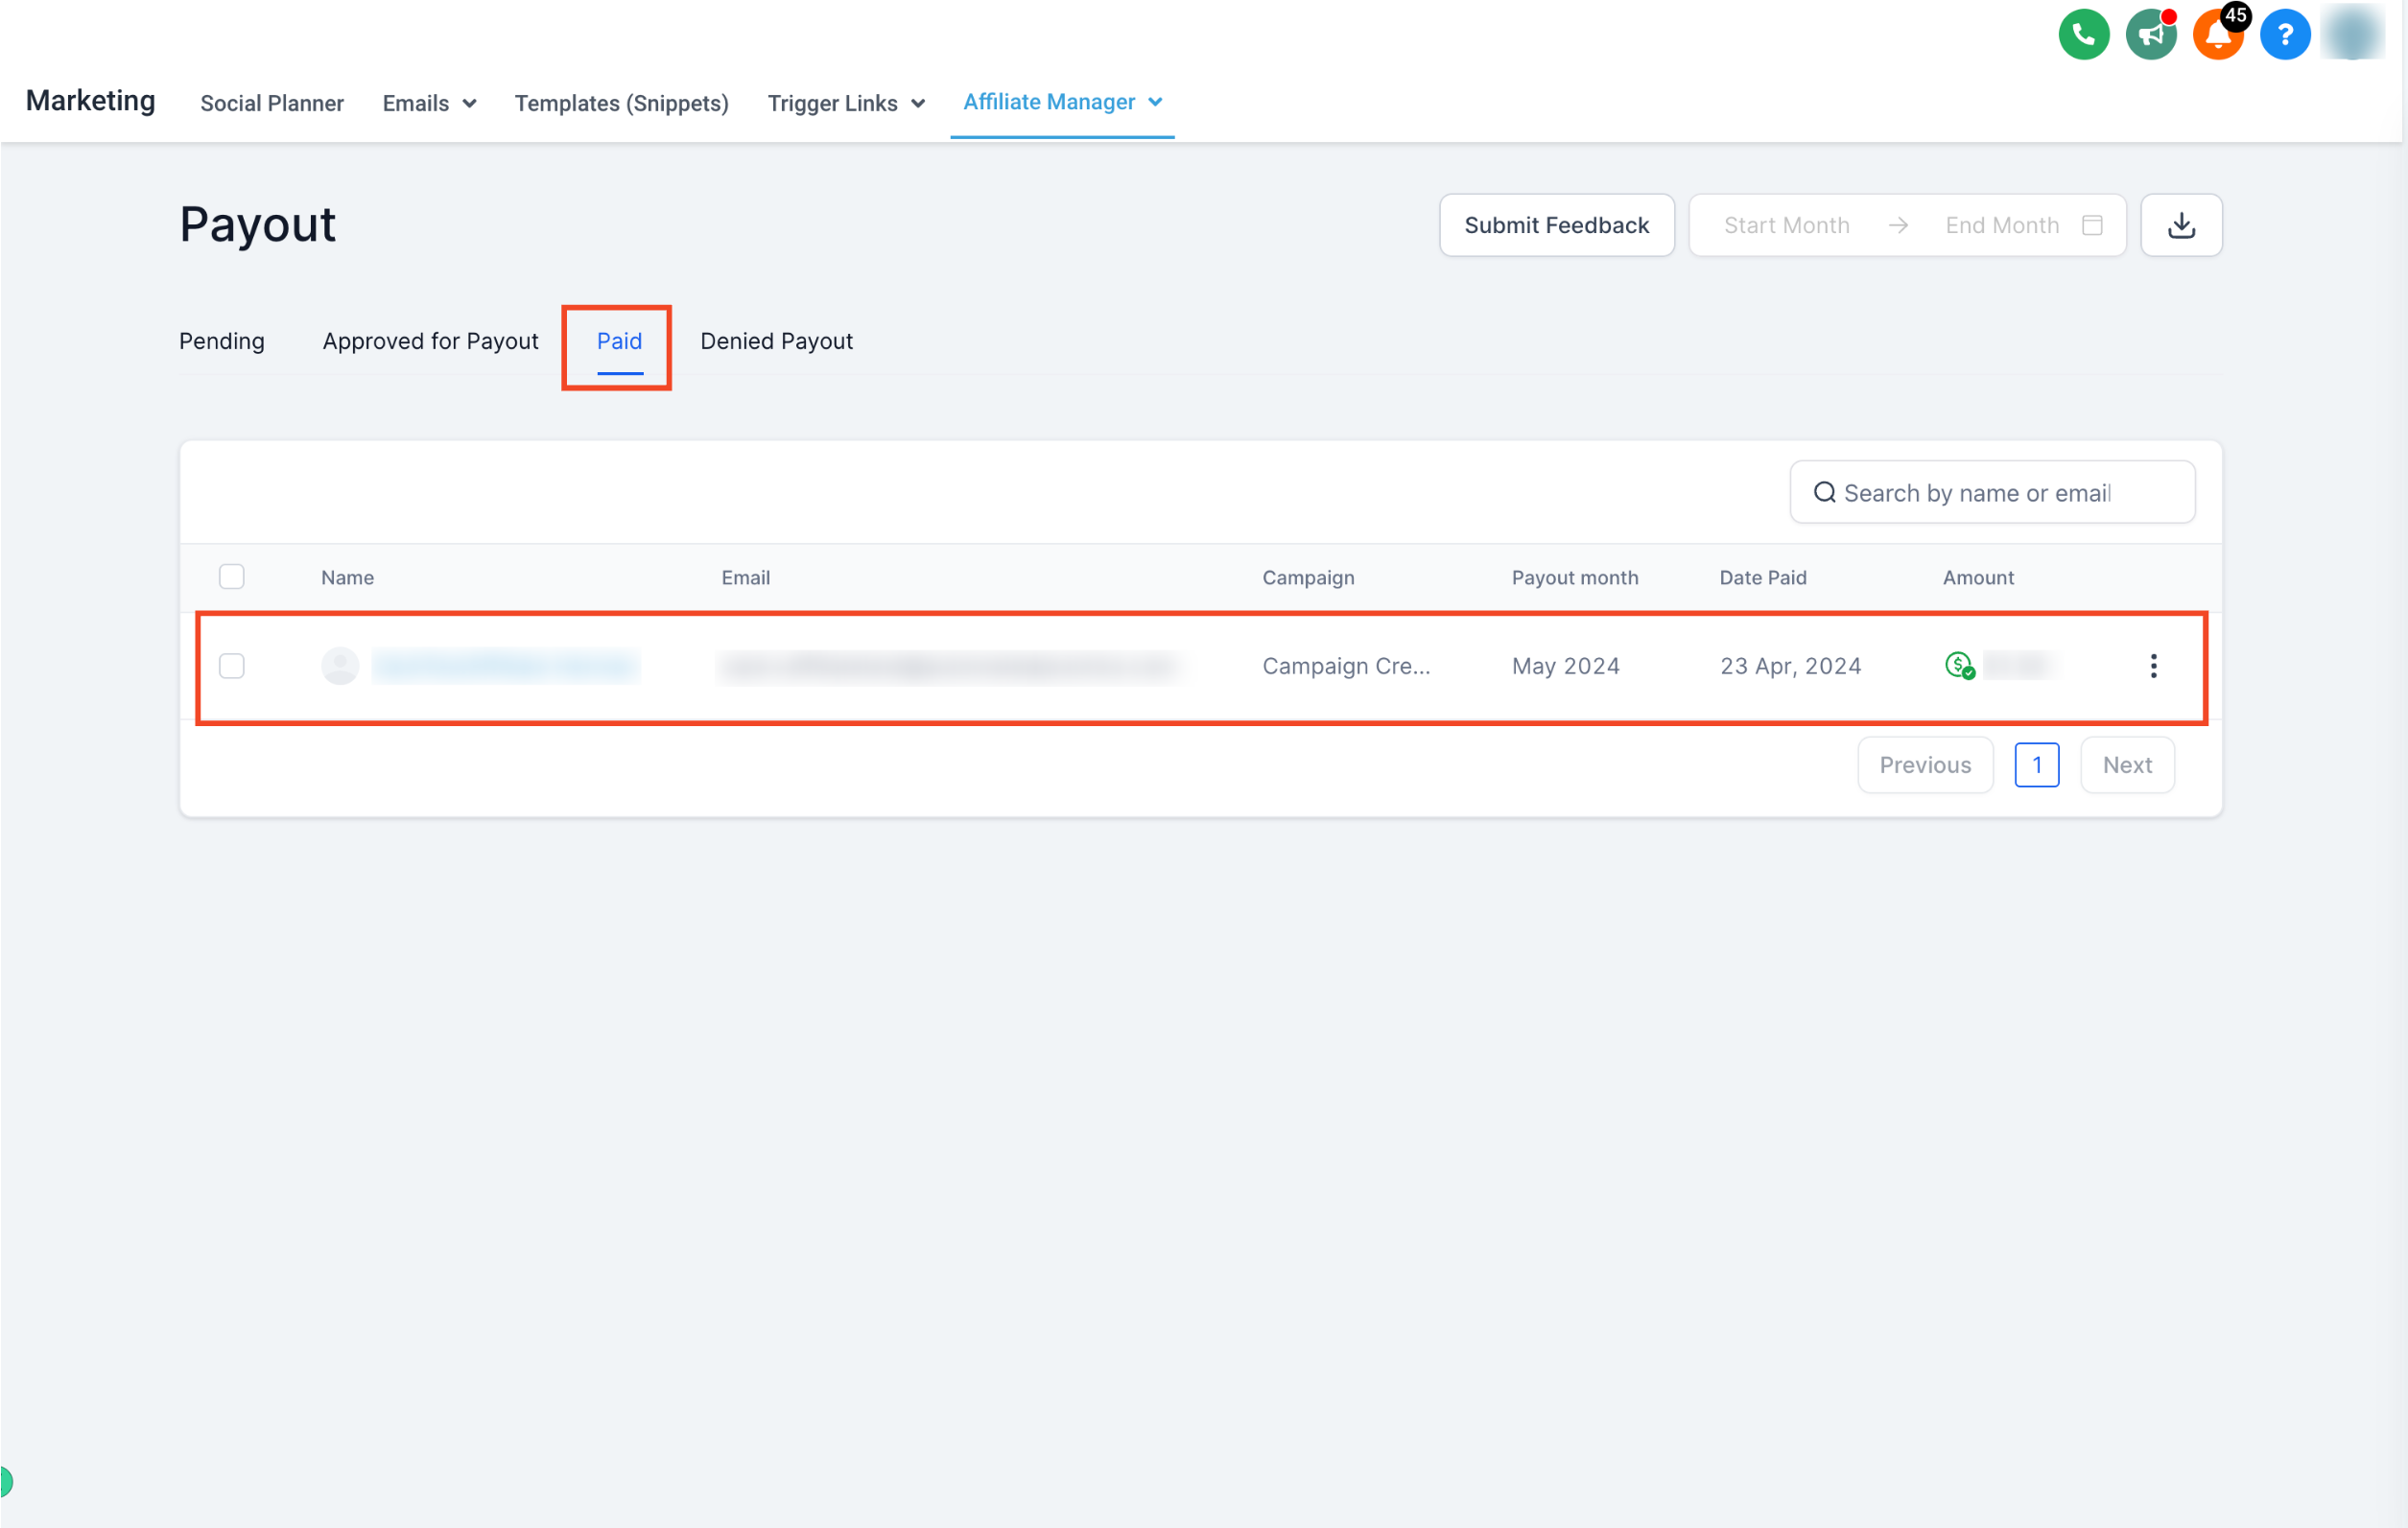
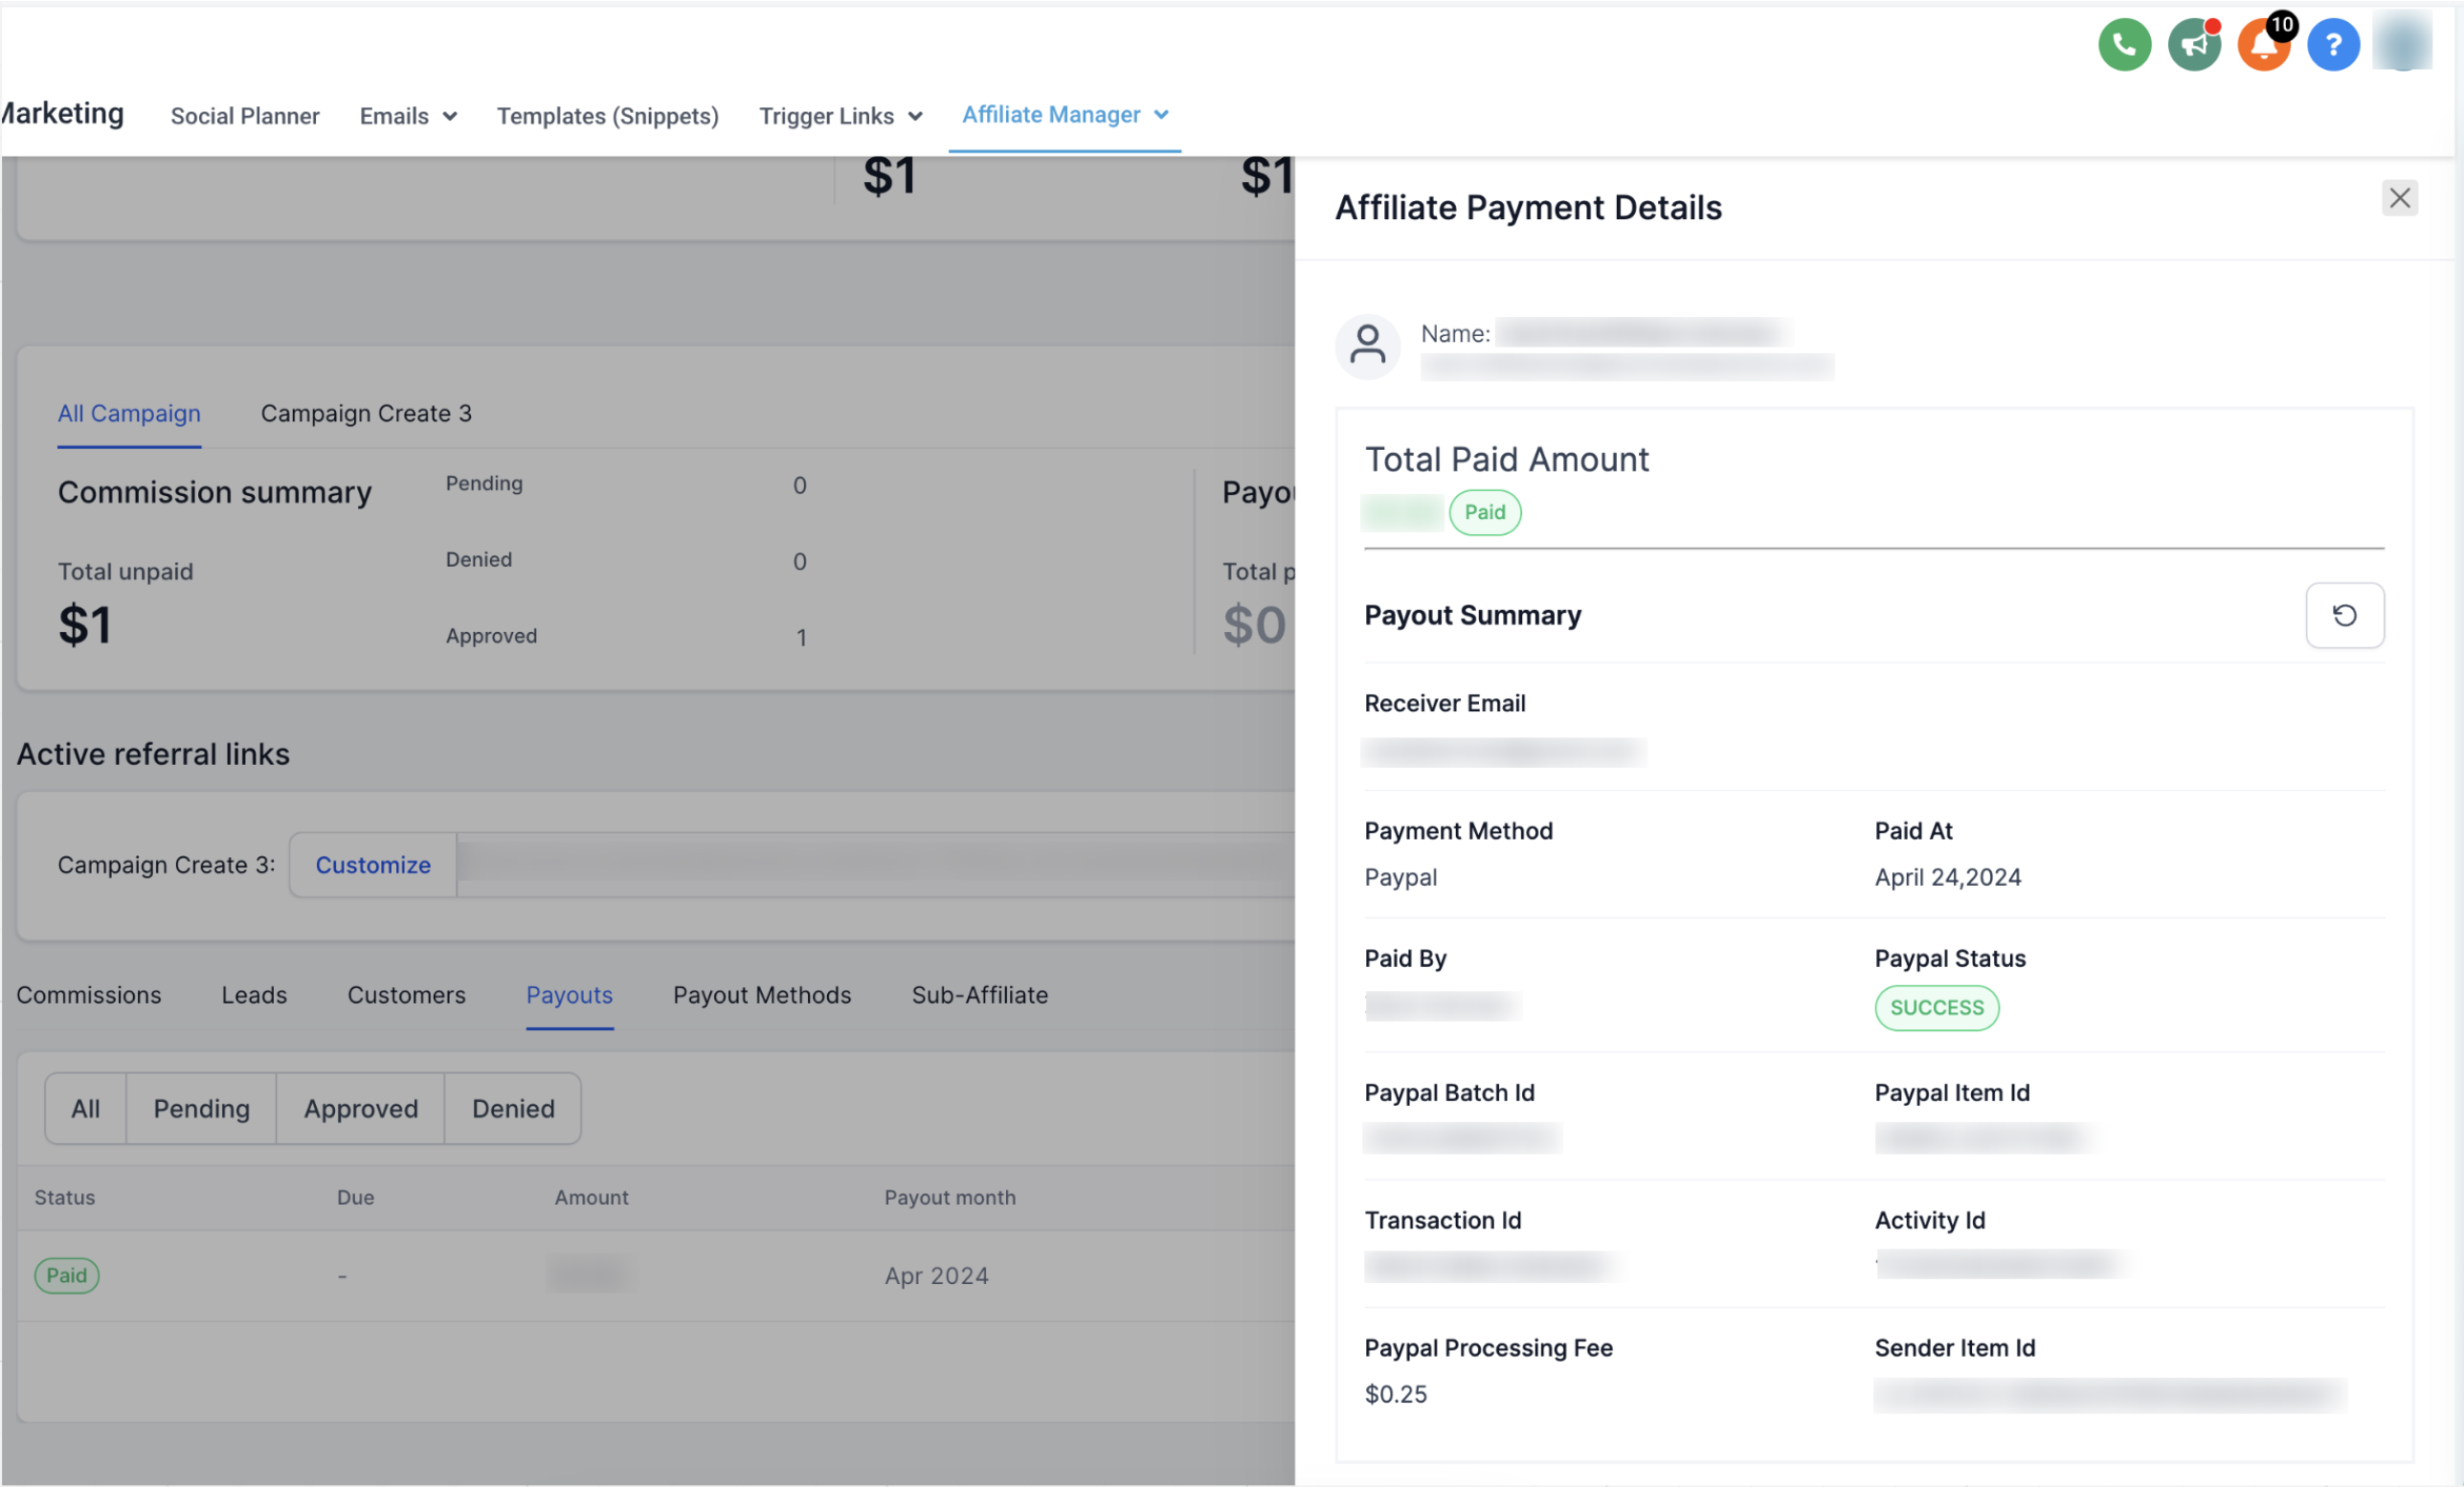
- Navigate to Payouts Page
- View Approved Payouts
- Select Affiliates for Payouts
- Click "Pay" to pay multiple affiliates together, or the blue Pay icon for individual payments
- Review and Confirm
- Click "Pay Now"
📌 Imp Note:
- Ensure PayPal Business Account integration and valid PayPal email IDs for affiliates.
- Only Agency Admins and Account Admins can initiate payouts using this method.
Click here for our detailed guide on how to pay affiliates using this method, and here for the guide to configure PayPal for Affiliate Auto Payouts
new
Affiliate Manager
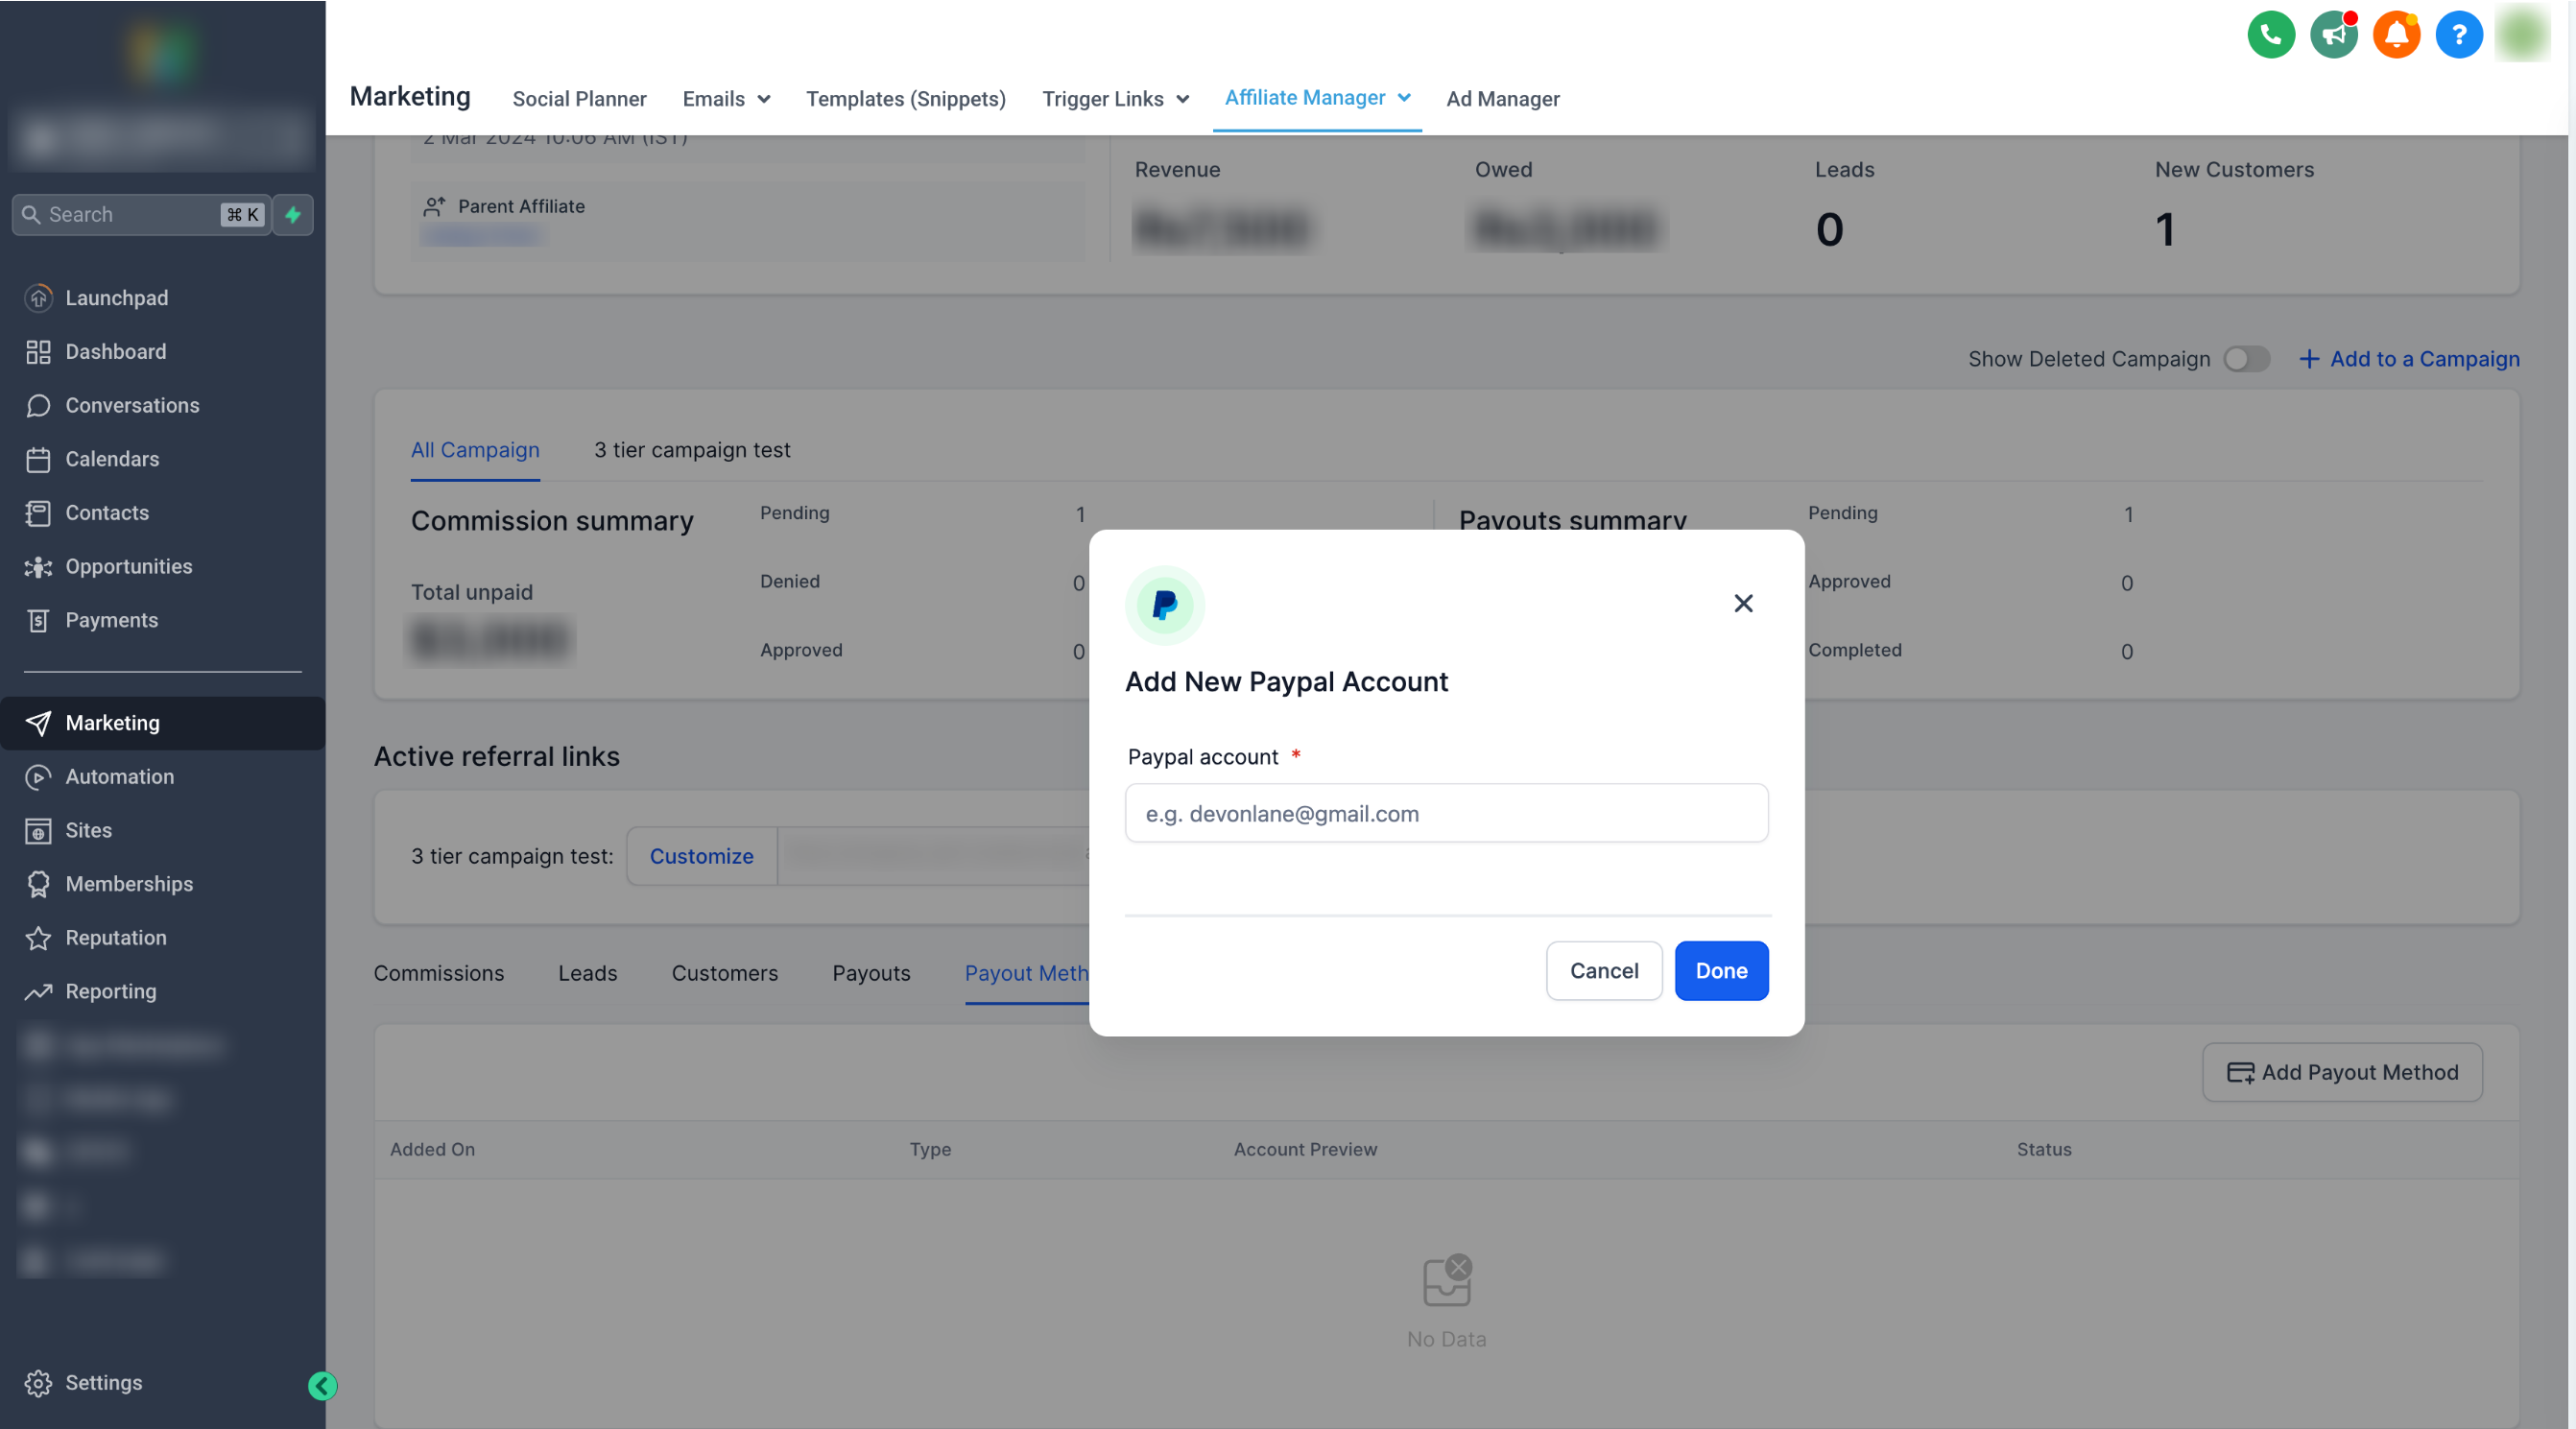
Sub Account Affiliate Manager: Link/Add Affiliate's Paypal Account
We are thrilled to introduce the ability for both admins and affiliates to seamlessly add PayPal as a payout method in affiliates' profiles, which will streamline the payout process and leverage the Auto Payouts using PayPal feature!
👀 What’s New?
- Users can now add PayPal as a payout method for their Affiliates for swift and convenient payments.
- Affiliates can easily add or edit their PayPal Account details directly from the client portal.
👷 How It Works:
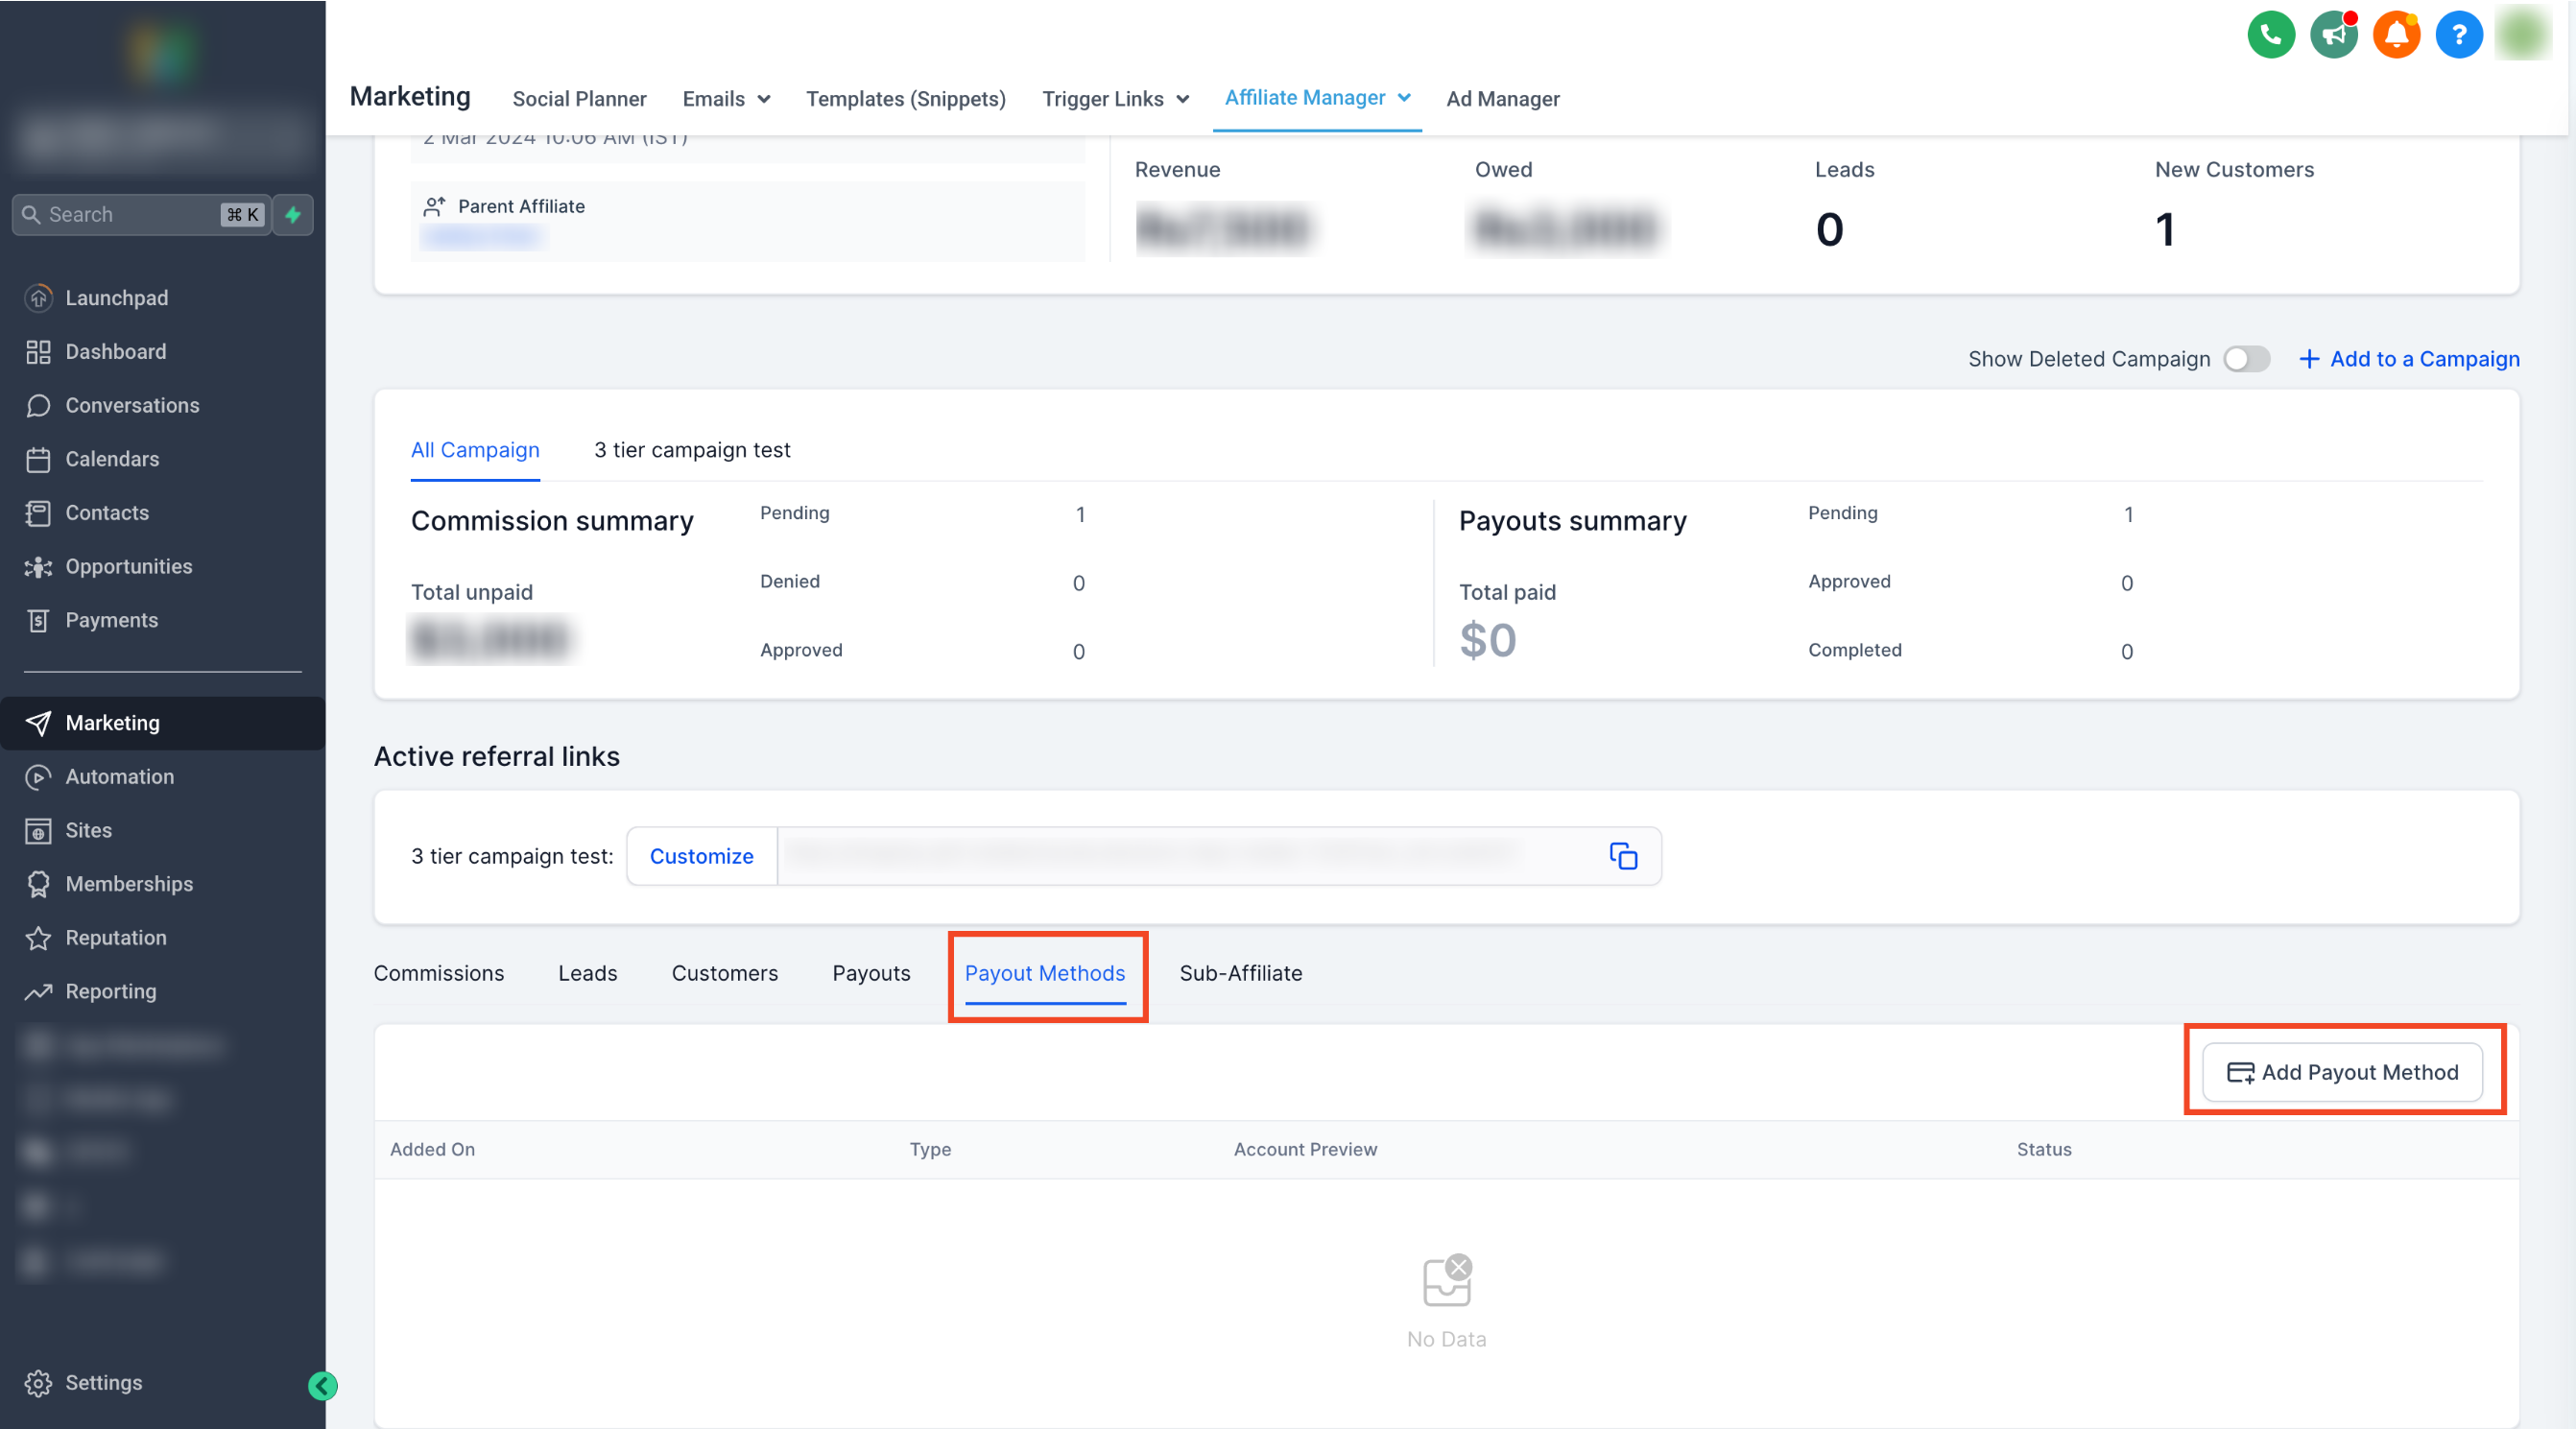
For Admins:
- Go to Affiliate's Profile Page.
- Navigate to Payout Methods Tab.
- Add Payout Method.
- Enter Affiliate's PayPal Email ID.
- Click Done.
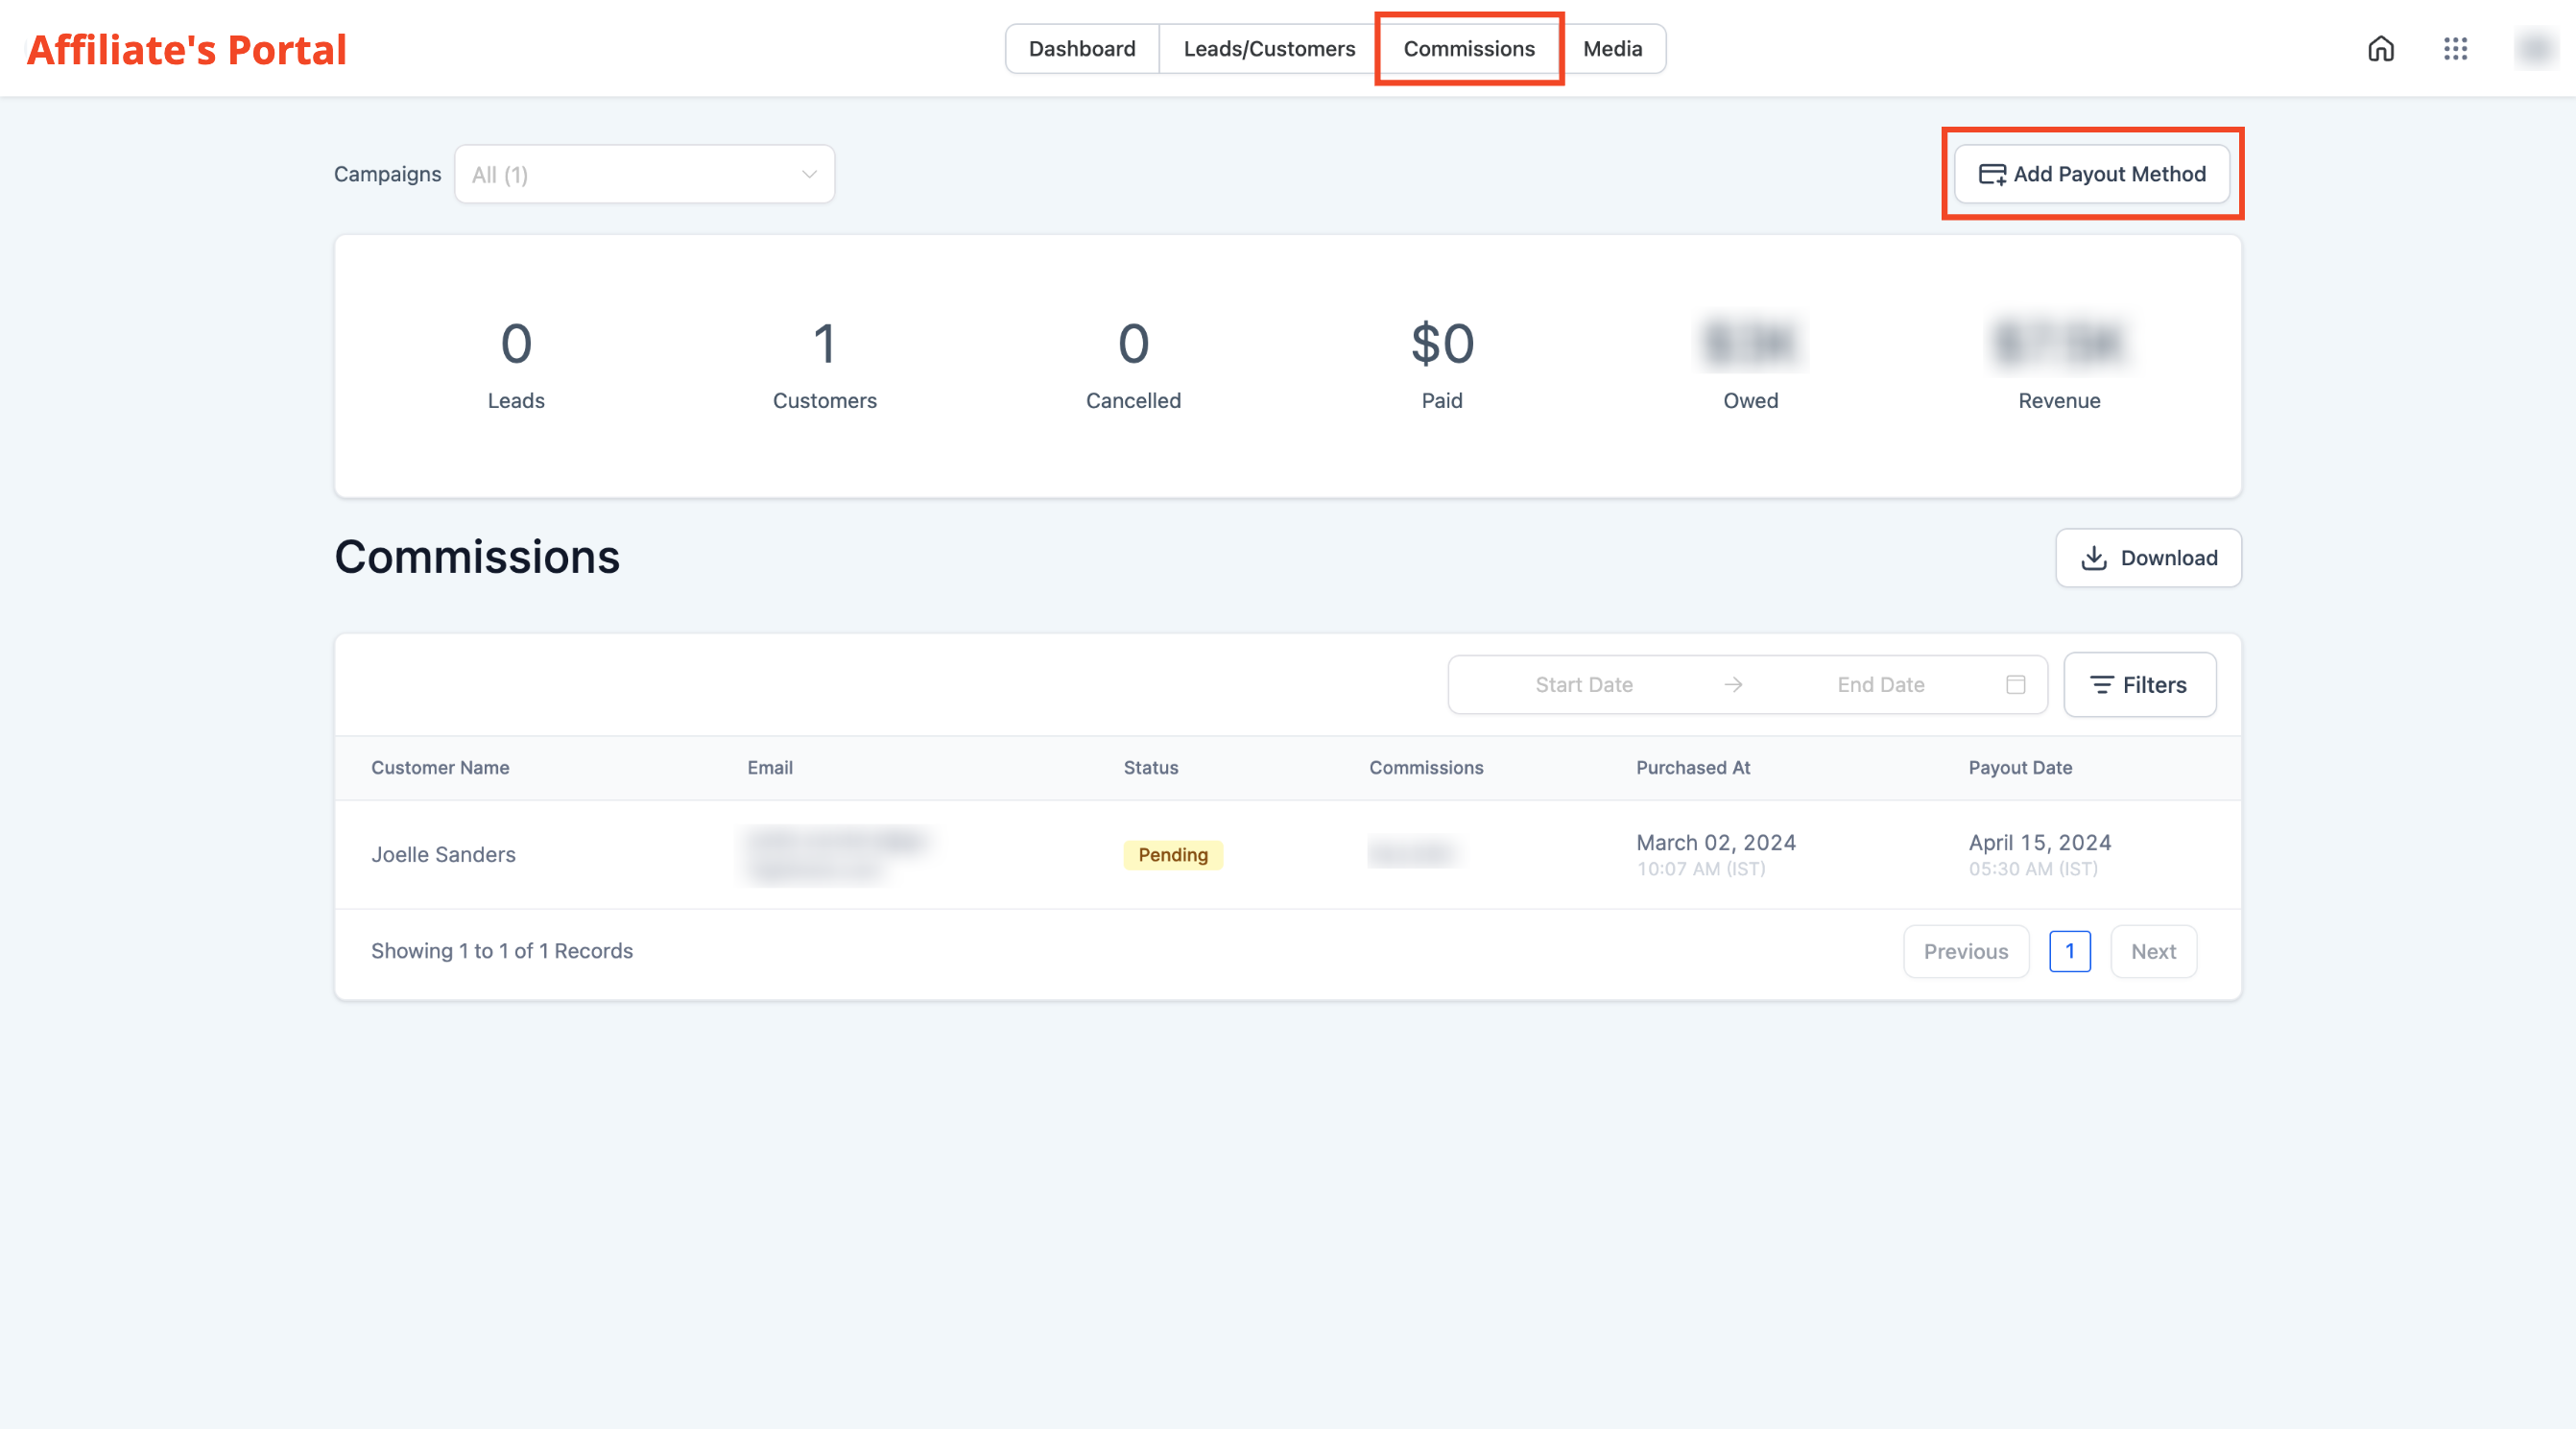
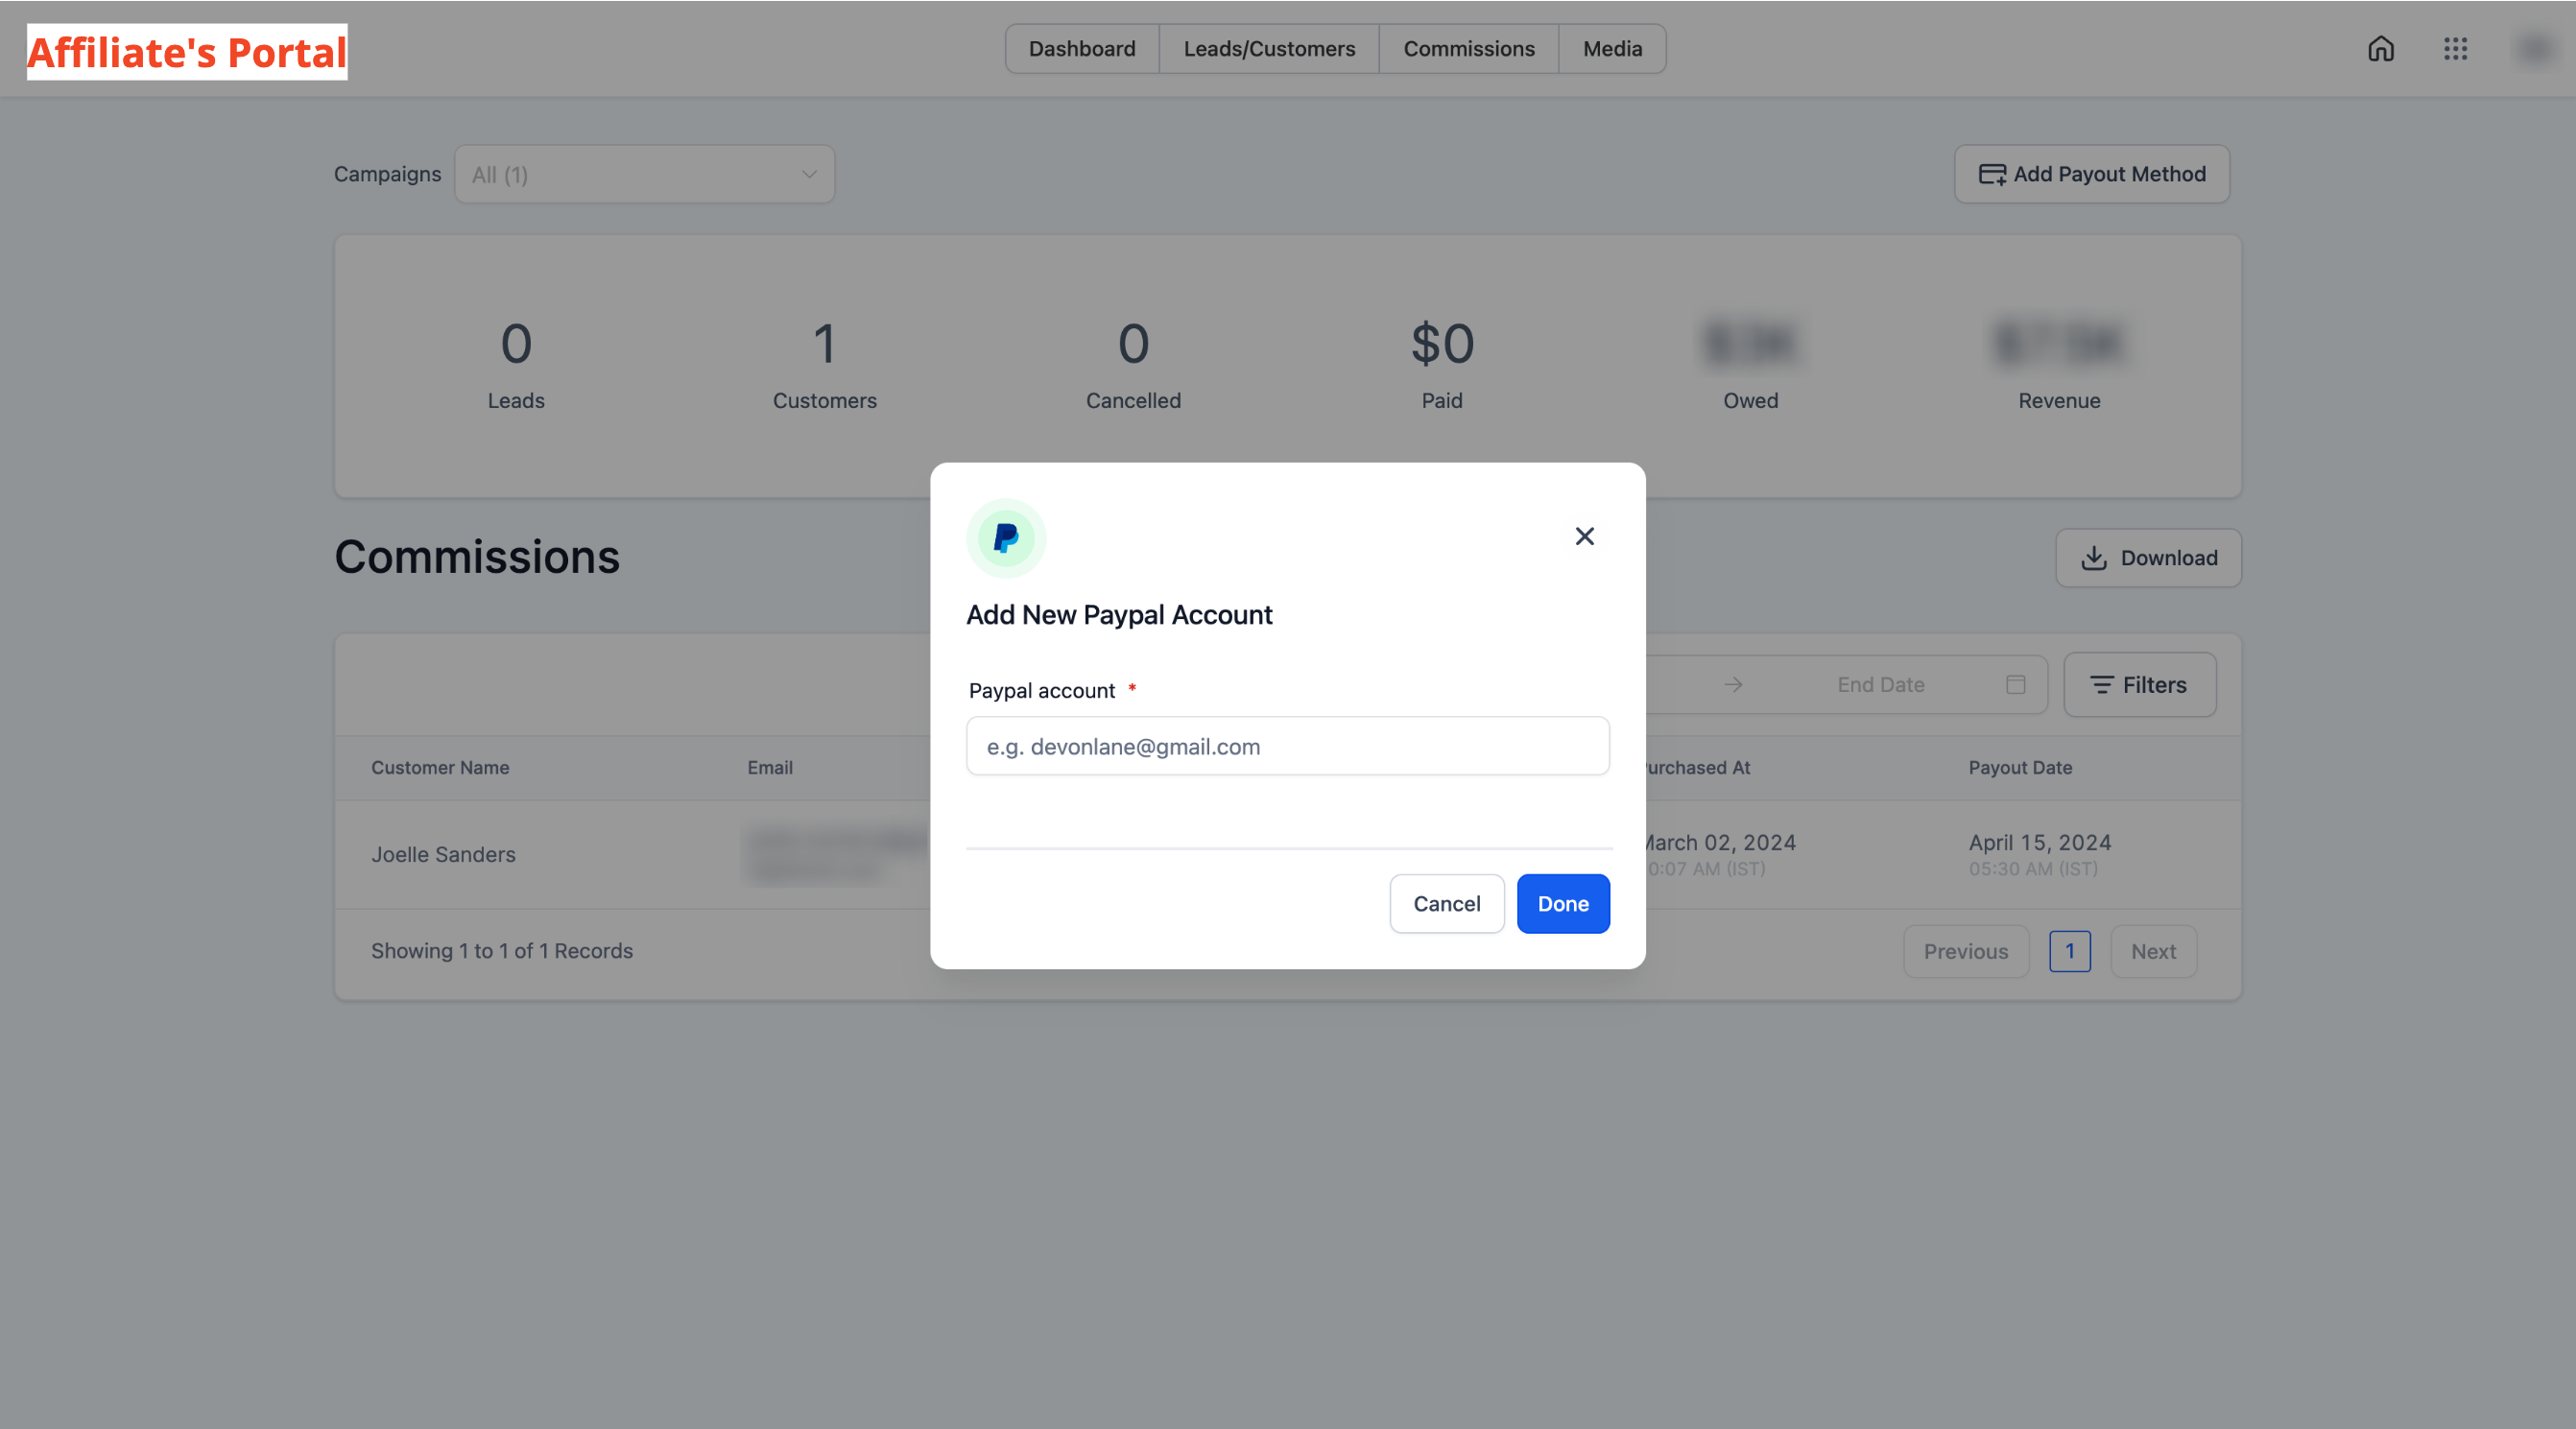
For Affiliates:
- Access Affiliate Portal.
- Navigate to Commissions Tab.
- Add Payout Method.
- Enter PayPal Email ID.
- Click Done.
🌟 Why it Matters:
- Enables automated payouts using PayPal.
- Facilitates swift and quick payments to Affiliates.
- Empowers affiliates to manage their payout Details conveniently through the client portal.
📌 Imp Note:
- Ensure to enter a valid PayPal email ID for successful payouts.
Click here to check our detailed guide on this!

improved
App Marketplace
App Marketplace: Delete Custom Conversation Providers
We are excited to announce a new enhancement in our platform that allows users to delete custom conversation providers from their apps seamlessly.
Important Considerations:
- Irreversibility: Please be aware that the deletion of a custom conversation provider is a permanent action. Once deleted, the provider cannot be reinstated or readded to the application.
- Data Loss: Deleting a provider will result in the removal of all associated data. We recommend ensuring that all necessary information is backed up before proceeding with deletion.
- Confirmation Required: To prevent accidental deletions, users will be prompted to confirm their action before a provider is permanently removed.
Should you have any questions or require assistance with this new feature, please reach out to our support team.
new
improved
Calendar
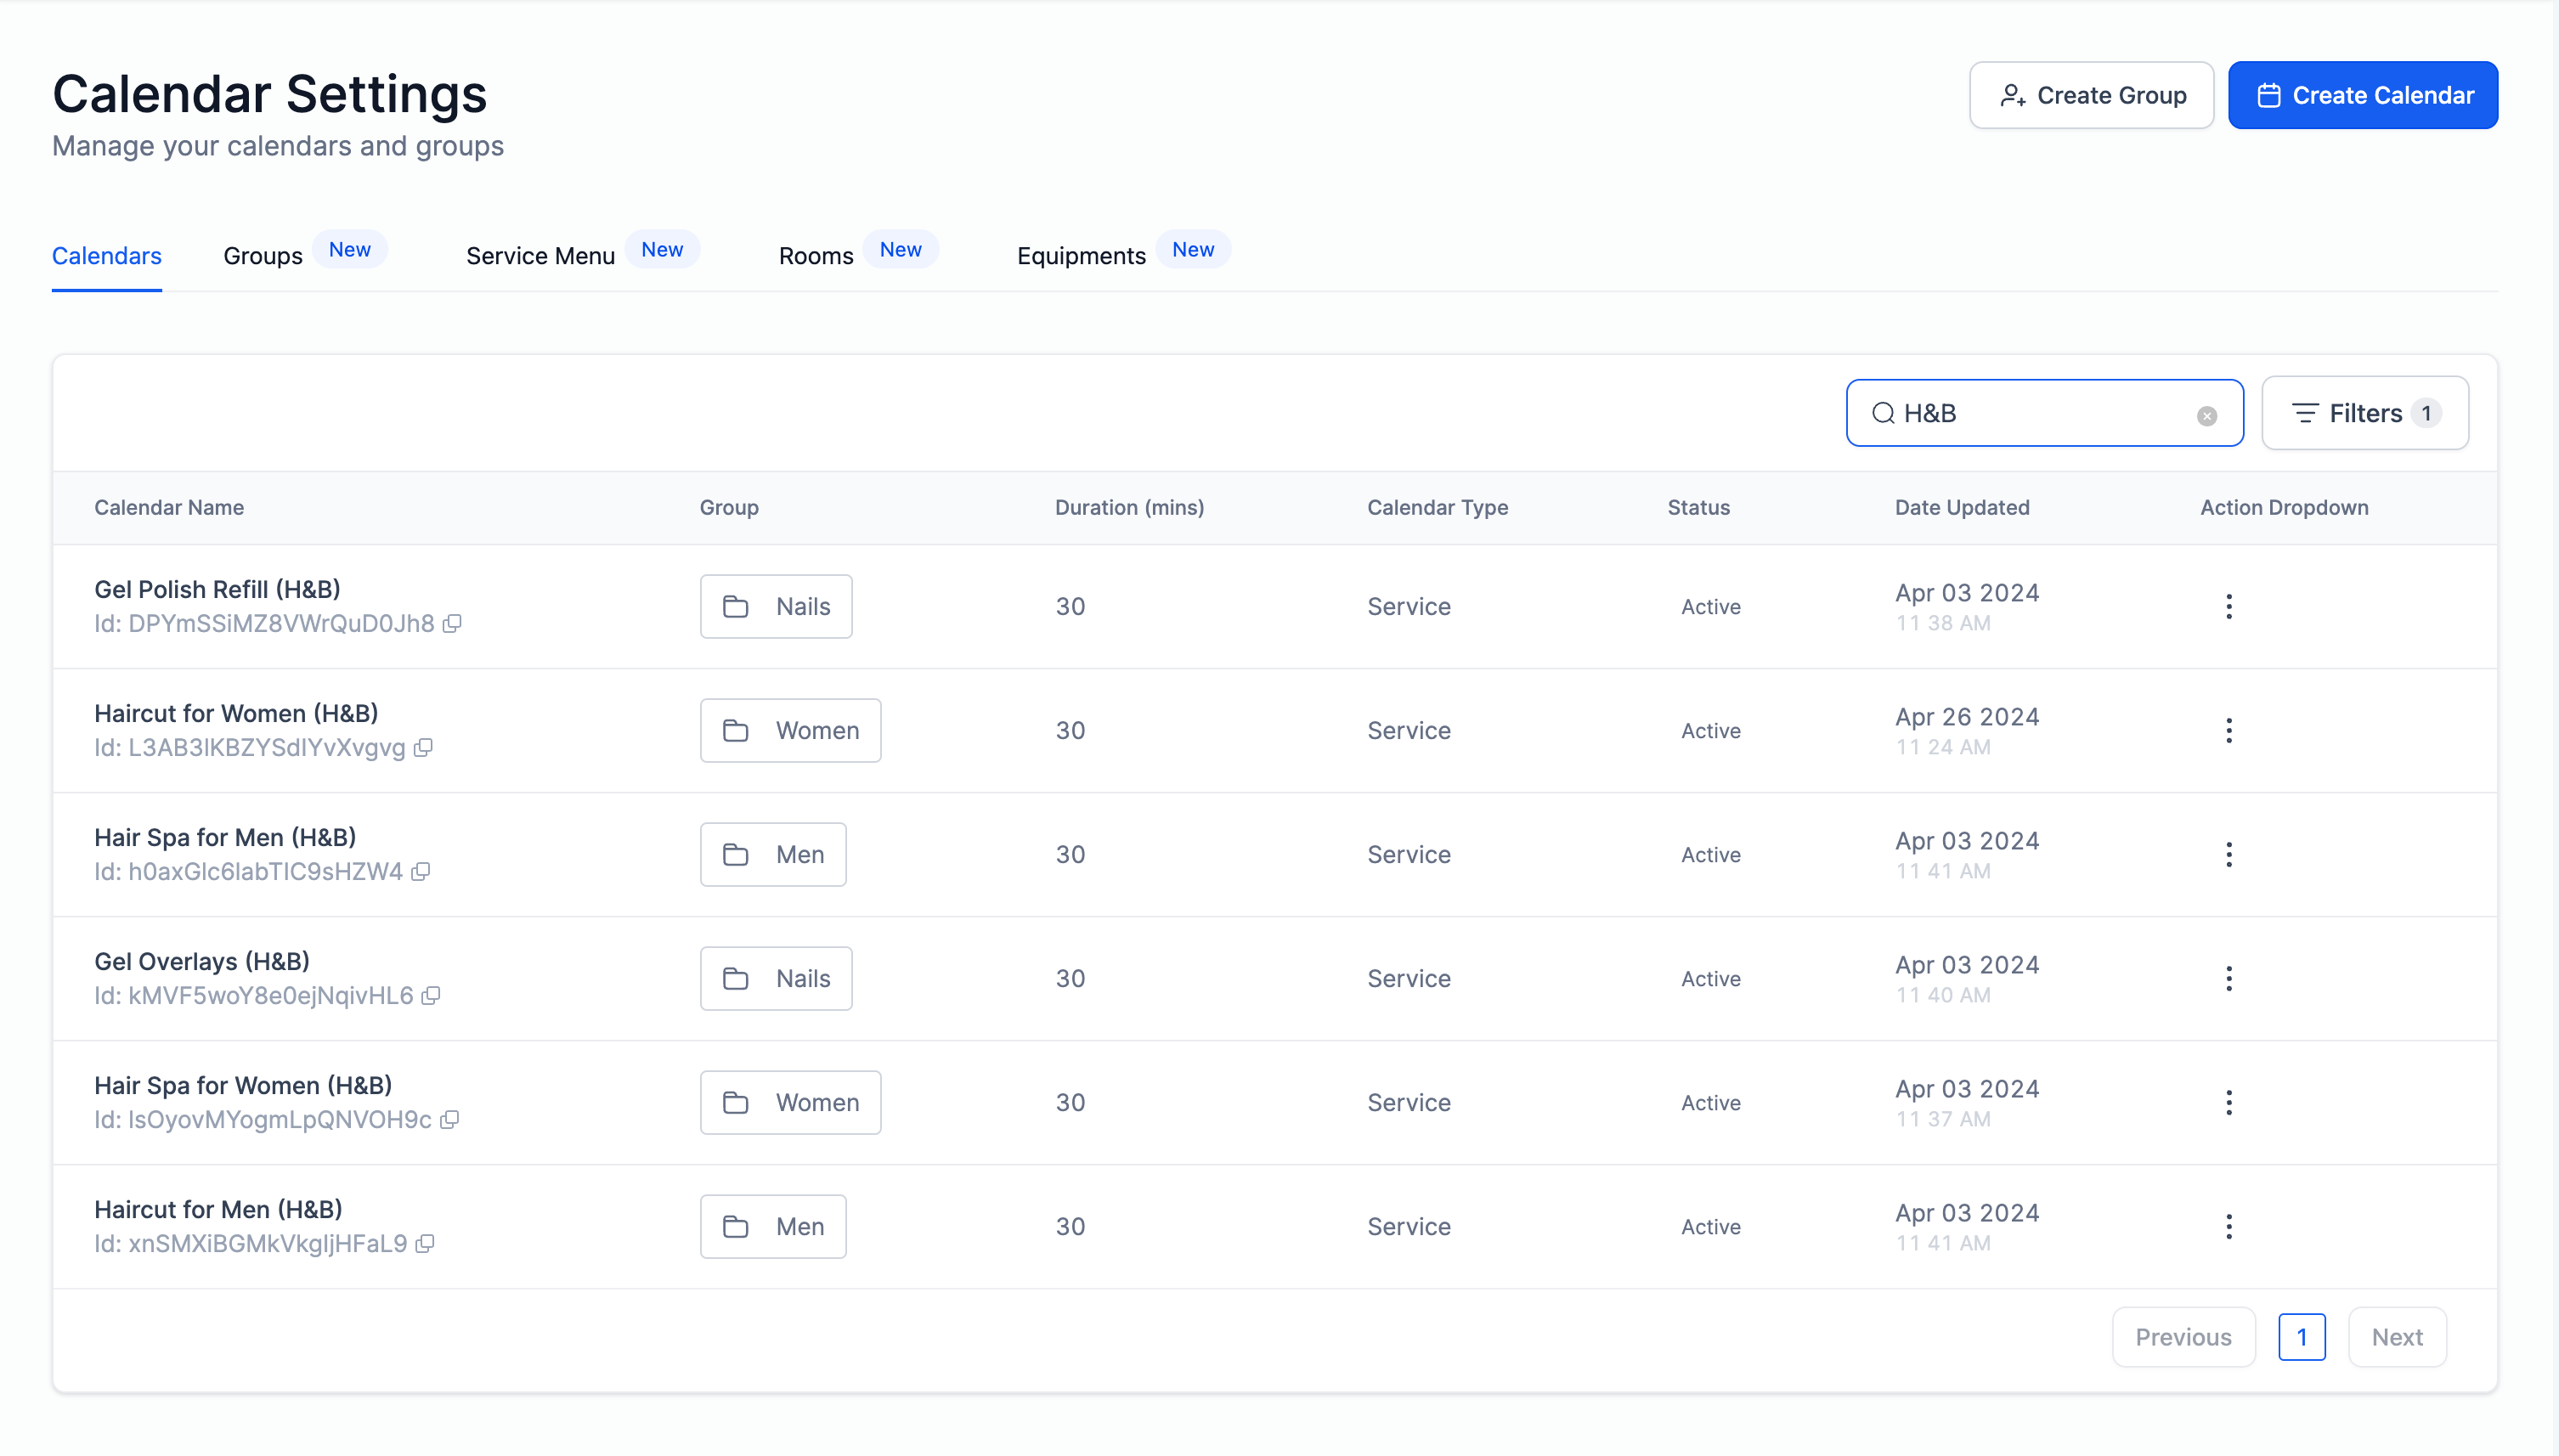
Audit Logs for Calendar Settings
Introducing Audit Logs for Calendar Settings! Now, users can easily track edits made to their calendars, including the timestamp, editor, and all modifications.
What's New?
- Users can effortlessly check edits to their calendars, including who made the changes, when they occurred, and what specific settings were modified.
- This feature simplifies troubleshooting and provides precise insights into any adjustments made, ensuring transparency and accountability.
- To make it simpler, we are now also showing calendar ID in the calendar settings.
How to Use?
- Navigate to Settings > Audit Logs.
- Select "Calendars" under the module to view changes across all calendars.
Alternatively, for a specific calendar:
- Access Calendar Settings and copy the calendar ID.
- Proceed to Settings > Audit Logs.
- Paste the calendar ID in the 'Document ID' search box and get all details specific to that calendar.

new
Mobile App
Conversation AI
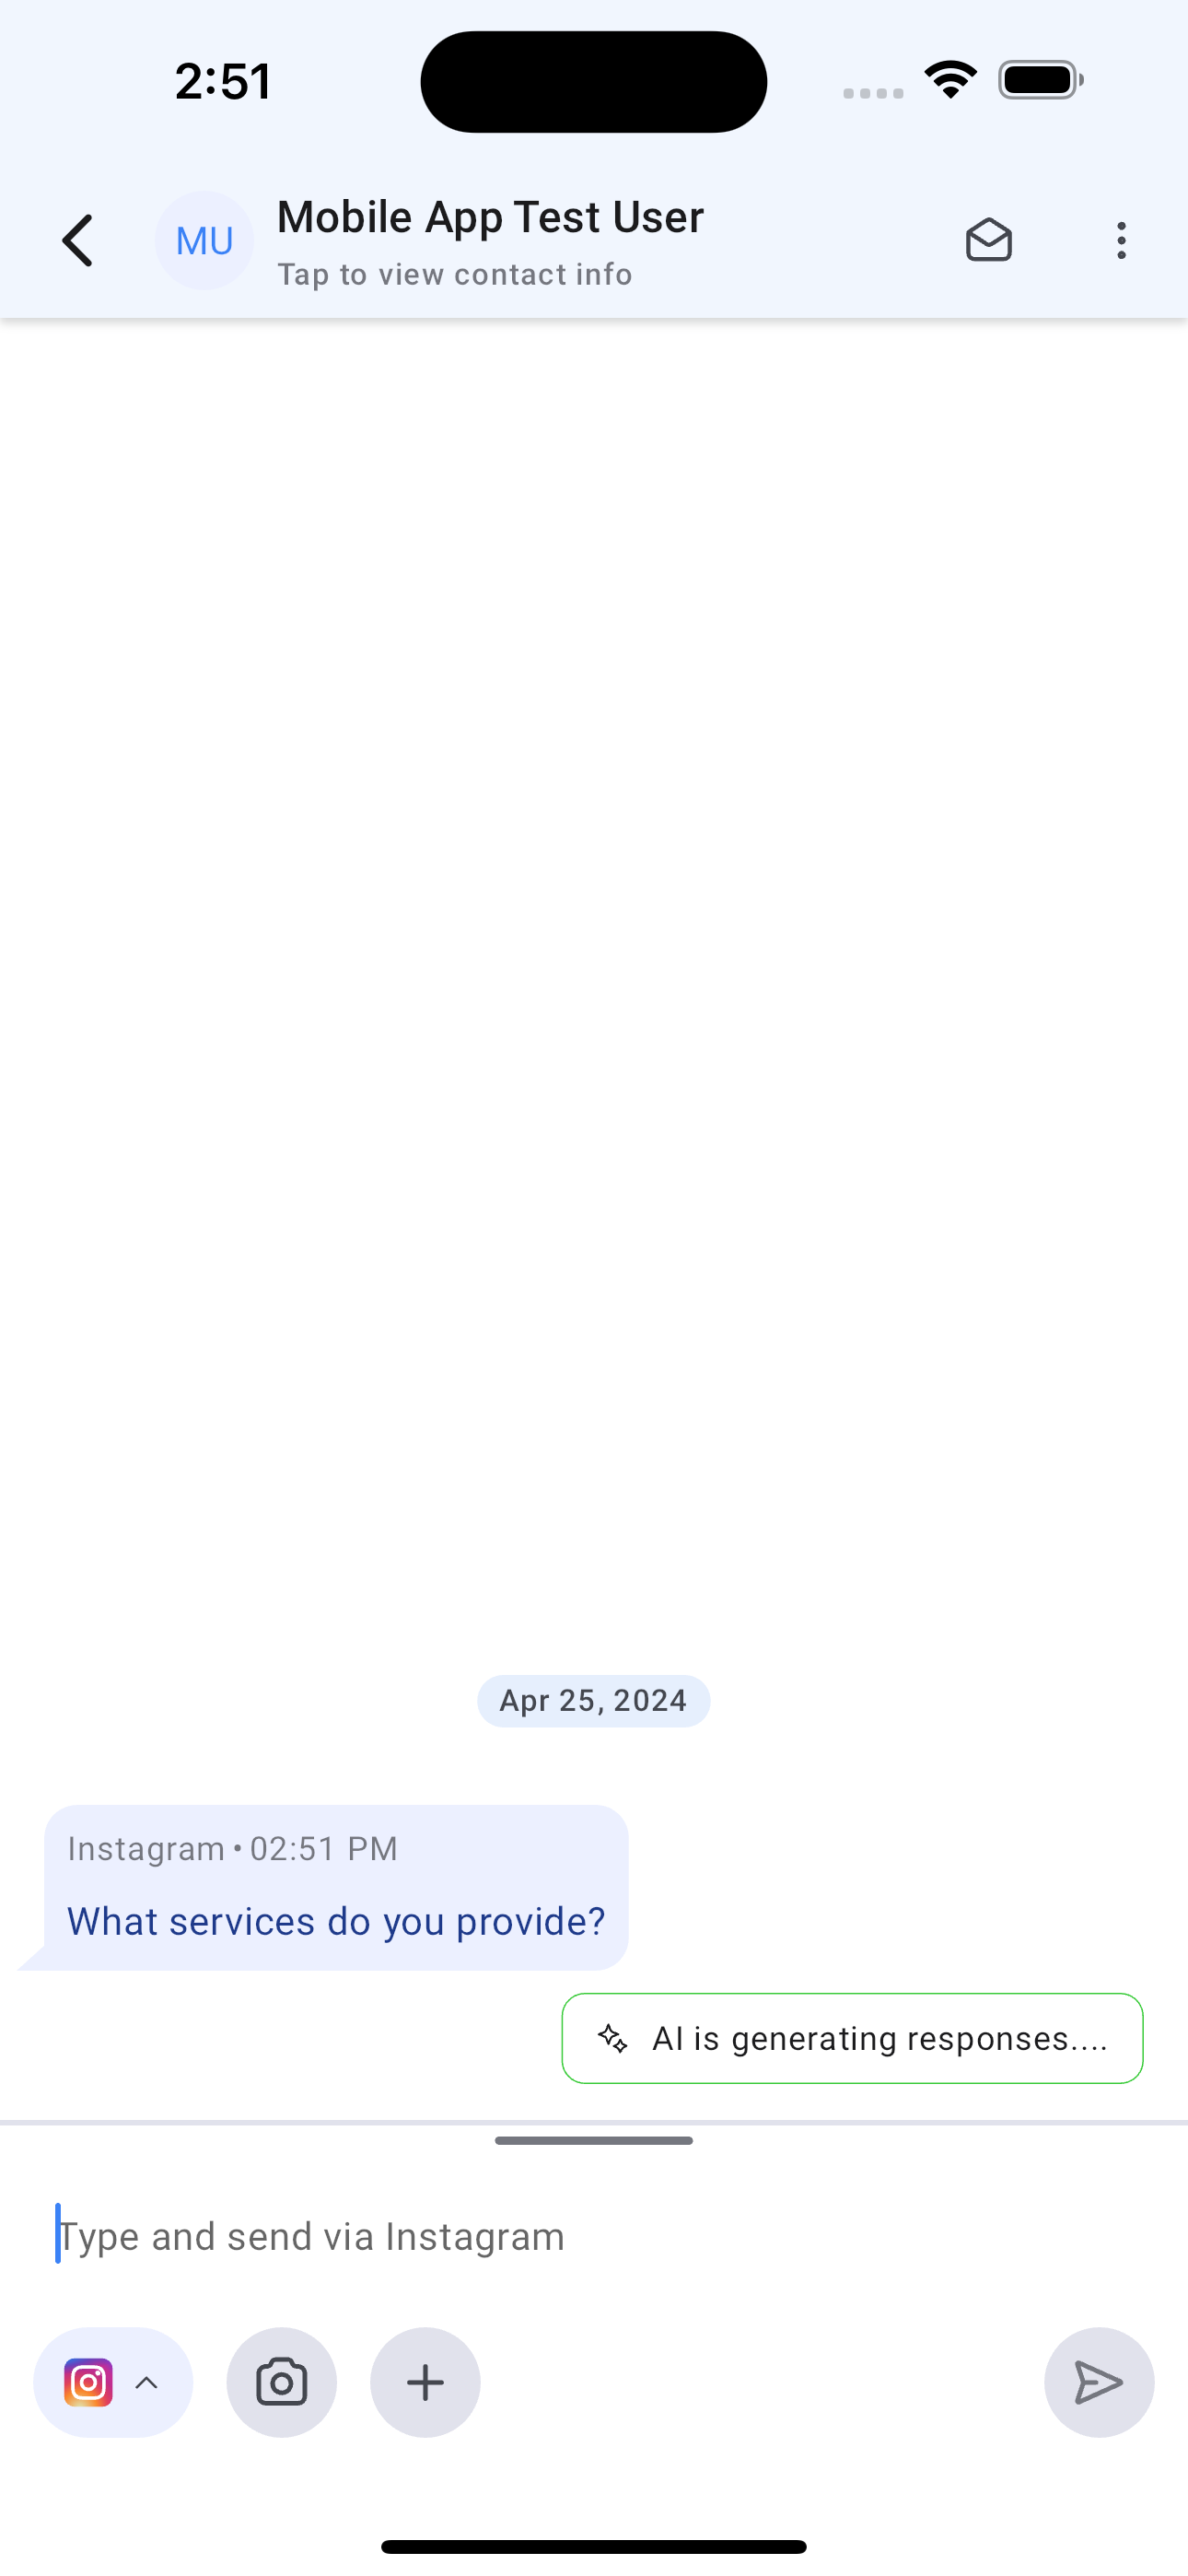
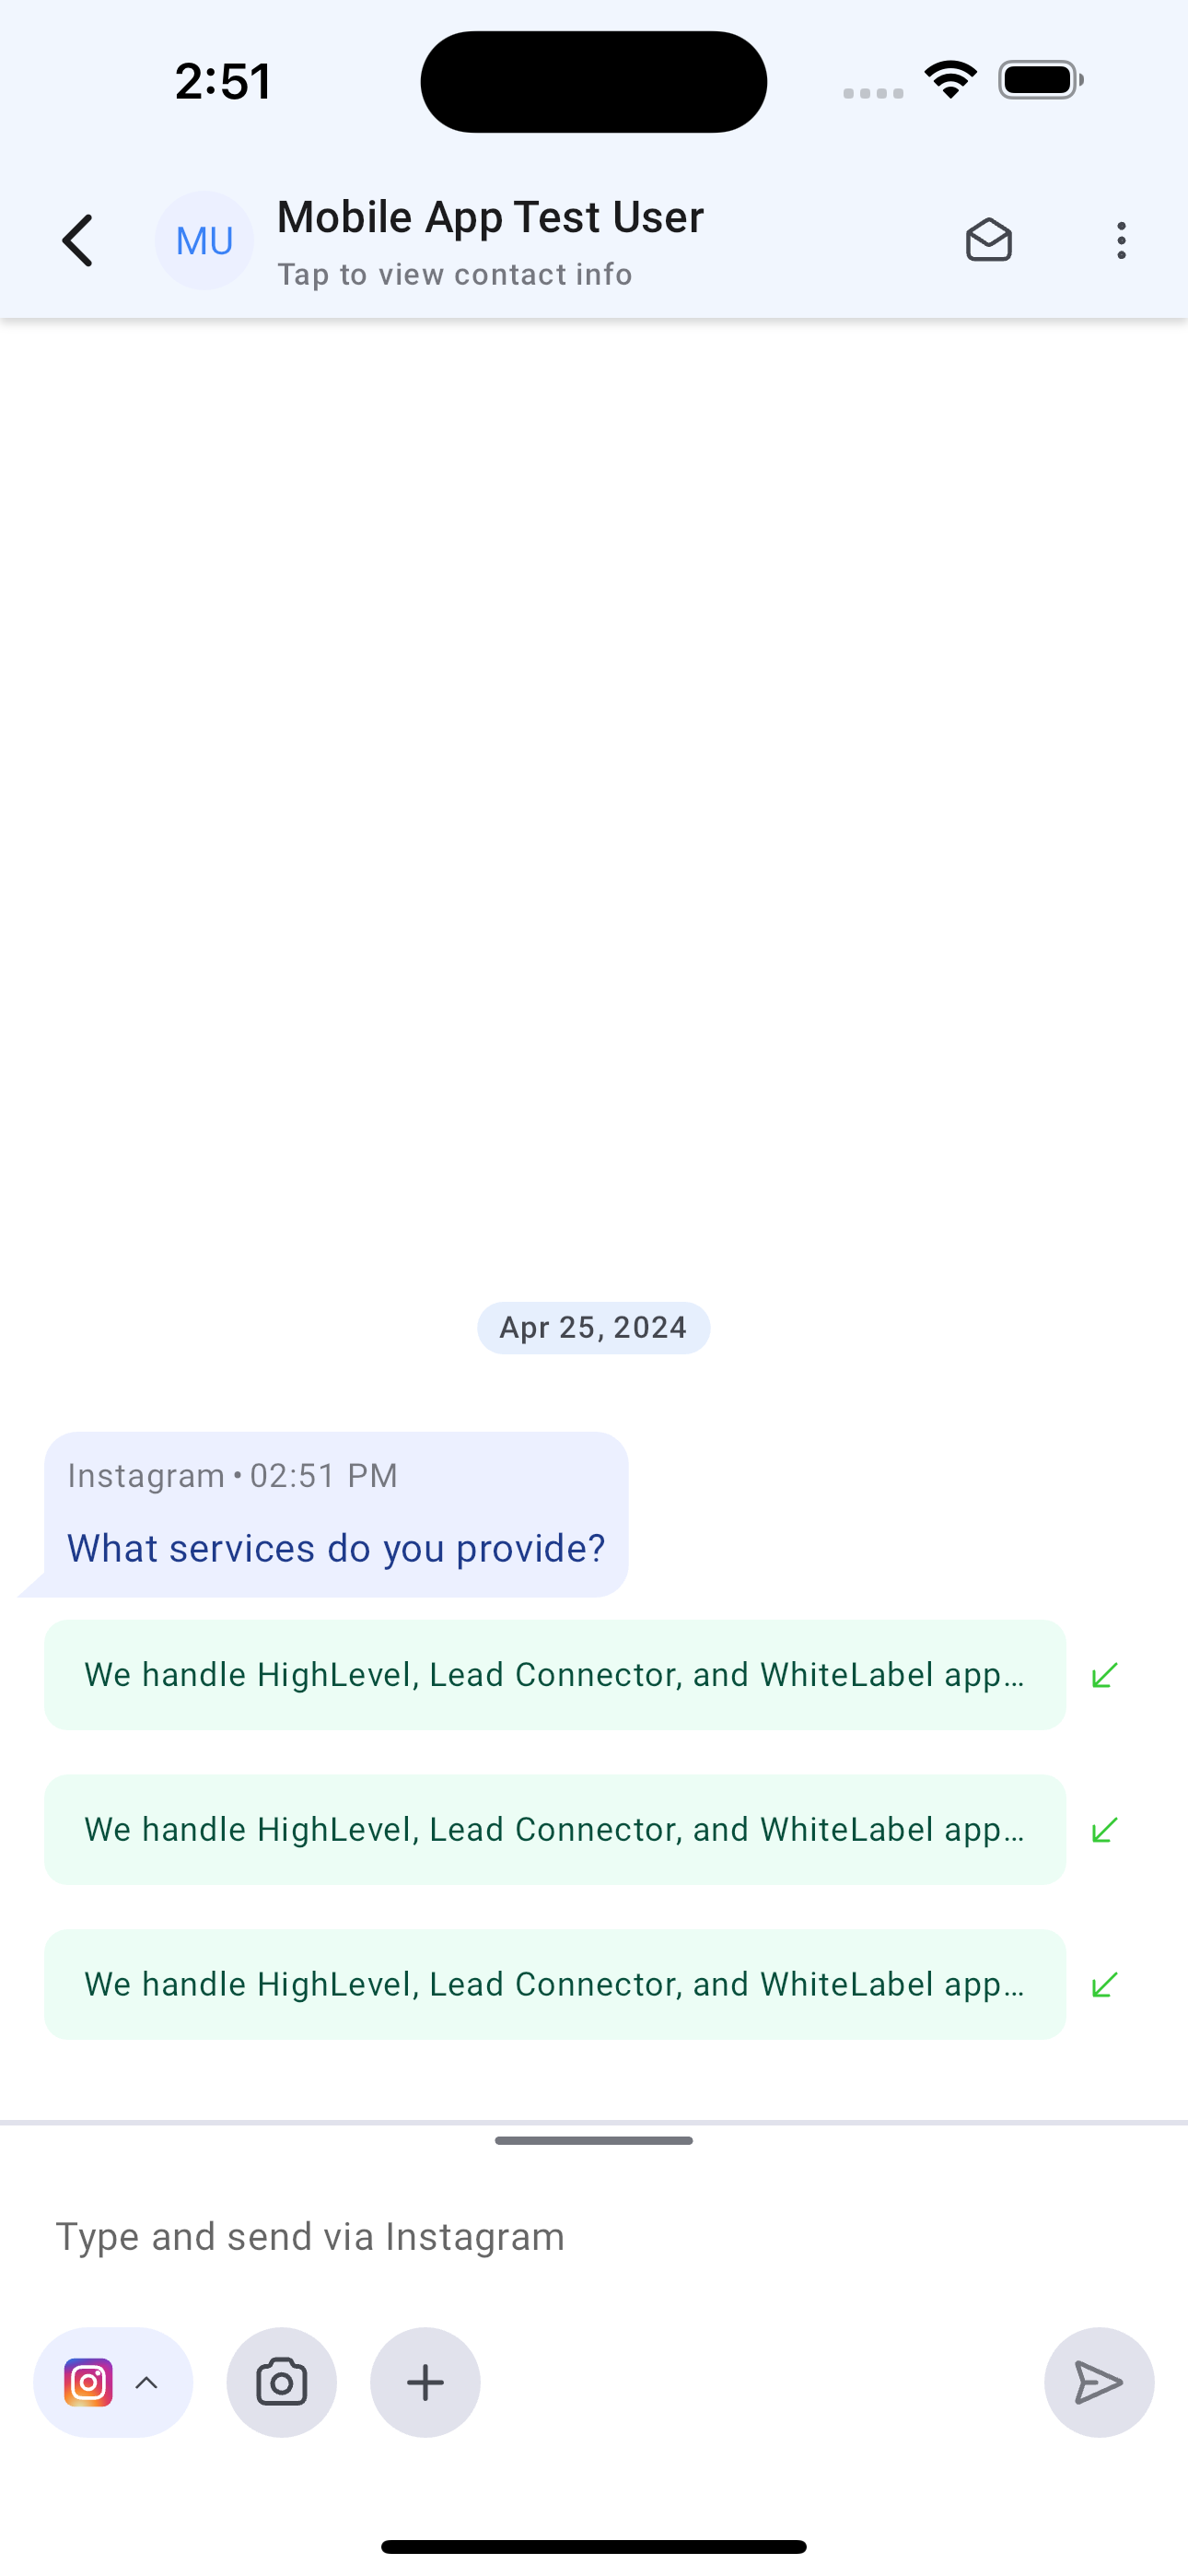
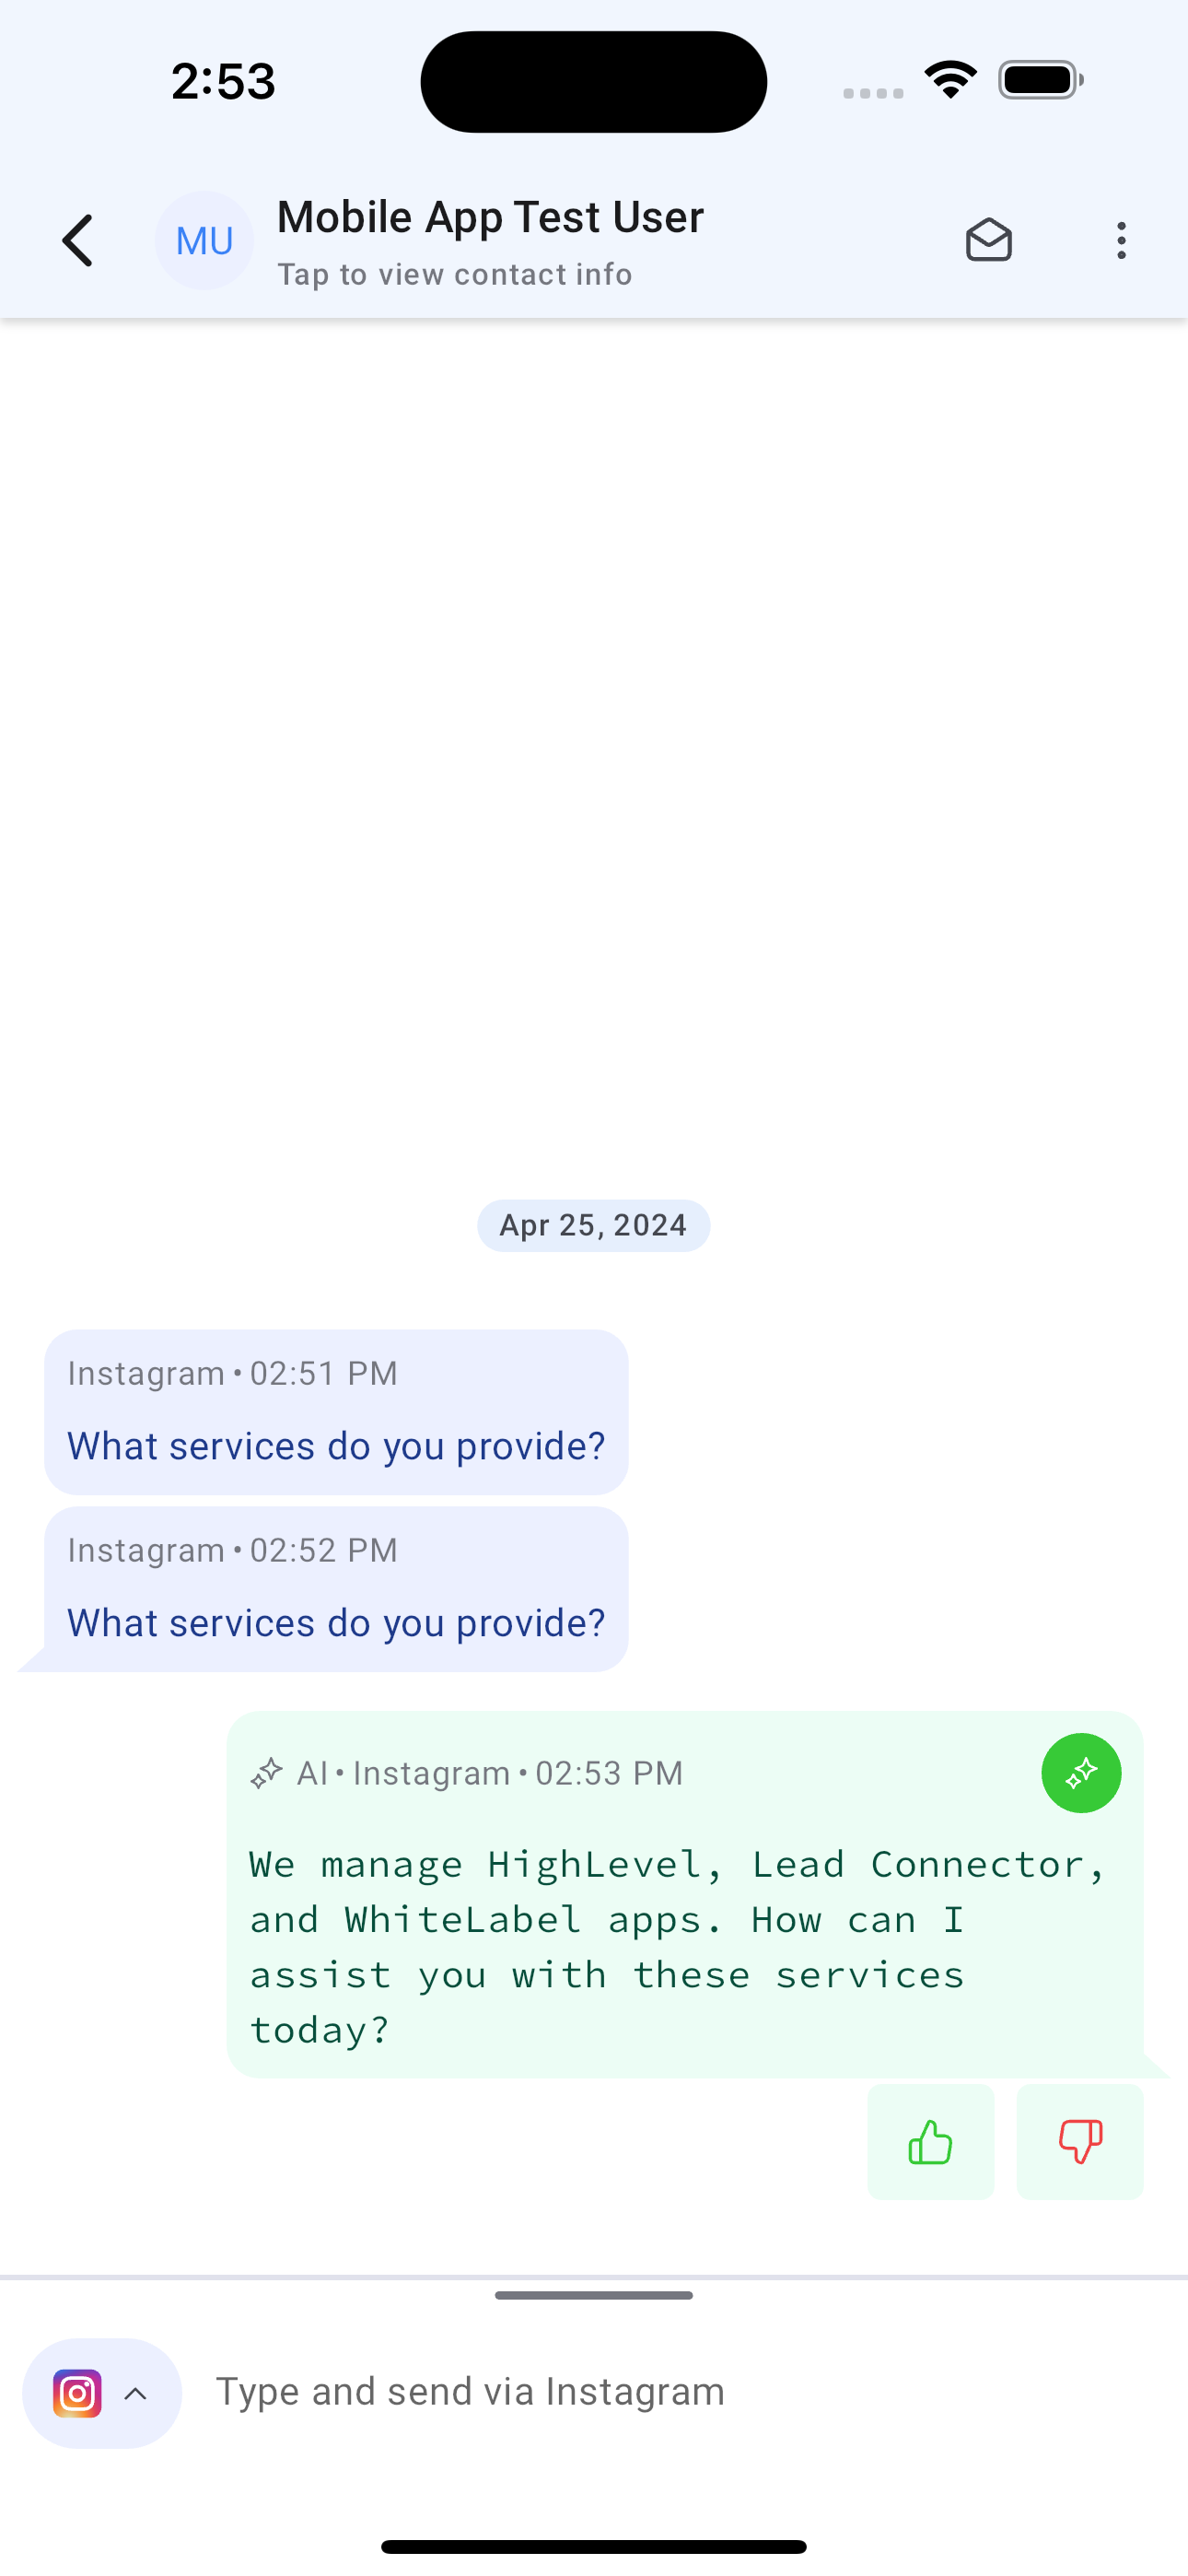
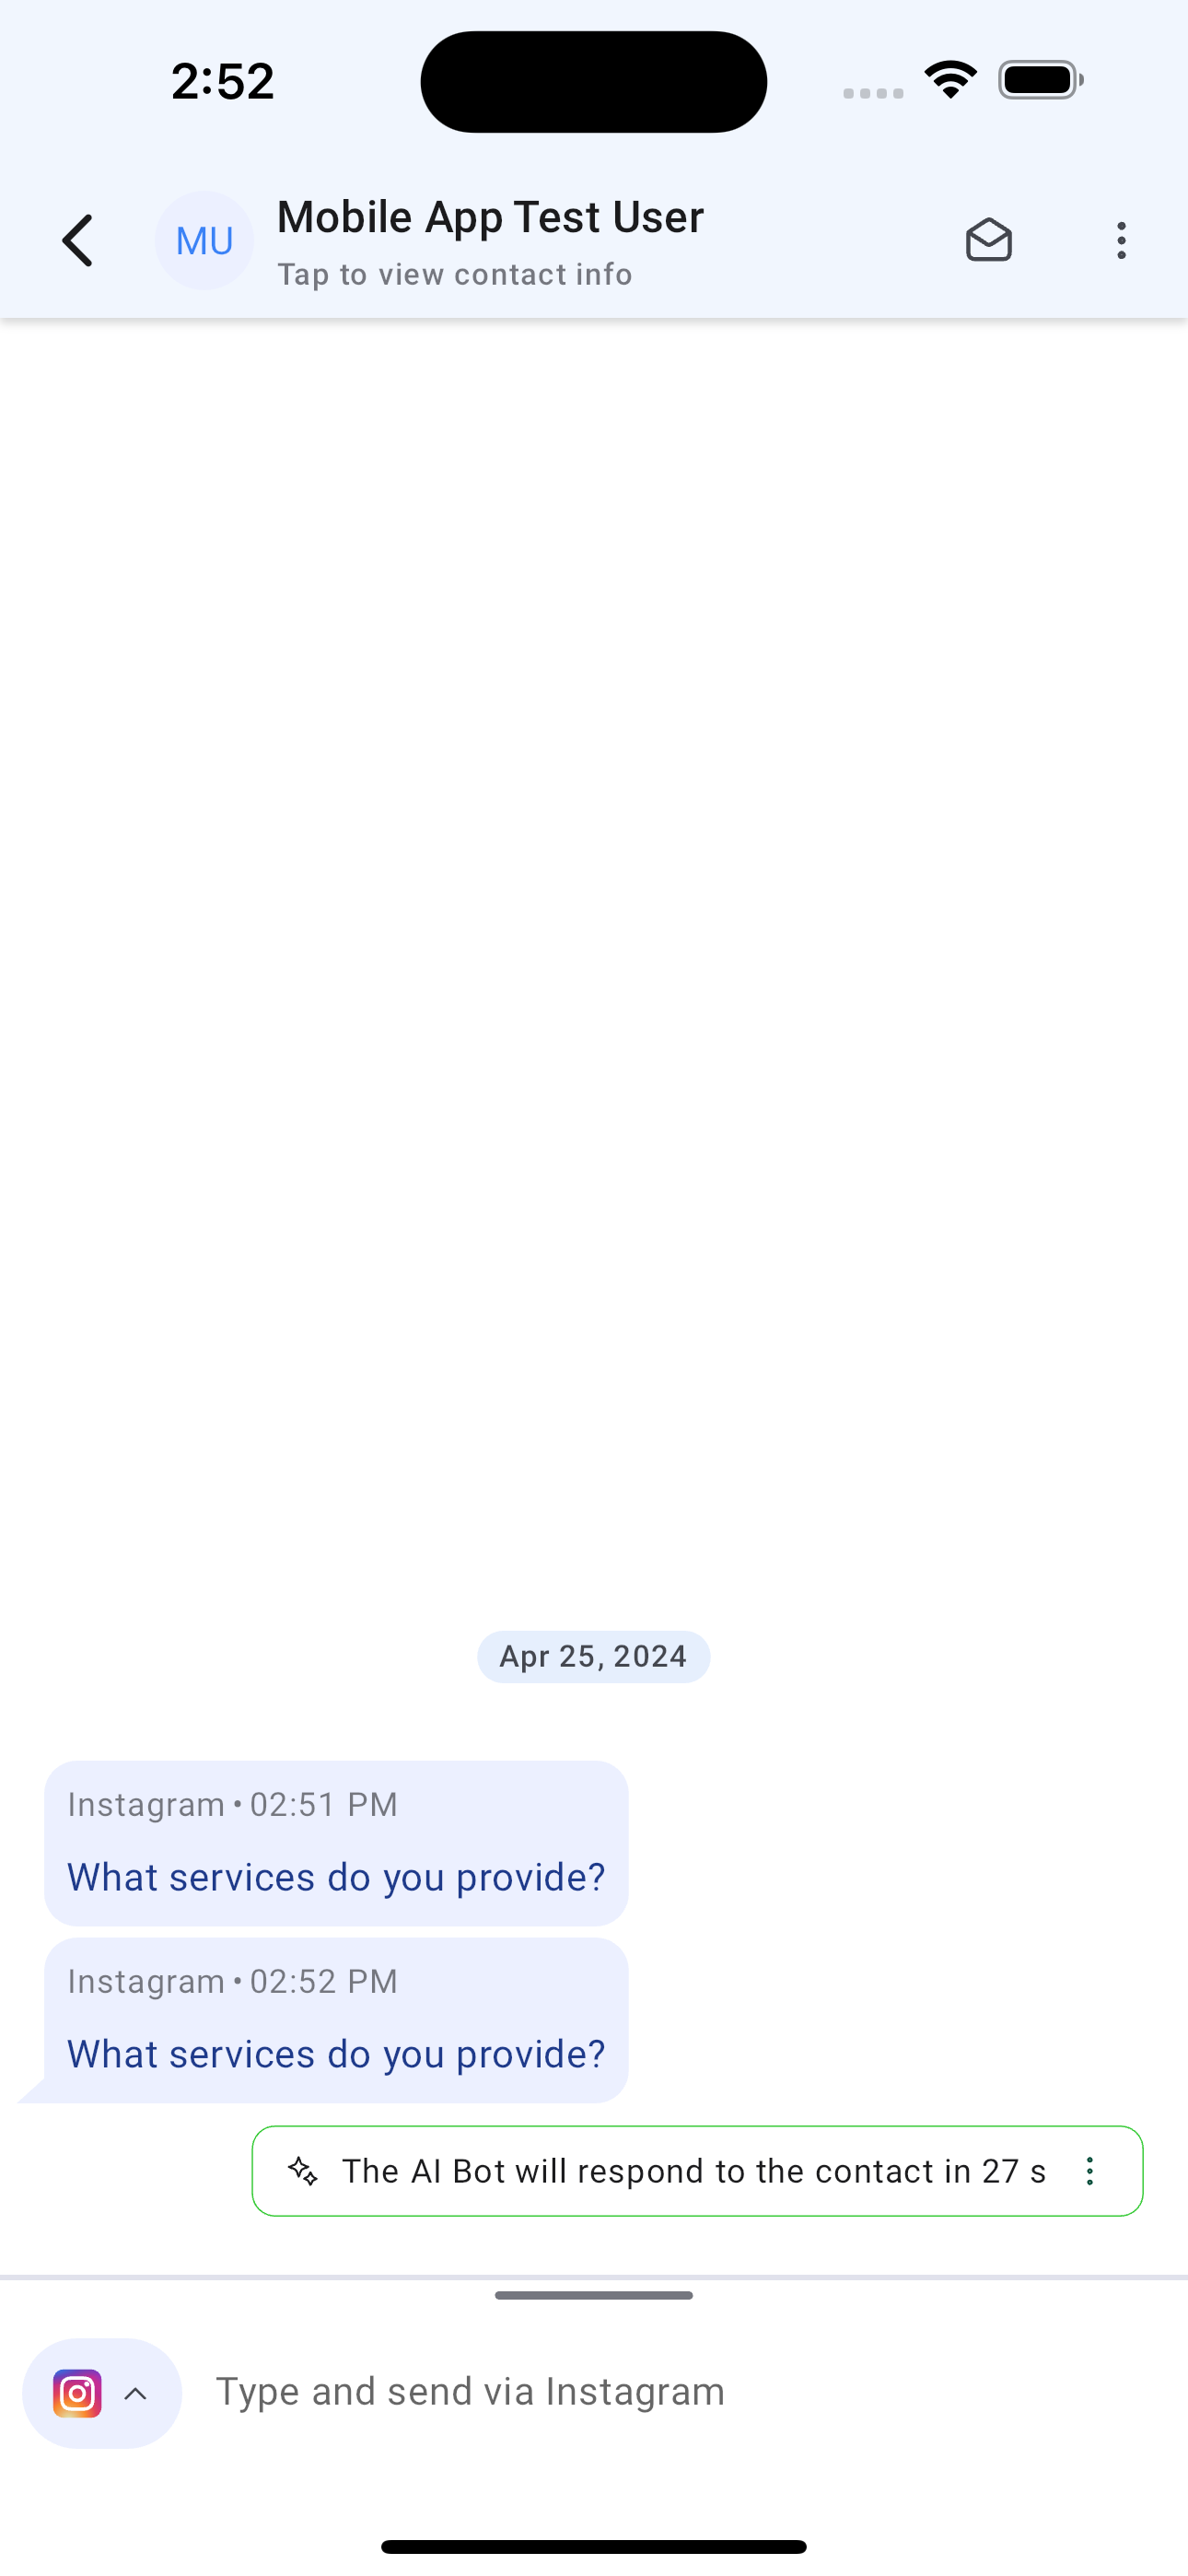
Conversation AI Support in Mobile
Suggestive Mode
Receive AI-based suggestions for new messages on supported channels. Quickly send suggestions or edit them before sending.
Auto Pilot Mode
Automatically send responses to new incoming queries in messages.
Feedback and Bot Training
Provide feedback to train the AI bot from auto-generated responses.
🚀 Available from v3.71 or later on HighLevel, LeadConnector. For WhiteLabel, request an update.

new
Mobile Payments and POS
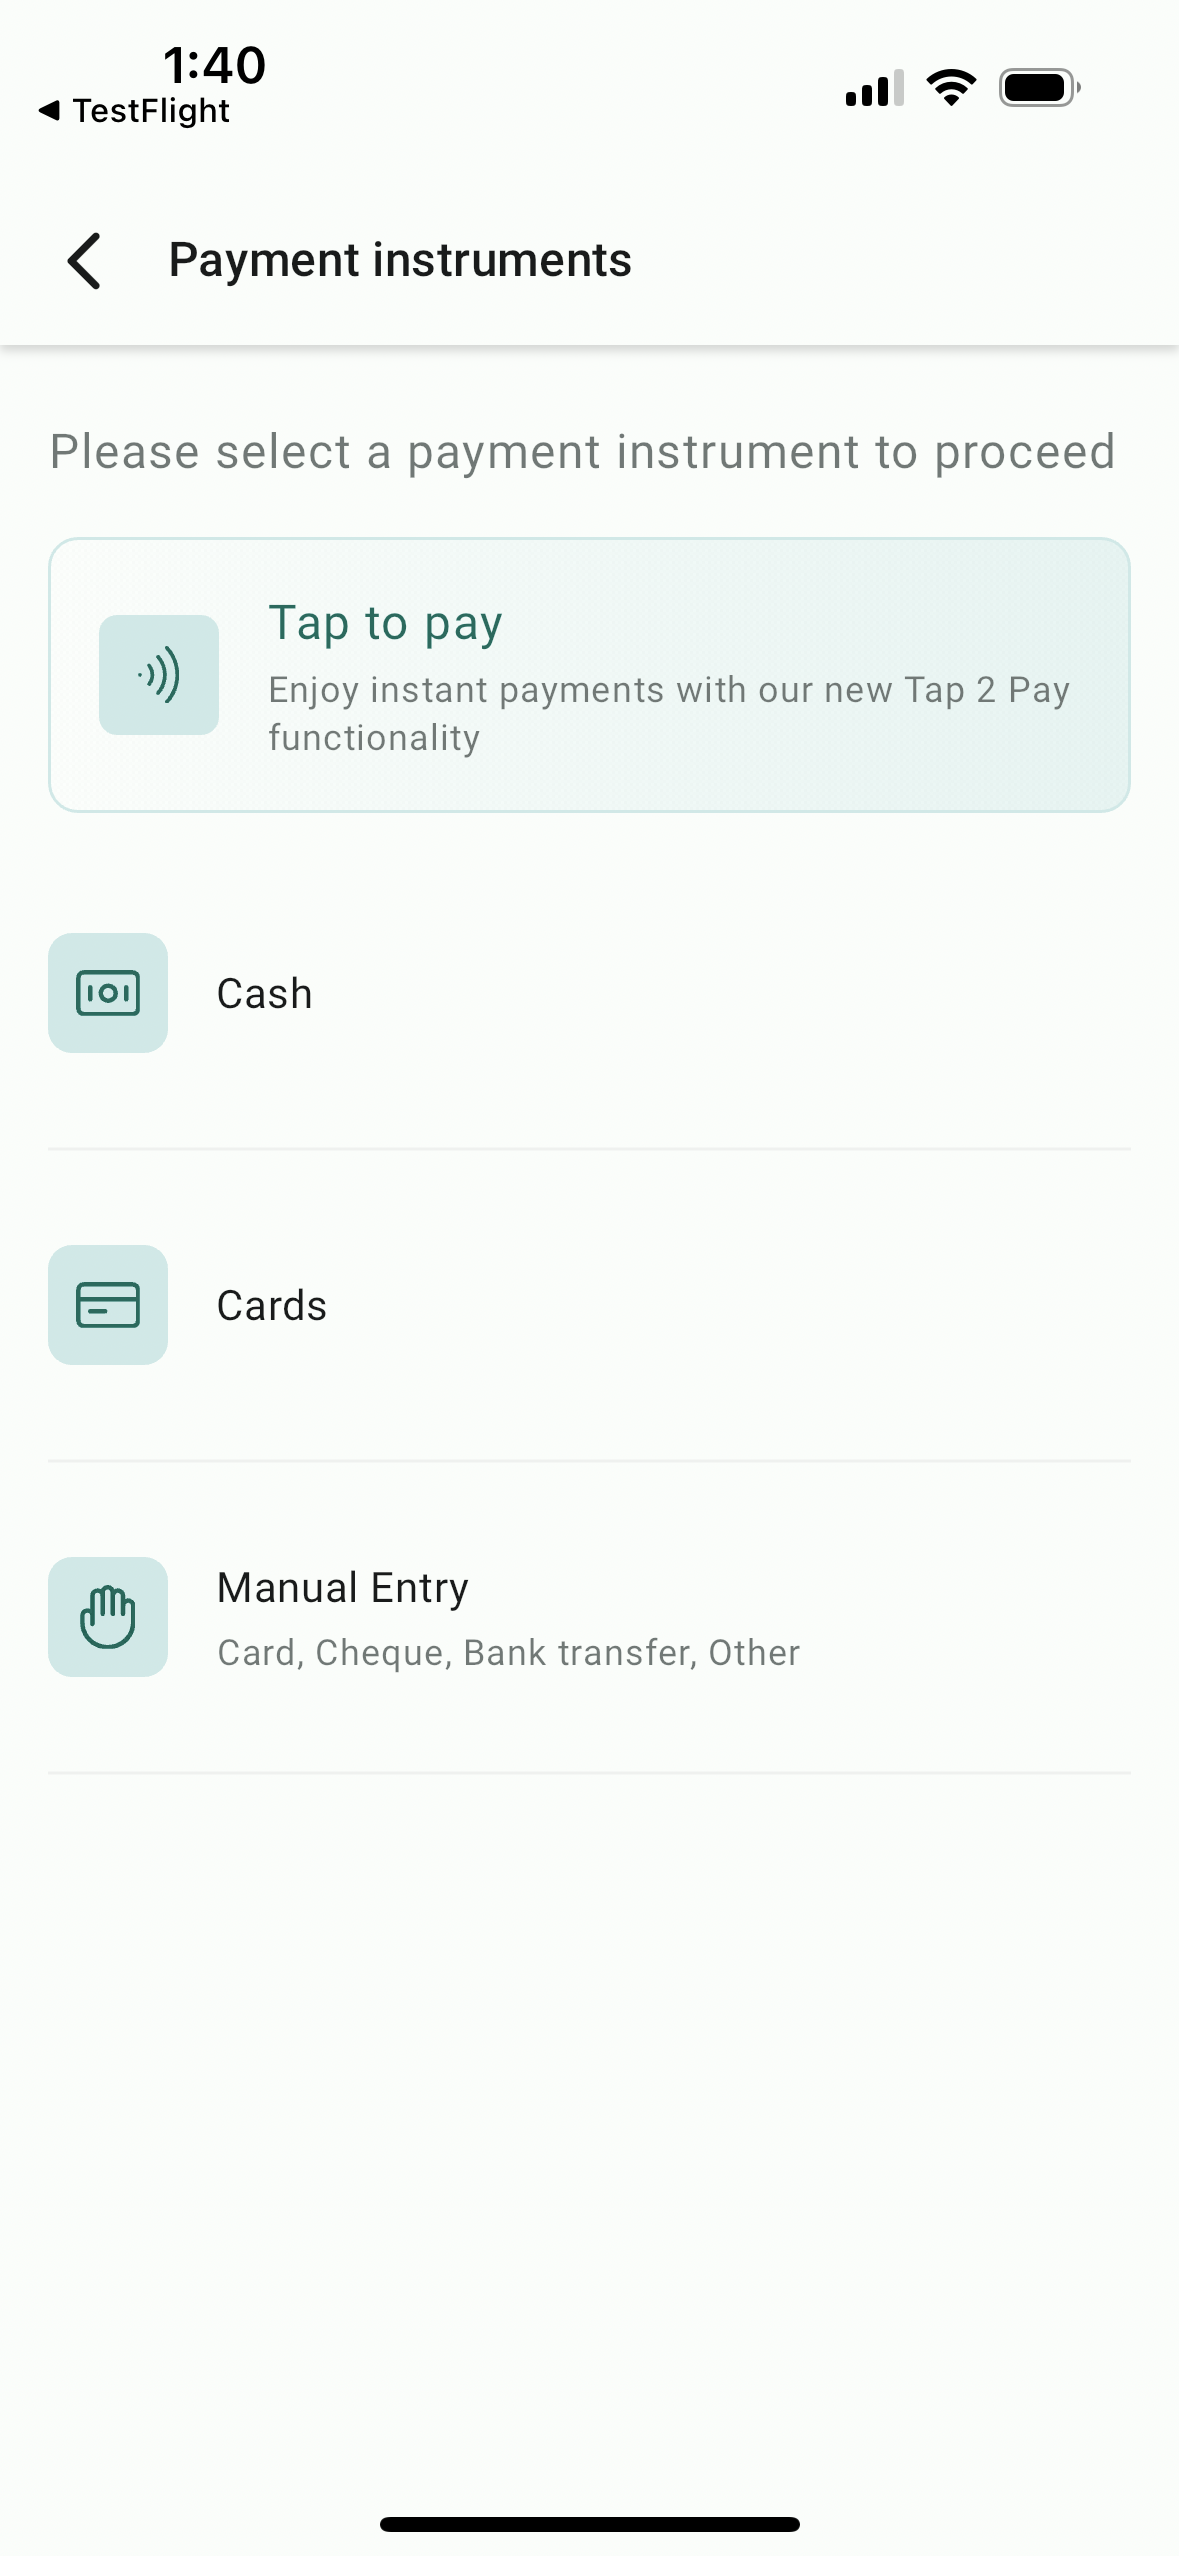
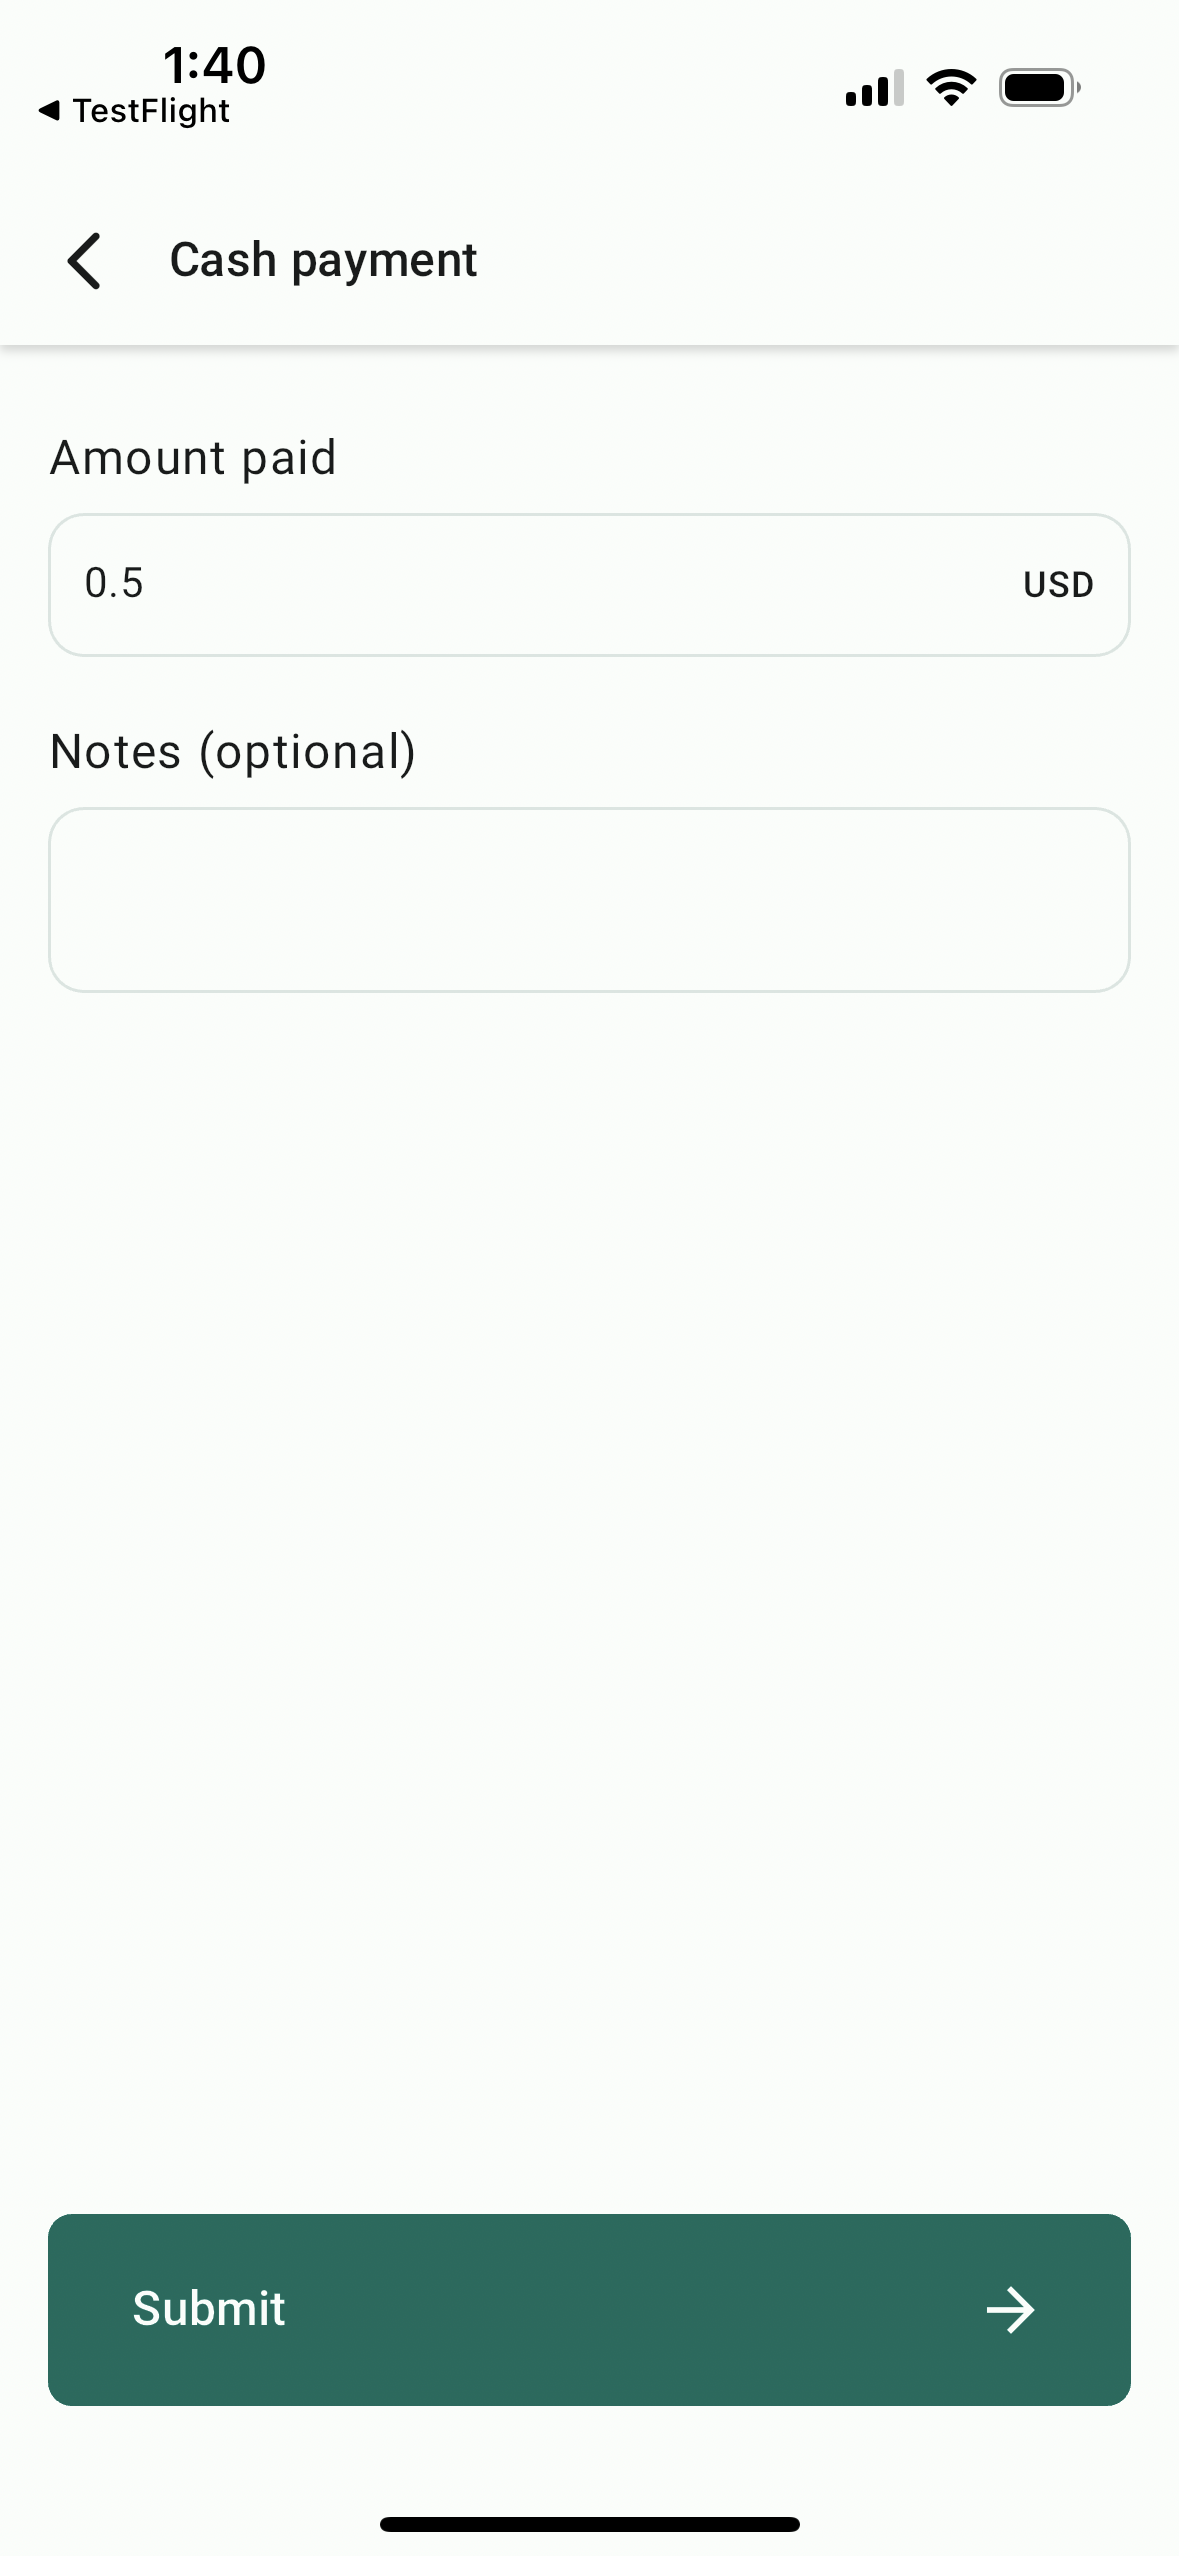
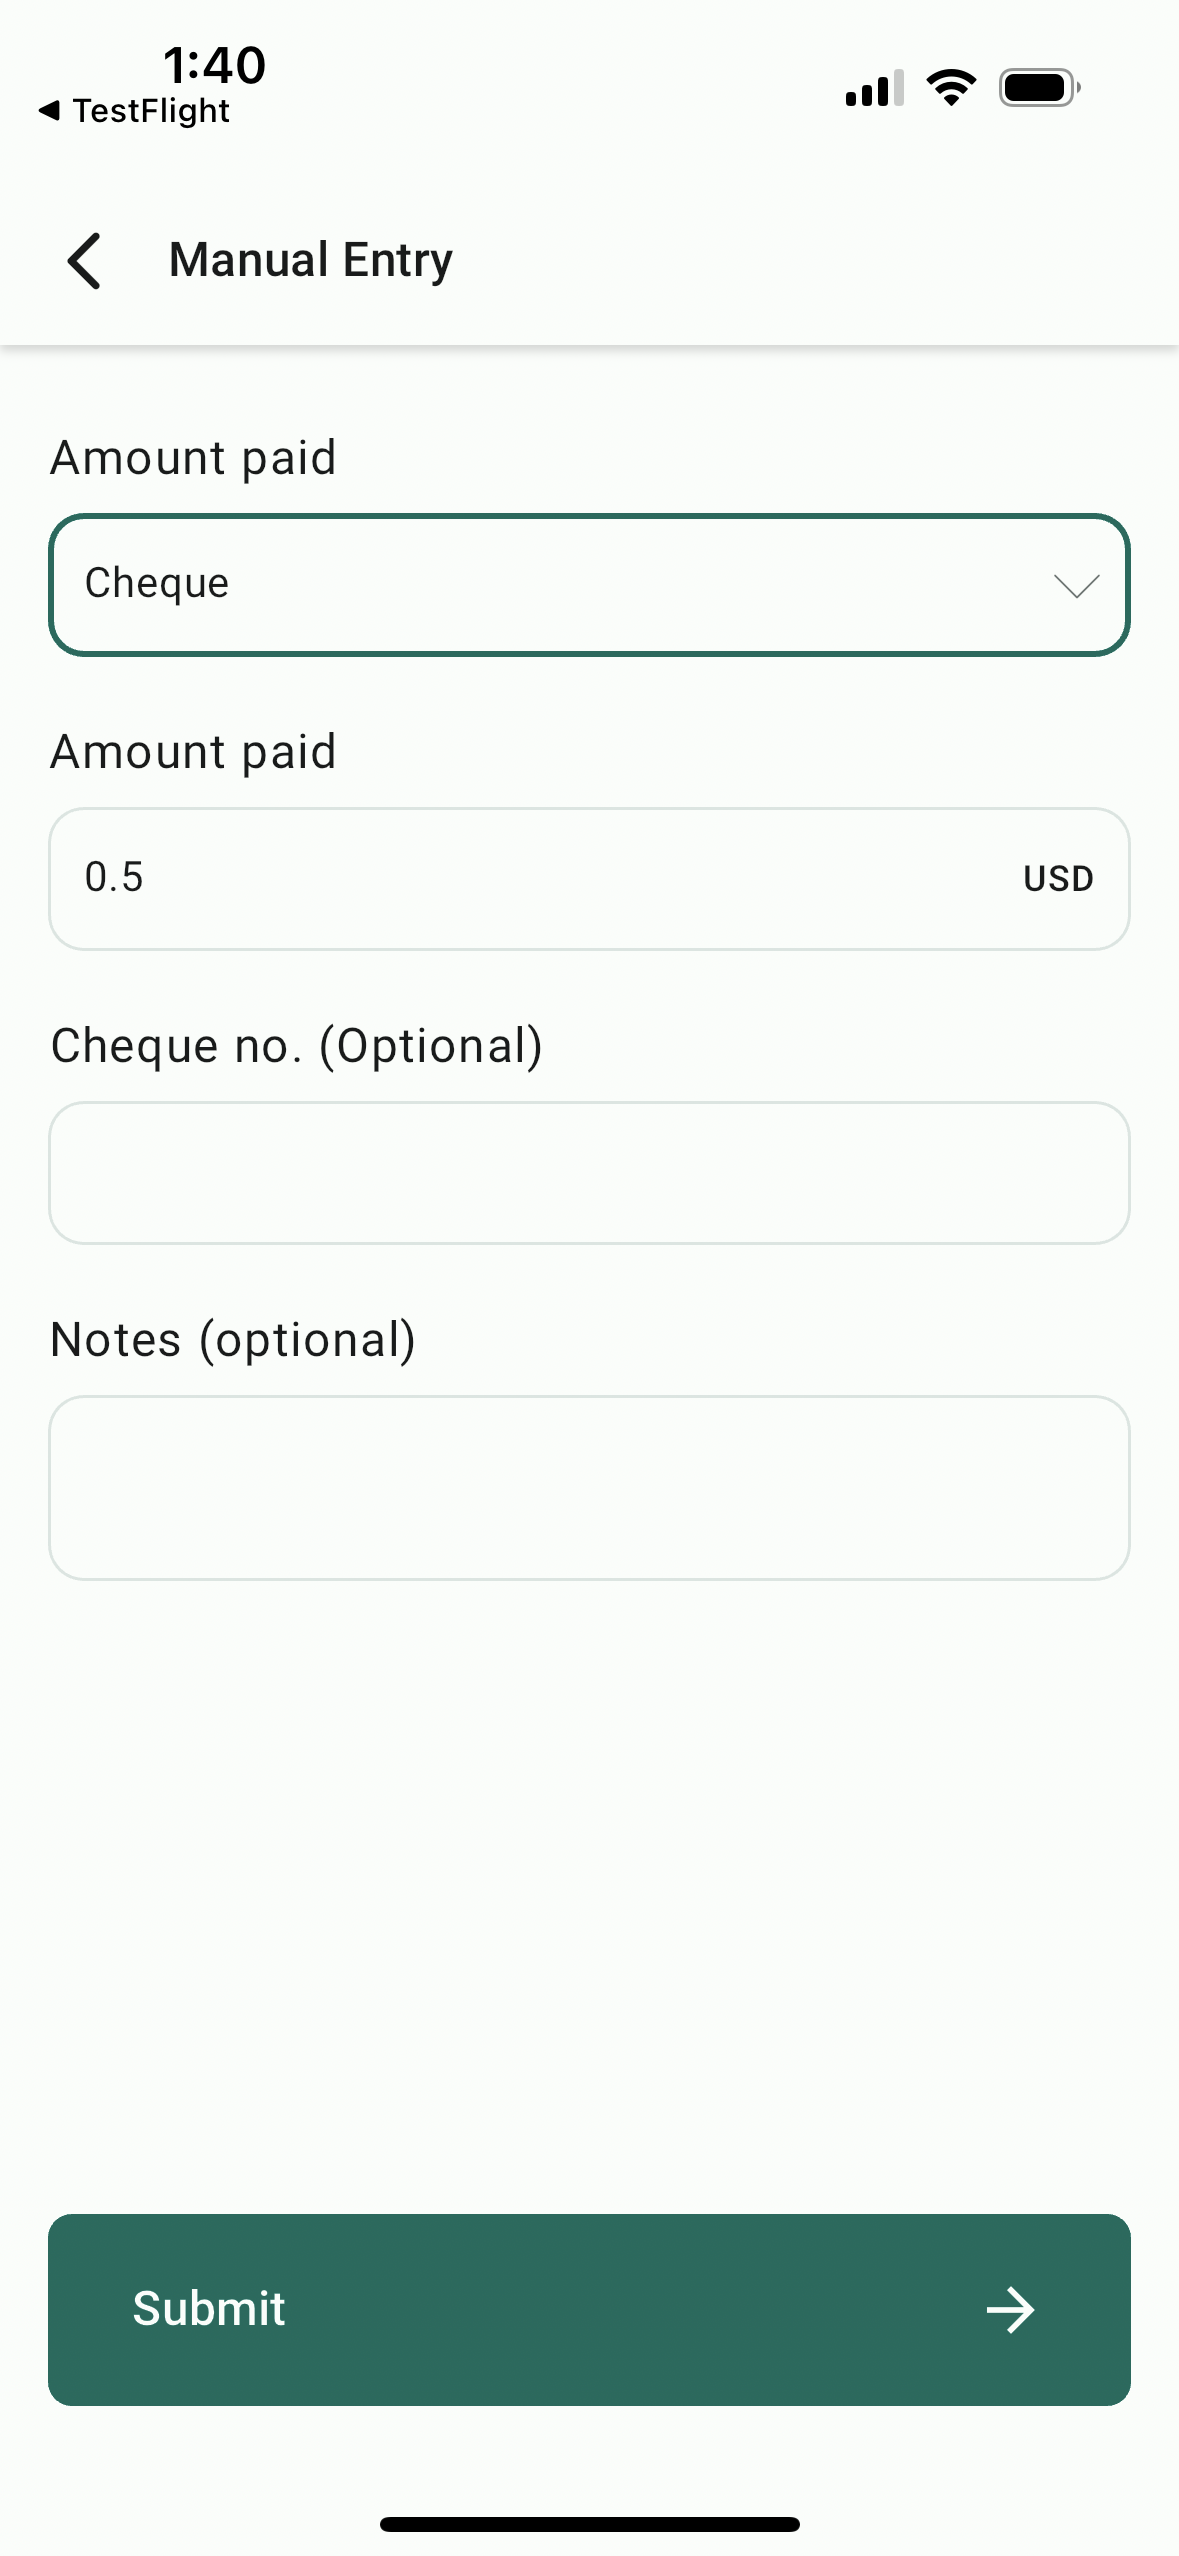
POS on all devices - Multiple payment methods - Mobile Payments
We're thrilled to announce our latest update to Payments on Mobile - the ability to accept payments using Cash, Cards on File, and Manual Entry for your mobile Point-of-Sale! Subaccount admin and users can now record payments for a POS transaction on Mobile using either Tap to Pay, Cash, Cards on File, Cheque, Bank Transfer, and more!
🚀
What's New
- Cards on File for POS: Accept POS payments using credit/debit cards. Everytime a payment is accepted with a new card for a particular contact, that card gets saved automatically for future use, making it super convenient for repeat customers!
- Cash Payments on POS: POS can now record cash payments, displaying the exact change that needs to be tendered for each transaction.
- Manual Entry on POS: If a payment has been accepted via Cheque or Bank Transfer, an entry can be recorded for that particular POS transaction.
👷♂️
How It Works
- Open the mobile app with your preferred subaccount selected.
- Head over to the POS tab from the bottom bar and initiate a new transaction using your Product Catalog/Keypad.
- Link a contact to the transaction and review all the details of the transaction. Once you're good to go, tap on "Choose Payment Instrument".
- Select your preferred payment method.
- Enter the tip amount.
- Accept payment via your chosen payment method!
Note
: If you choose to accept payment via a saved card, make sure you link the relevant contact on the Review Payment screen. If the transaction does not have a linked contact, no saved cards will show up.⭐️
Why it Matters
This update finally removes the restriction of POS running on devices with NFC support only. Now, the HighLevel Point-of-Sale will work on every device (including iPads and tablets) that have the highlevel/leadconnector/whitelablled app installed. Happy transacting!
📝 Tap to Pay and Cards on File are supported for Stripe Provider only as of now.
🚀 Available from v3.71 or later on HighLevel, LeadConnector. For WhiteLabel, request an update.

new
Invoicing
Mobile Payments and POS
Record payment for Invoice - Mobile Payments
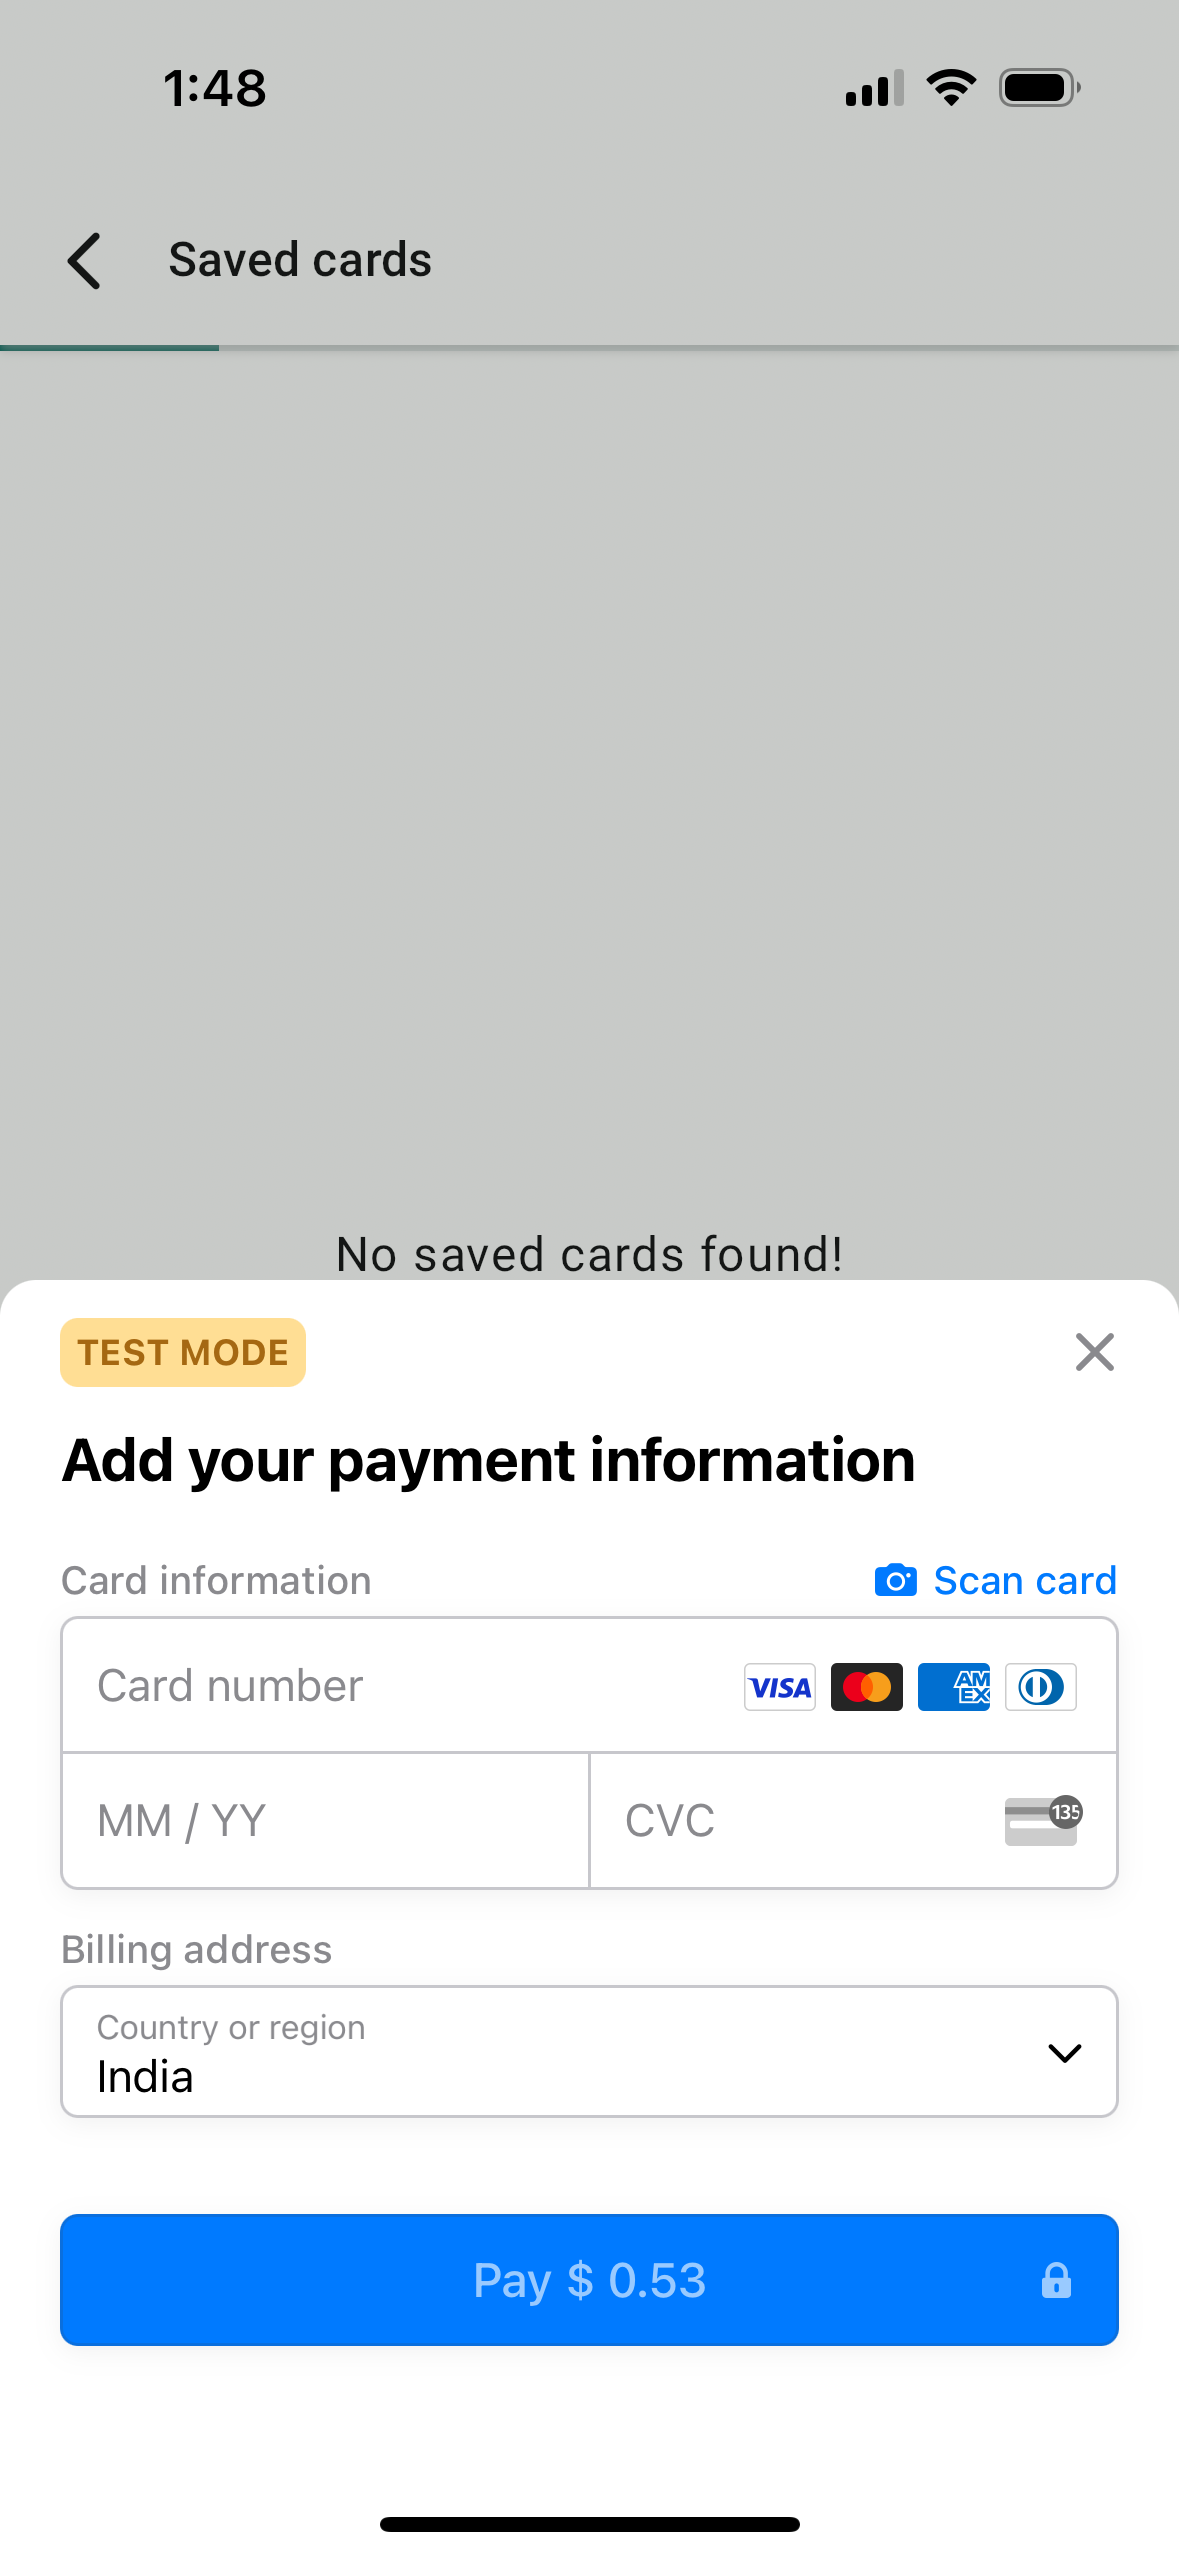
We're thrilled to announce our latest update to Payments on Mobile - the ability to record payment for an existing invoice! Subaccount admin and users can now record payments for an invoice on Mobile, provided they have specific permissions enabled from the agency settings. Payment can be recorded using Cards (new or saved), manual entry (cash, cards, bank transfer, cheque, others), and tap to pay (only applicable to devices with NFC support). This feature will be available on the HighLevel app, LeadConnector app, and Whitelabelled apps (update needs to be requested).
🚀
What's New
- Tap to Pay for invoices: Now record a payment for an existing invoice using Tap to Pay.
- Cards + Manual entry: Record a live payment using a new/saved card or record a manual entry for an already paid invoice.
👷♂️
How It Works
- Open the mobile app with your preferred subaccount selected.
- Using the hamburger menu from the top left of the screen, head over to the "Invoice" section.
- Choose and long-press on an invoice for which you would like to record payment.
- Select record payment.
- Select the payment instrument.
- Accept payment via your chosen payment method!
⭐️
Why it Matters
This update allows subaccount admins and users to finally start recording invoice payments directly from the mobile app, also allowing for payments to be accepted via Tap to Pay.

new
Conversations
Notes and Task Management in Conversations Module
Now you can effortlessly create tasks and add notes while engaging in conversations simultaneously. 🙌
👀
What's New:
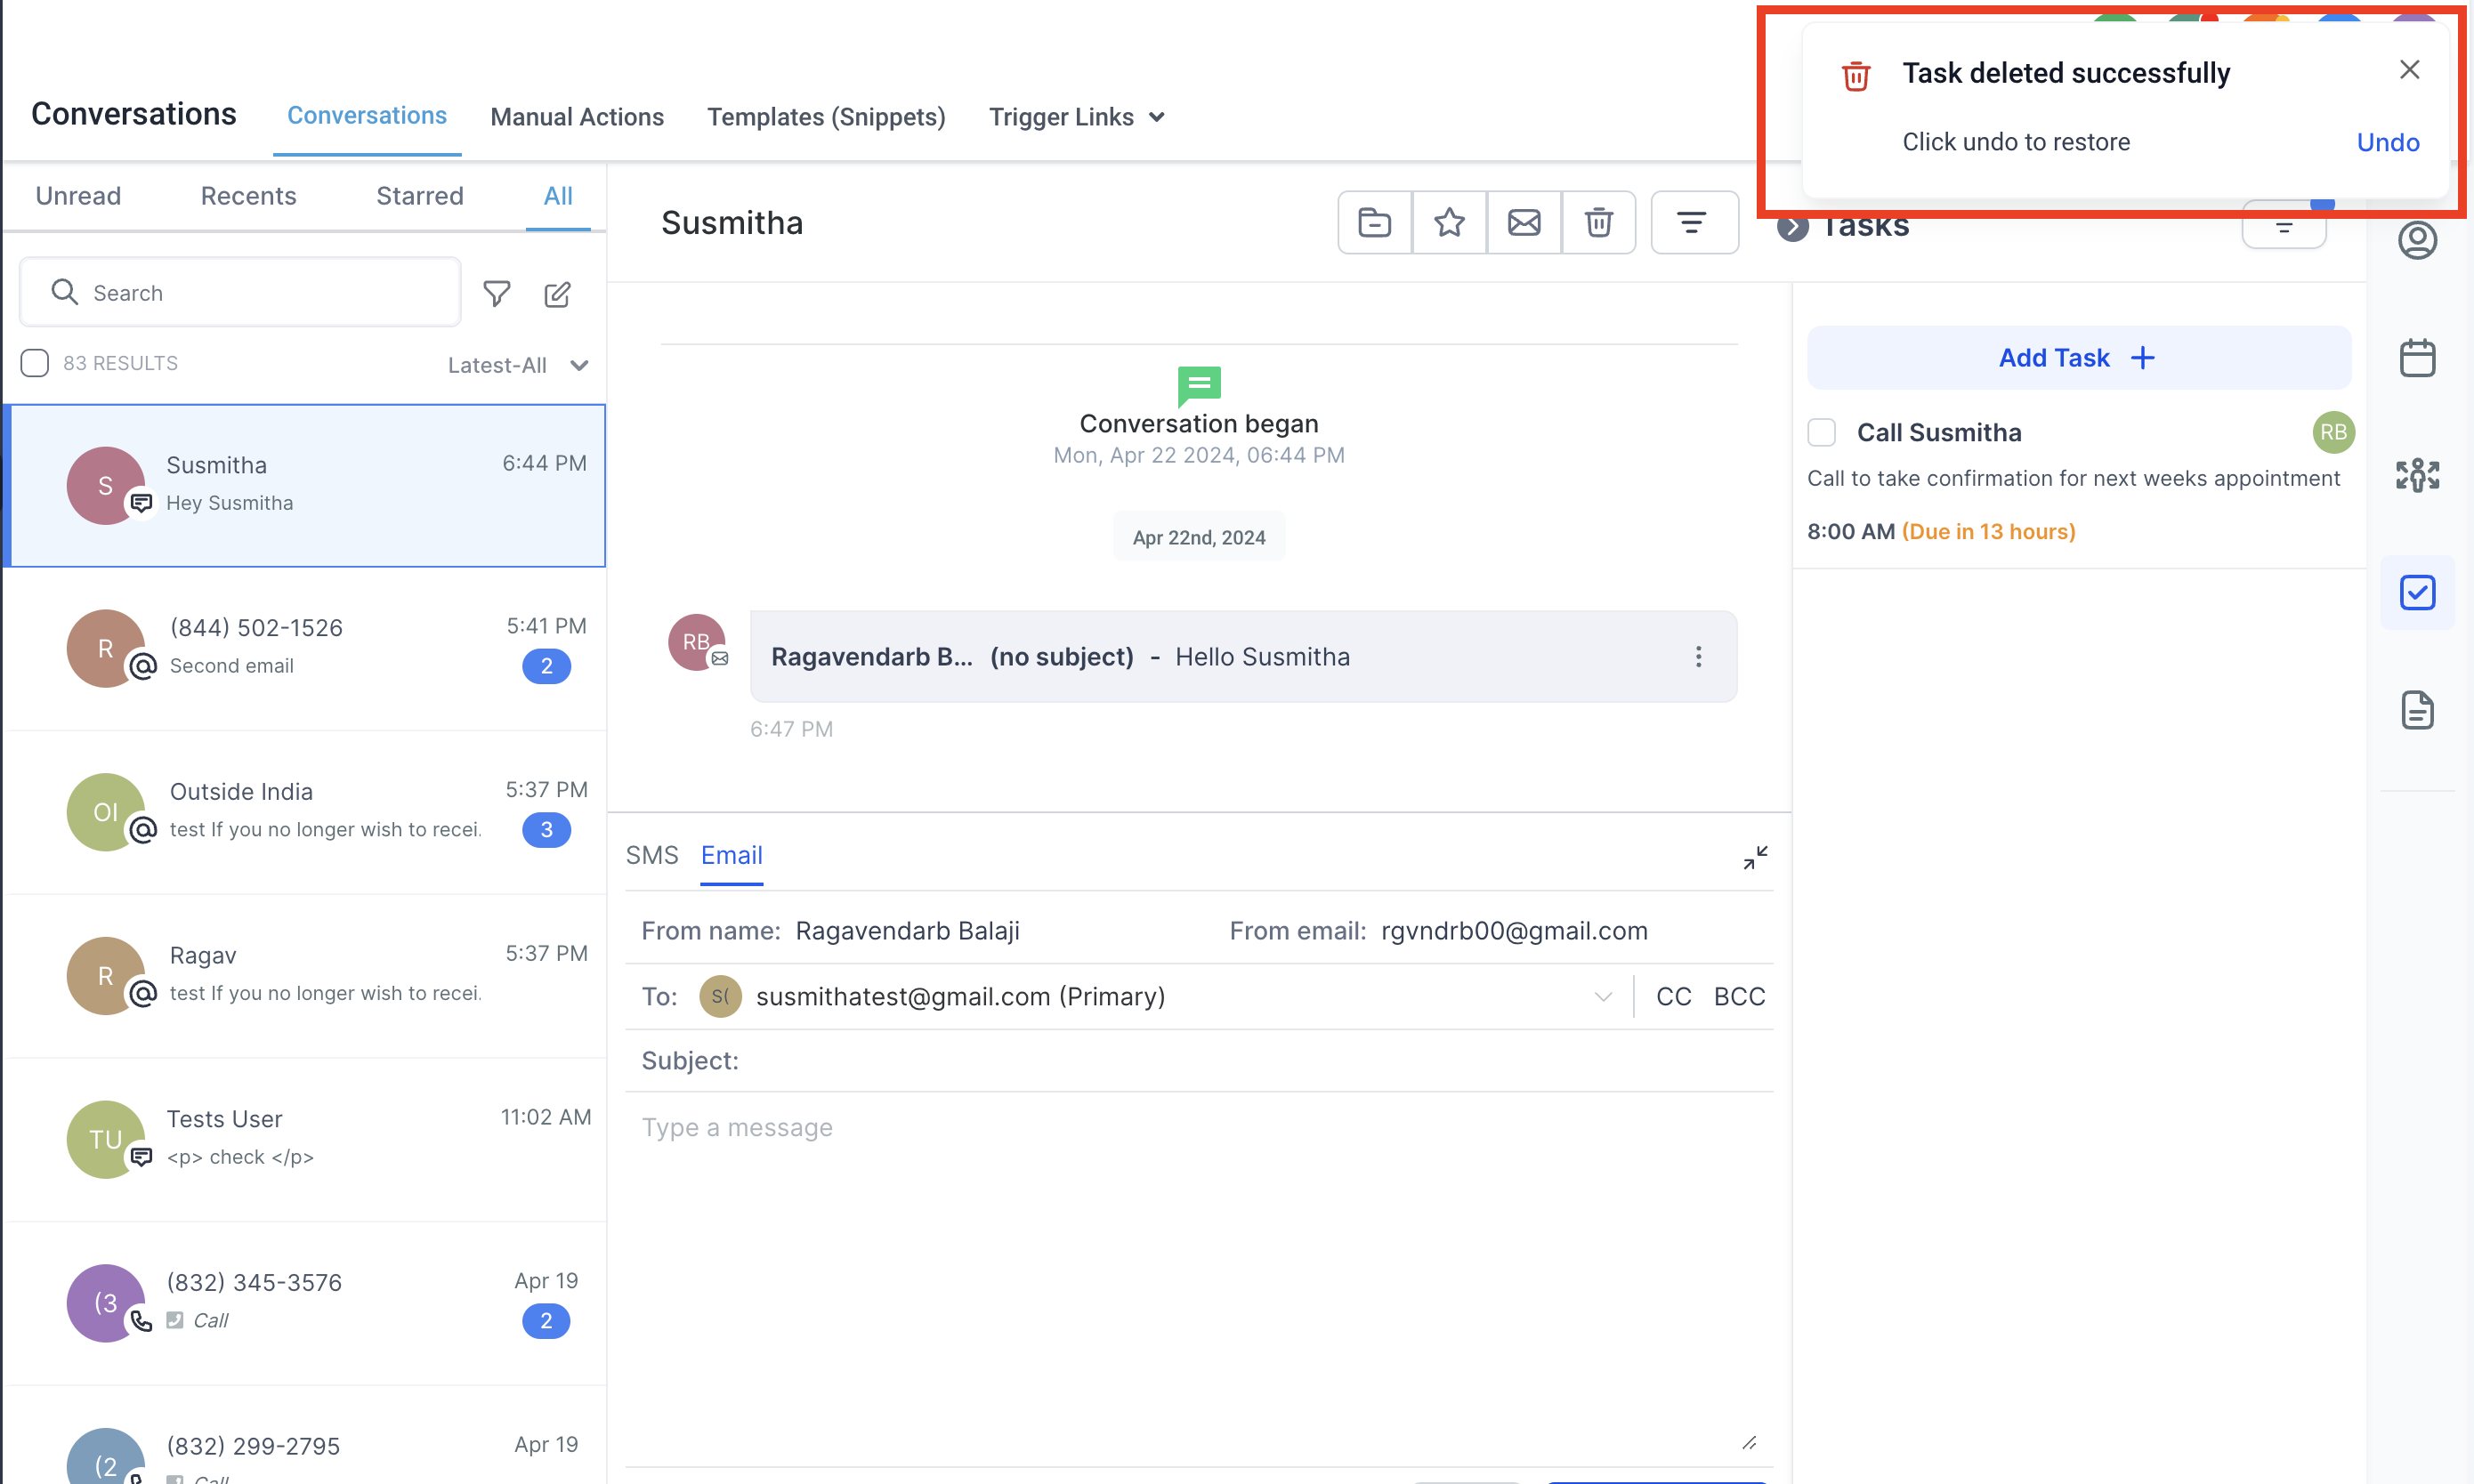
- 📝 Seamless Notes and Task Creation:Users can now create notes and tasks directly from the conversations module's right pane, eliminating the need to navigate outside the conversations module.
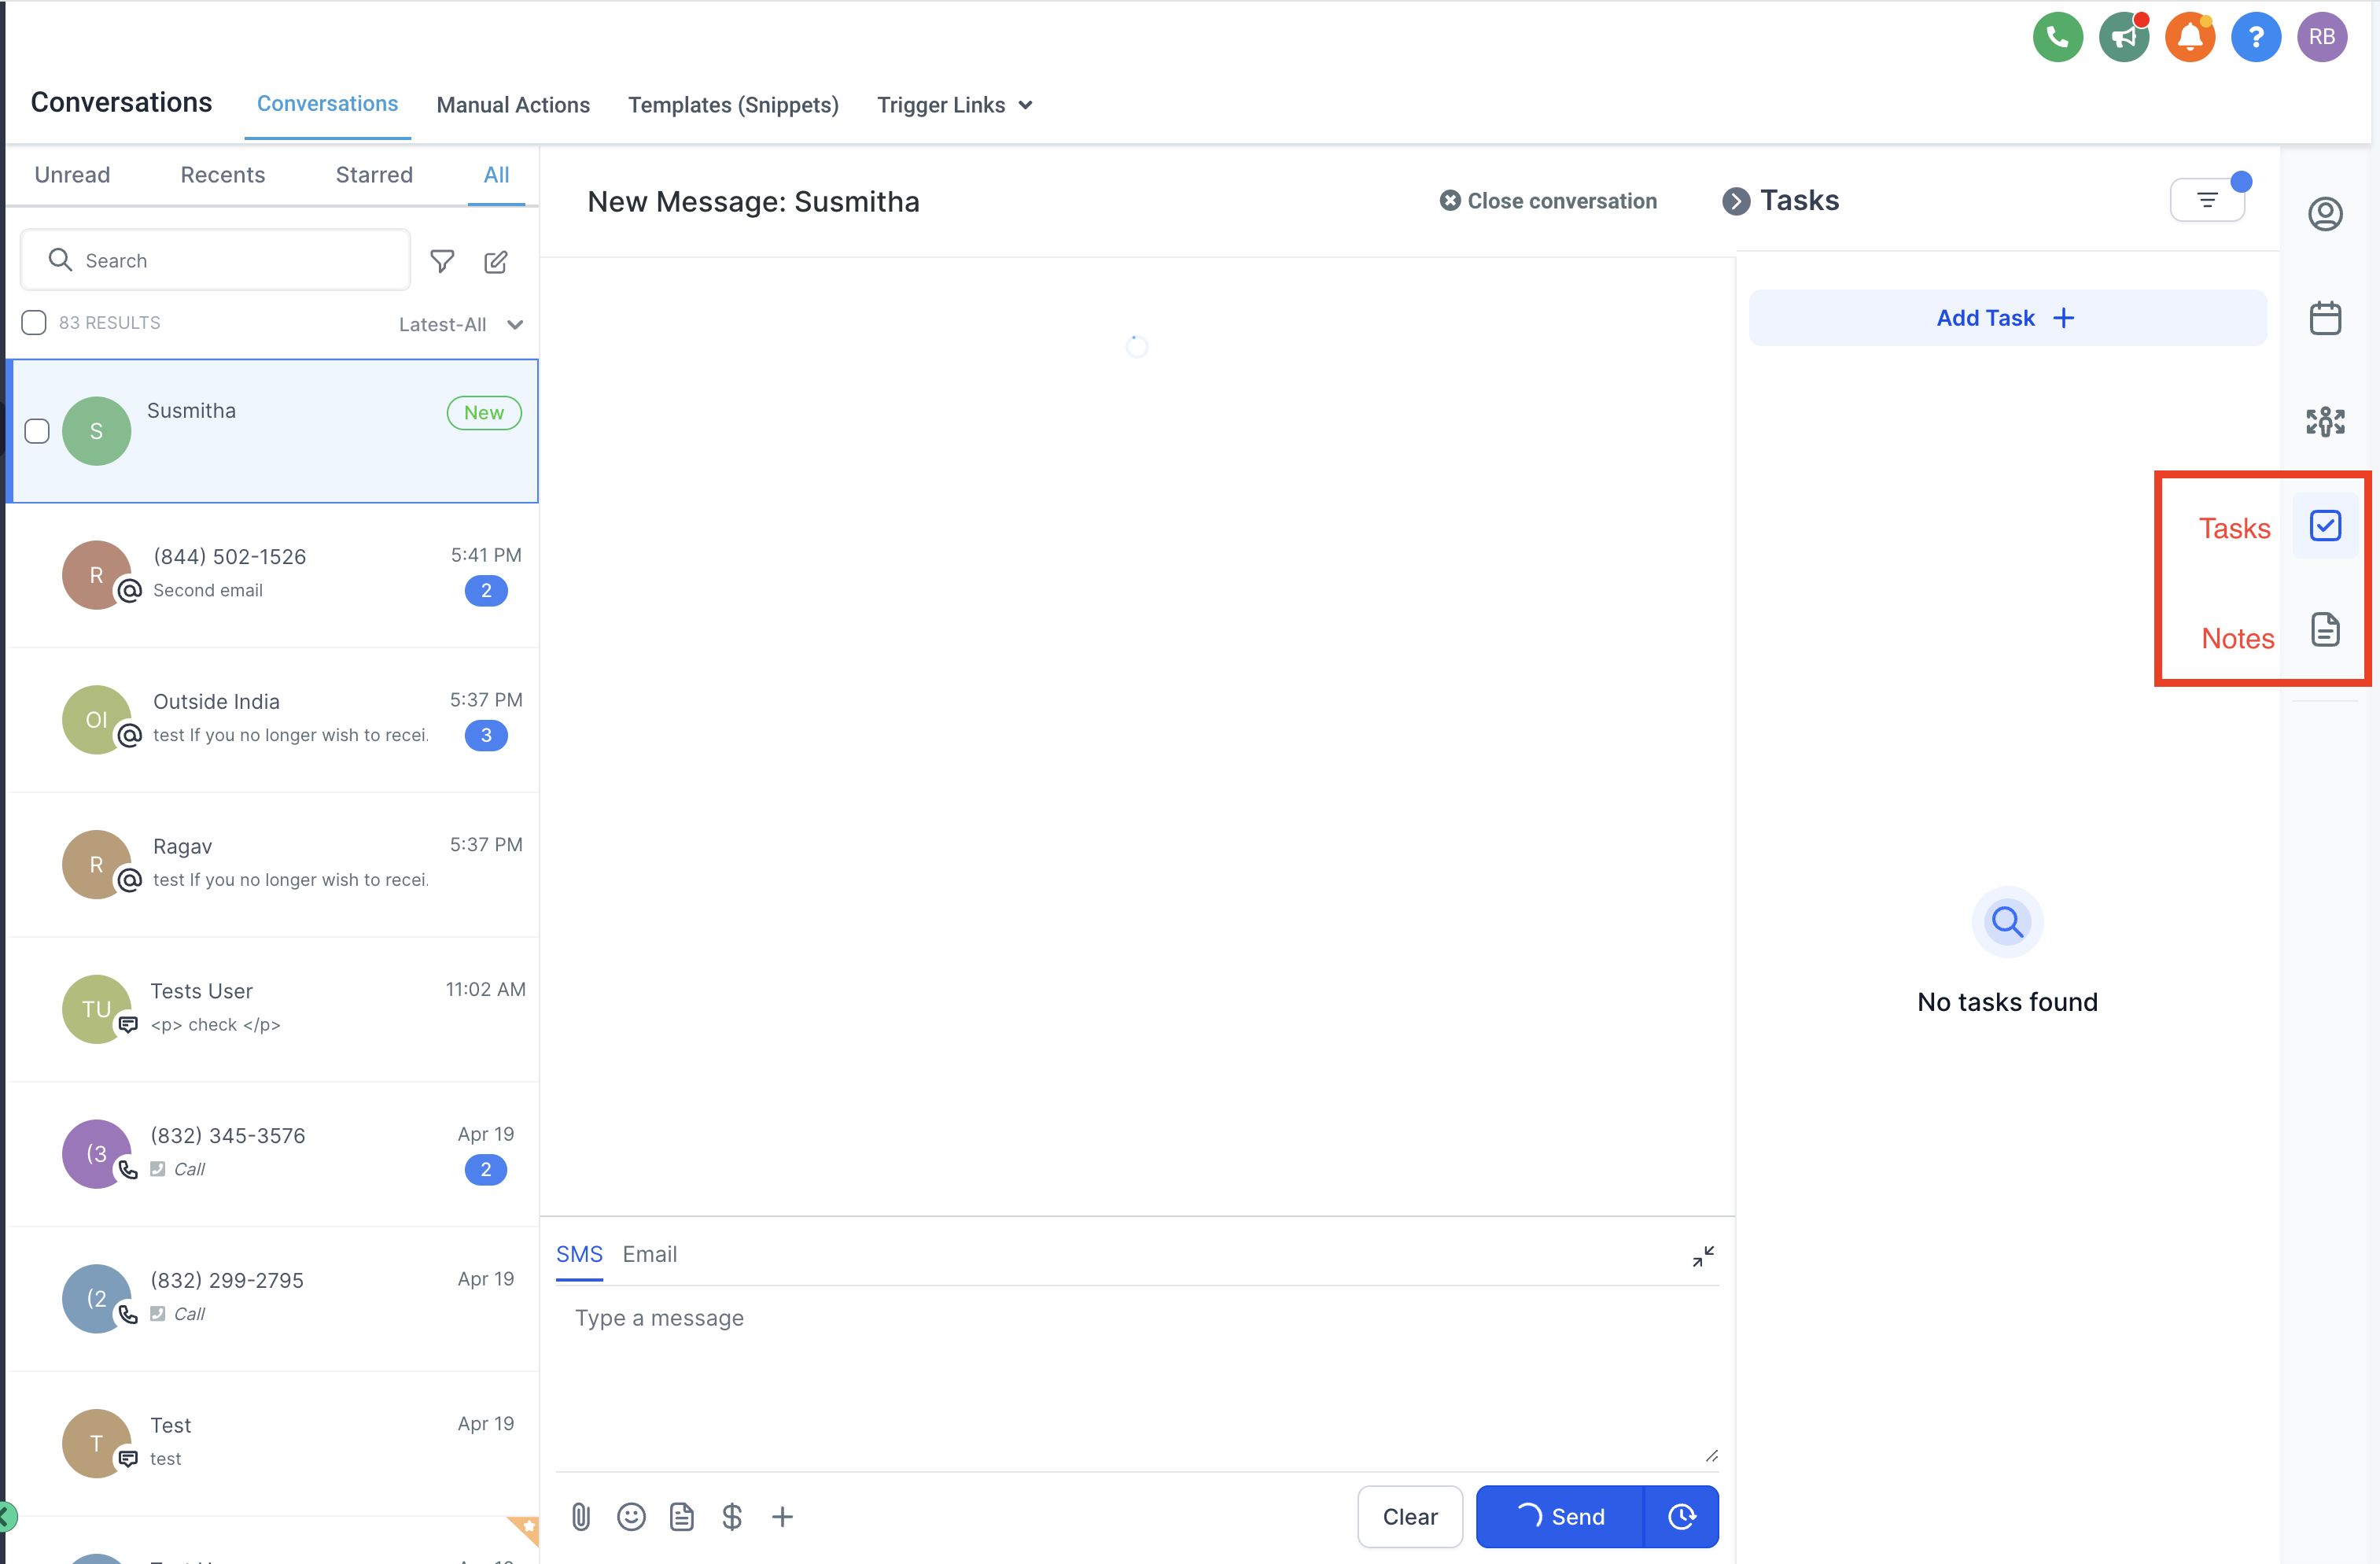
- 💯 Parallel Action:Users can effortlessly take notes and create tasks while engaging in conversations, enhancing multitasking capabilities.
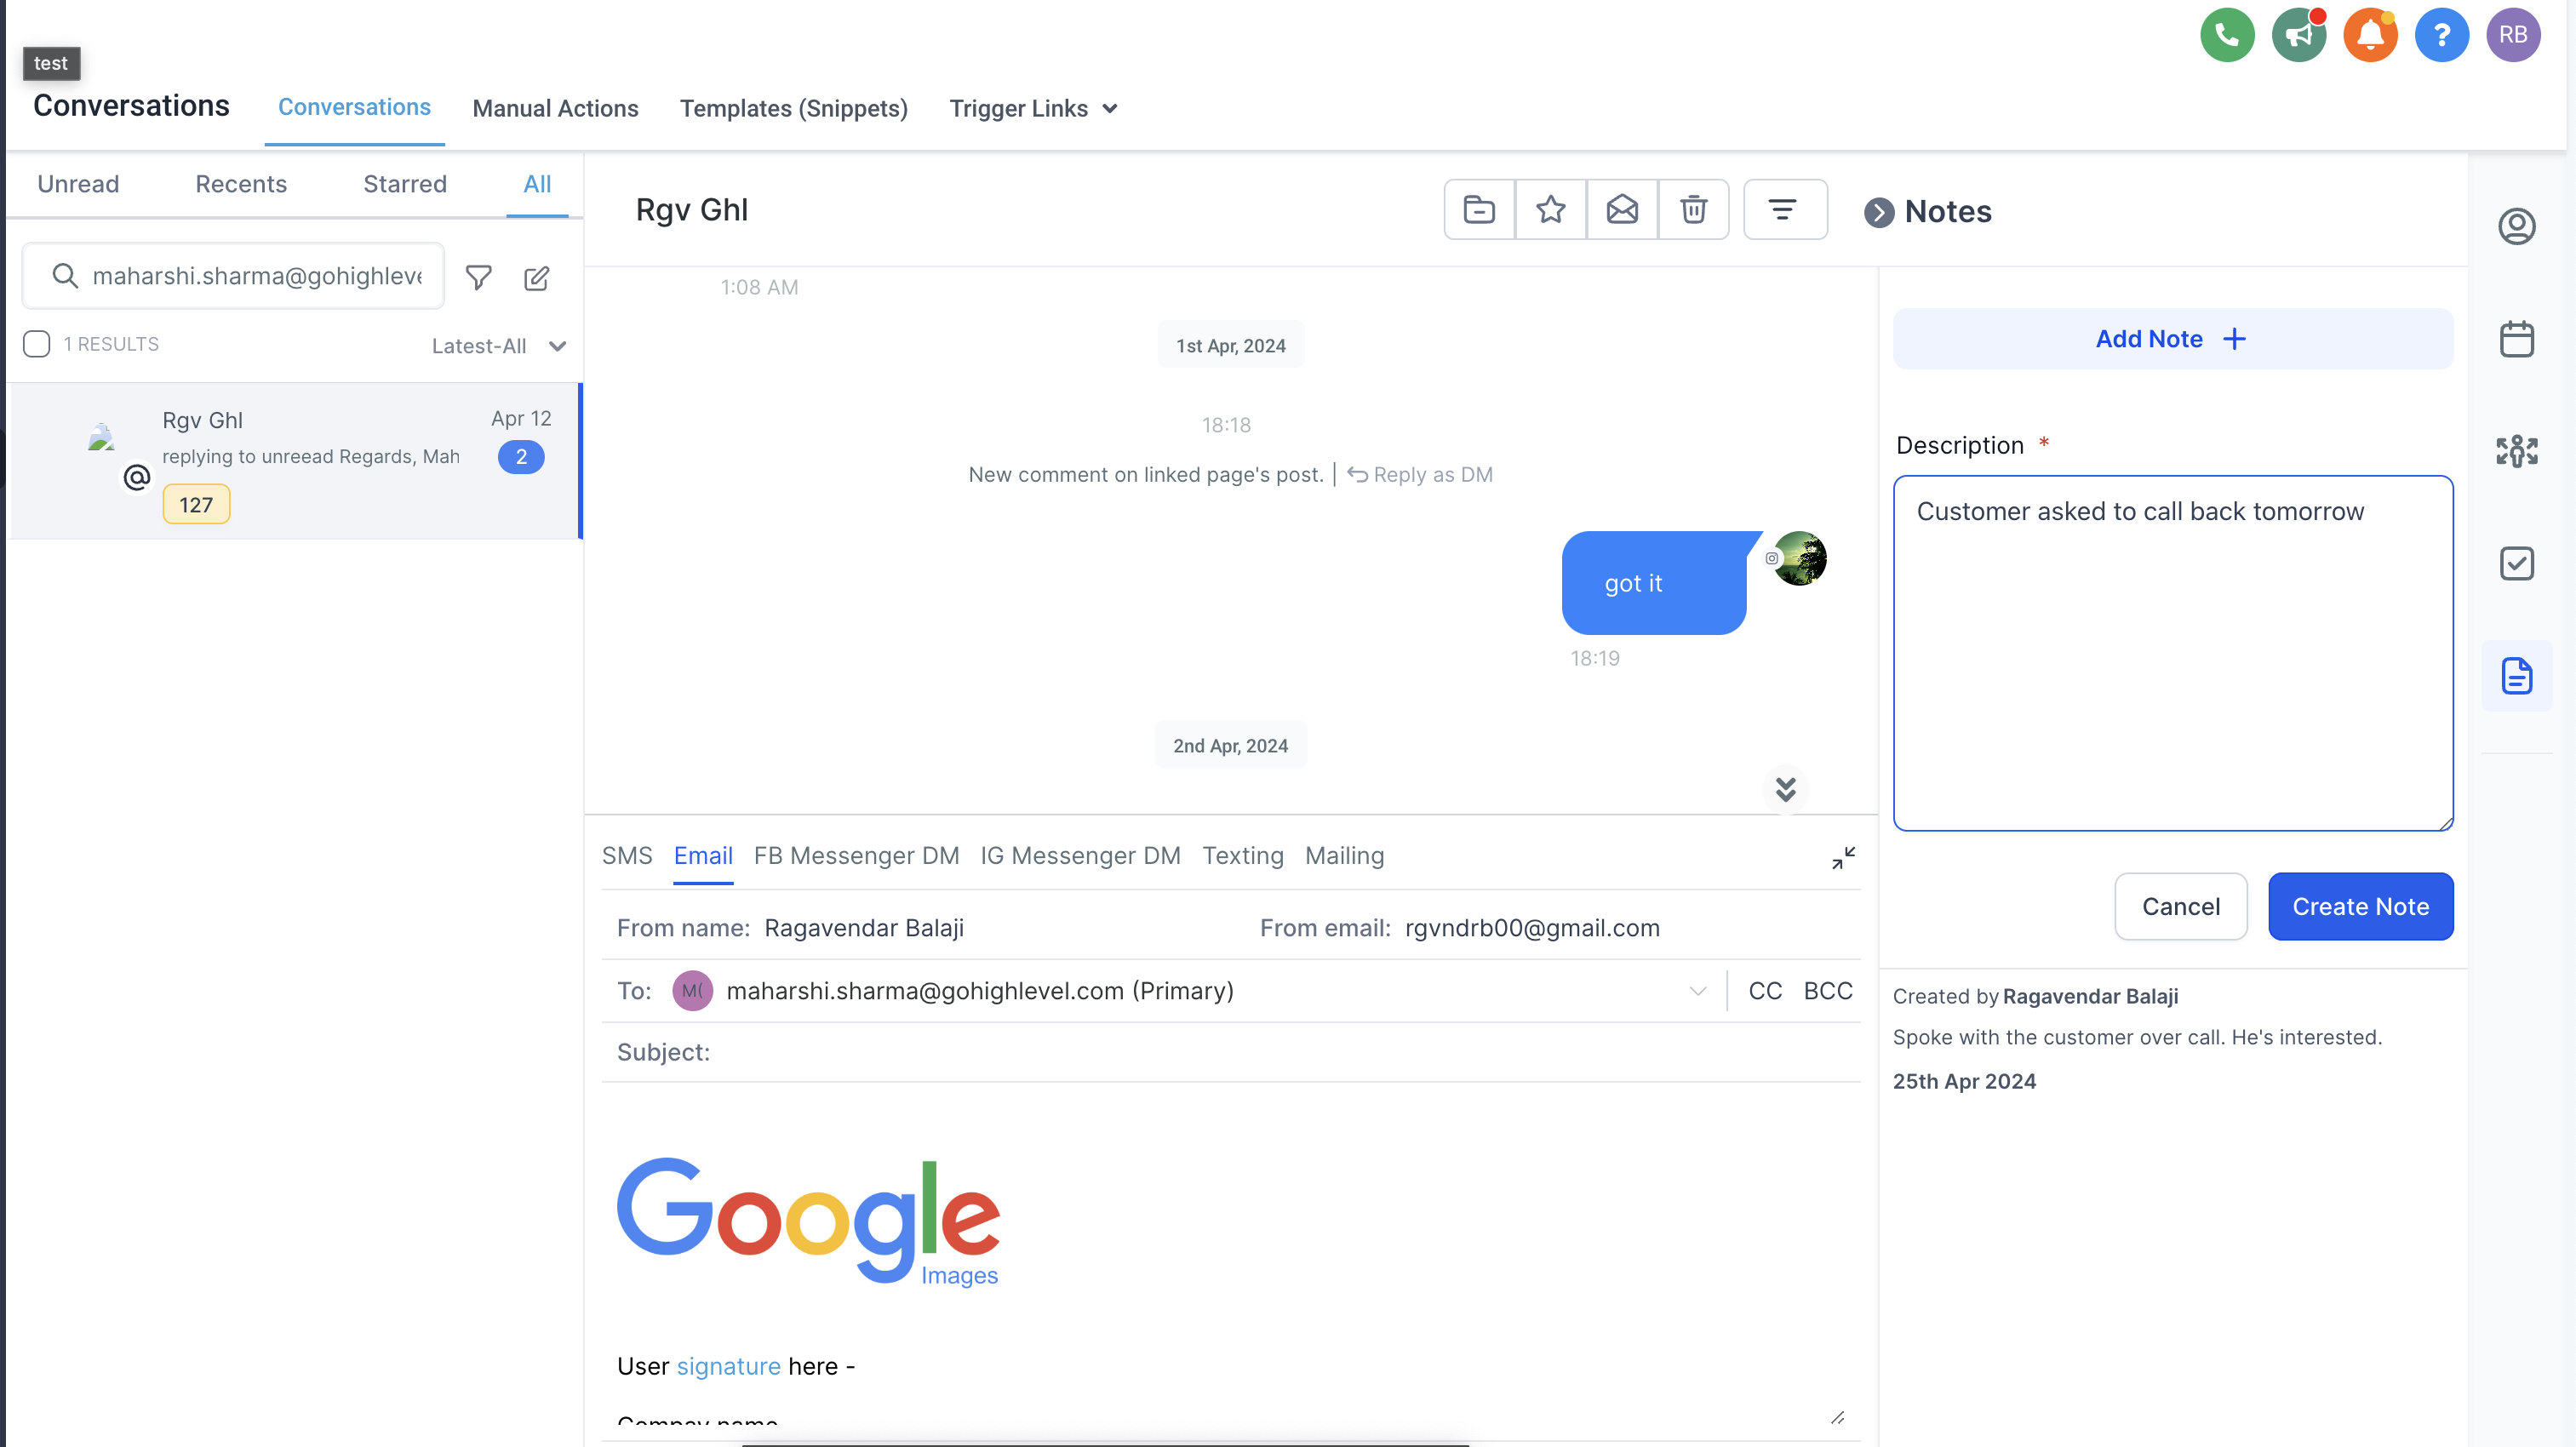
- ✍️ Edit and Delete Tasks/Notes:Seamlessly manage your tasks and notes within the conversations module with the ability to edit and delete.
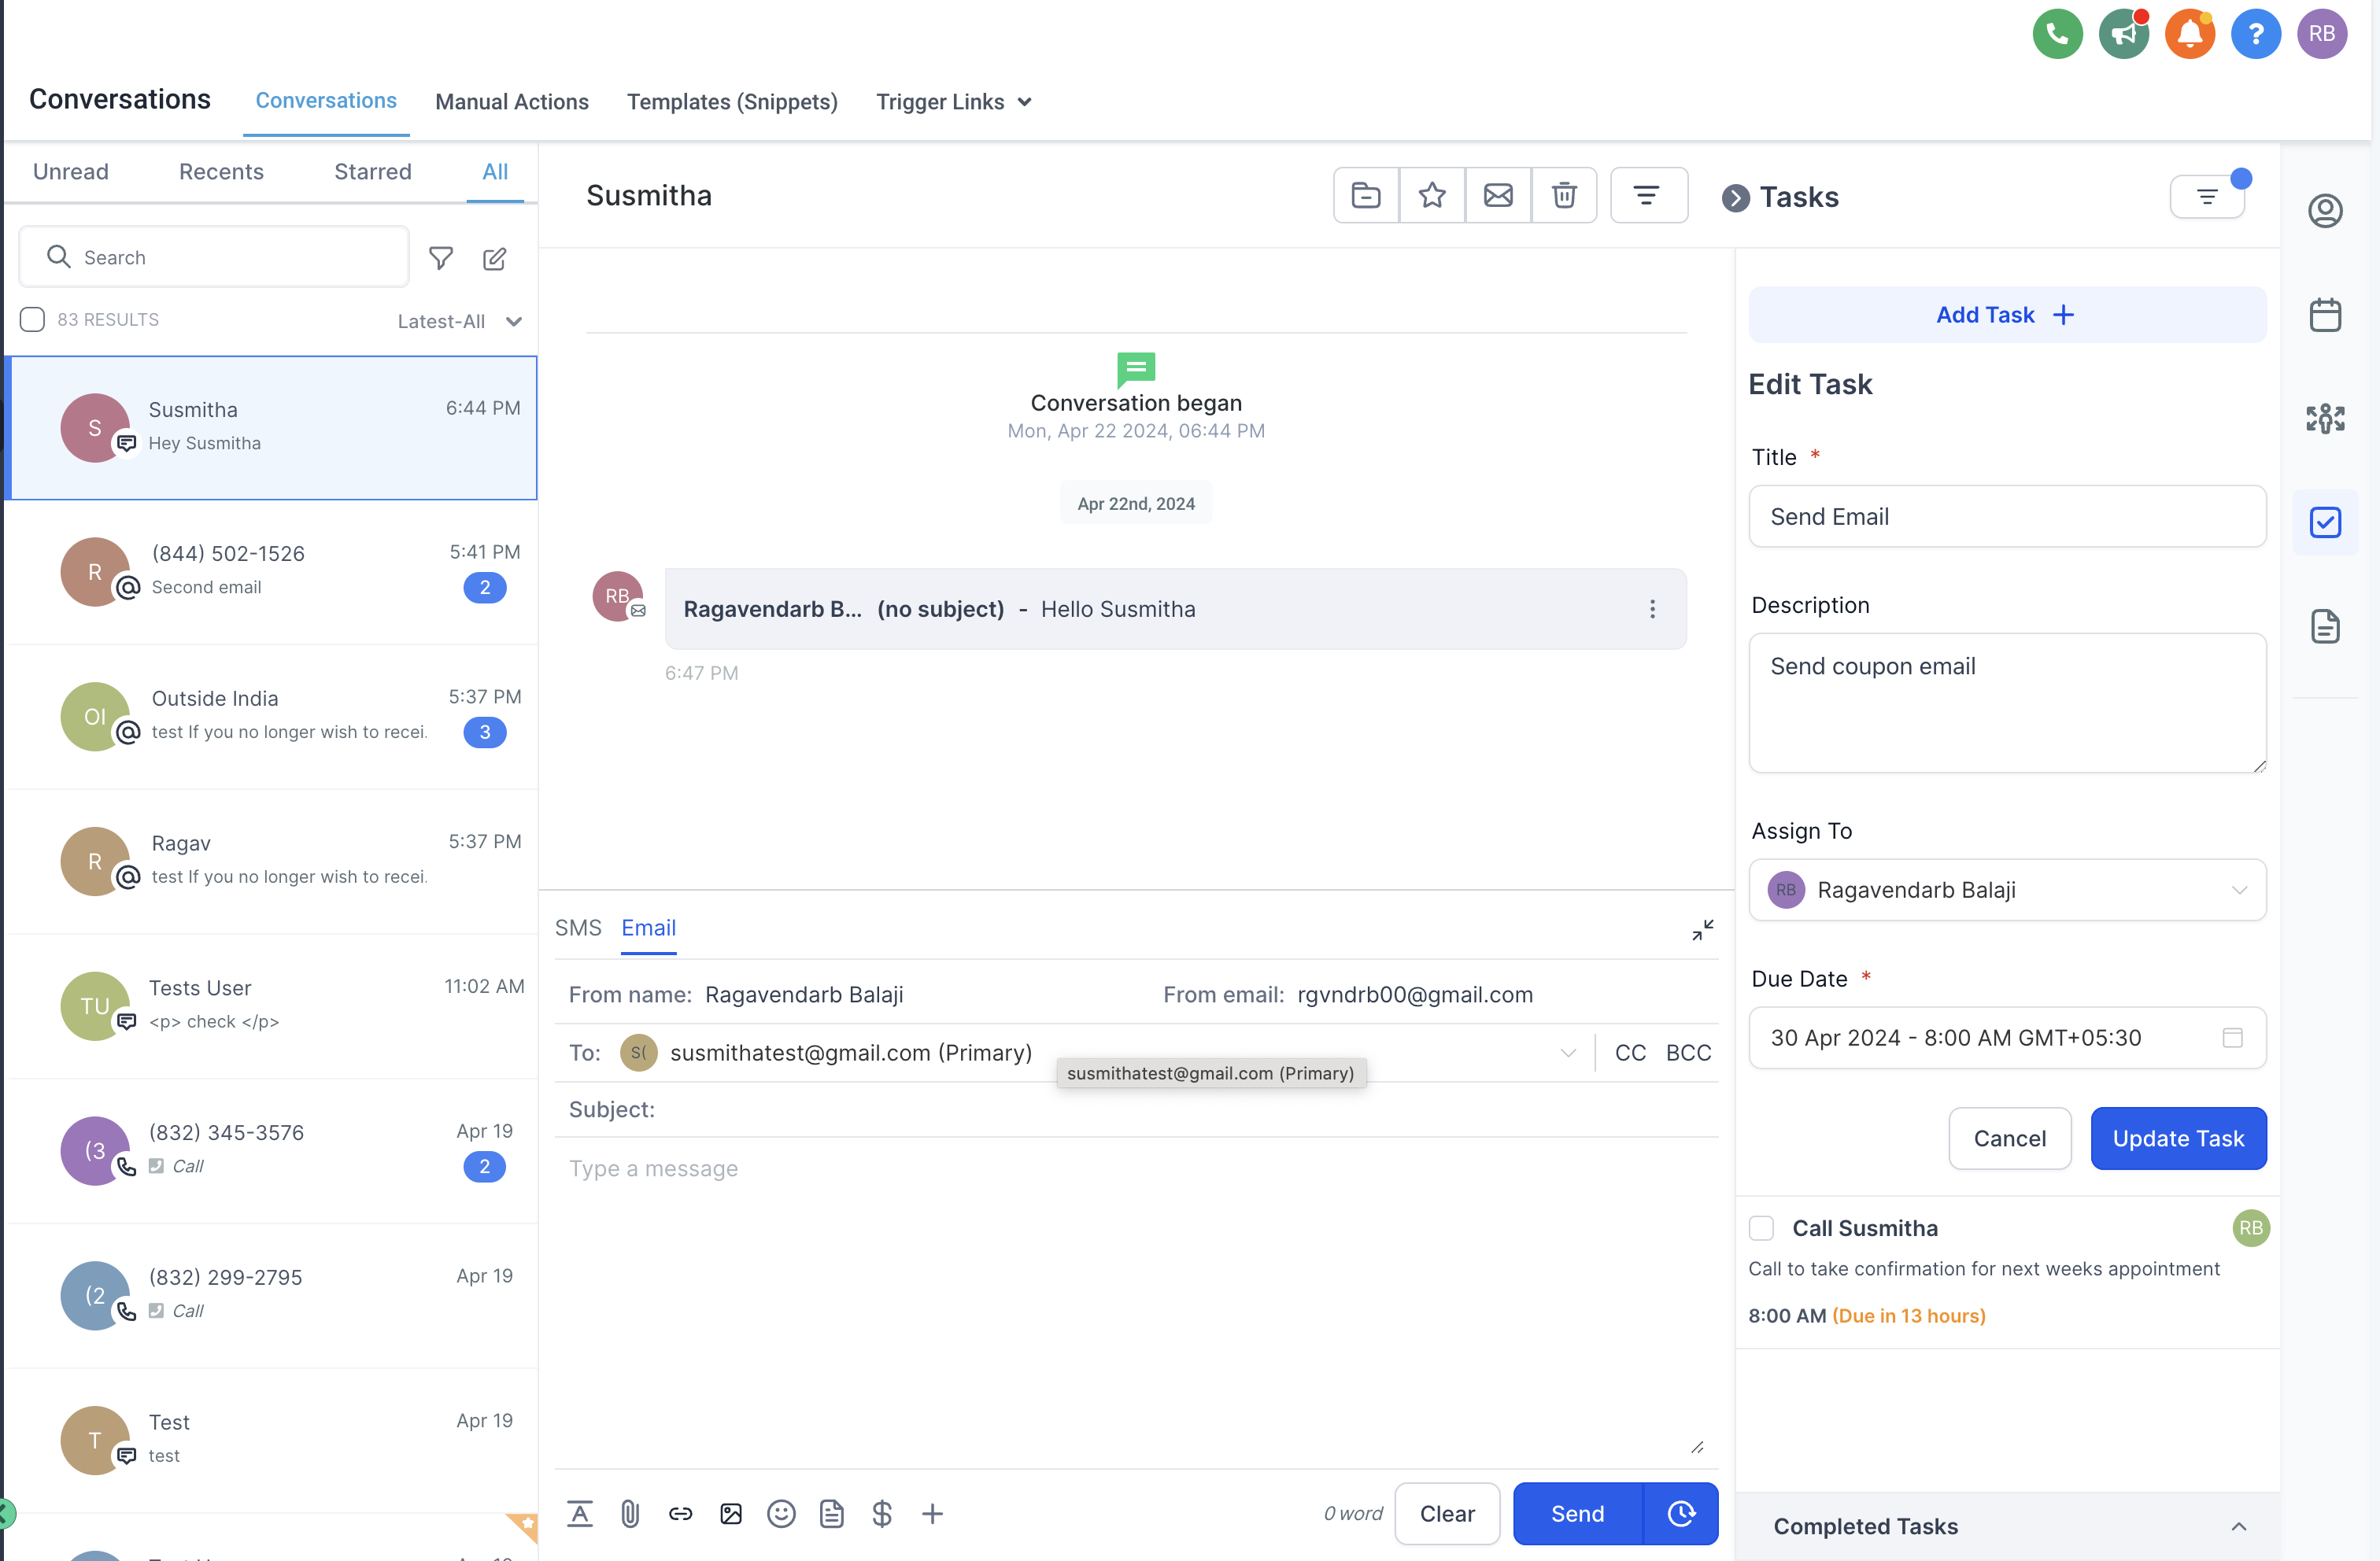
- 😃 Undo Delete Option:Introducing the 'Undo Delete' feature for both tasks and notes, allowing users to effortlessly restore accidentally deleted items and prevent data loss.
How It Benefits:
- Boosts Productivity:Managing notes and tasks within the Conversations module saves time and allows users to quickly multitask. ⏰
- Improves User Experience:Integration into the conversations module reduces interruptions, providing a smoother and more intuitive workflow. 😊
- Easy Recovery: The 'Undo Delete' feature allows users to recover accidentally deleted tasks, minimizing disruptions and preventing data loss. 👍
👉
Note
- This feature can currently be accessed via Labs. new
Automations
GPT 4 Turbo
What is this enhancement?
- We have revamped the current action and added multiple new enhancements. This new enhancement will make the GPT action extremely powerful and users will be able to use the power of GPT 4 Turbo in the workflows at same price we were offering GPT 3.
What are the new feature?
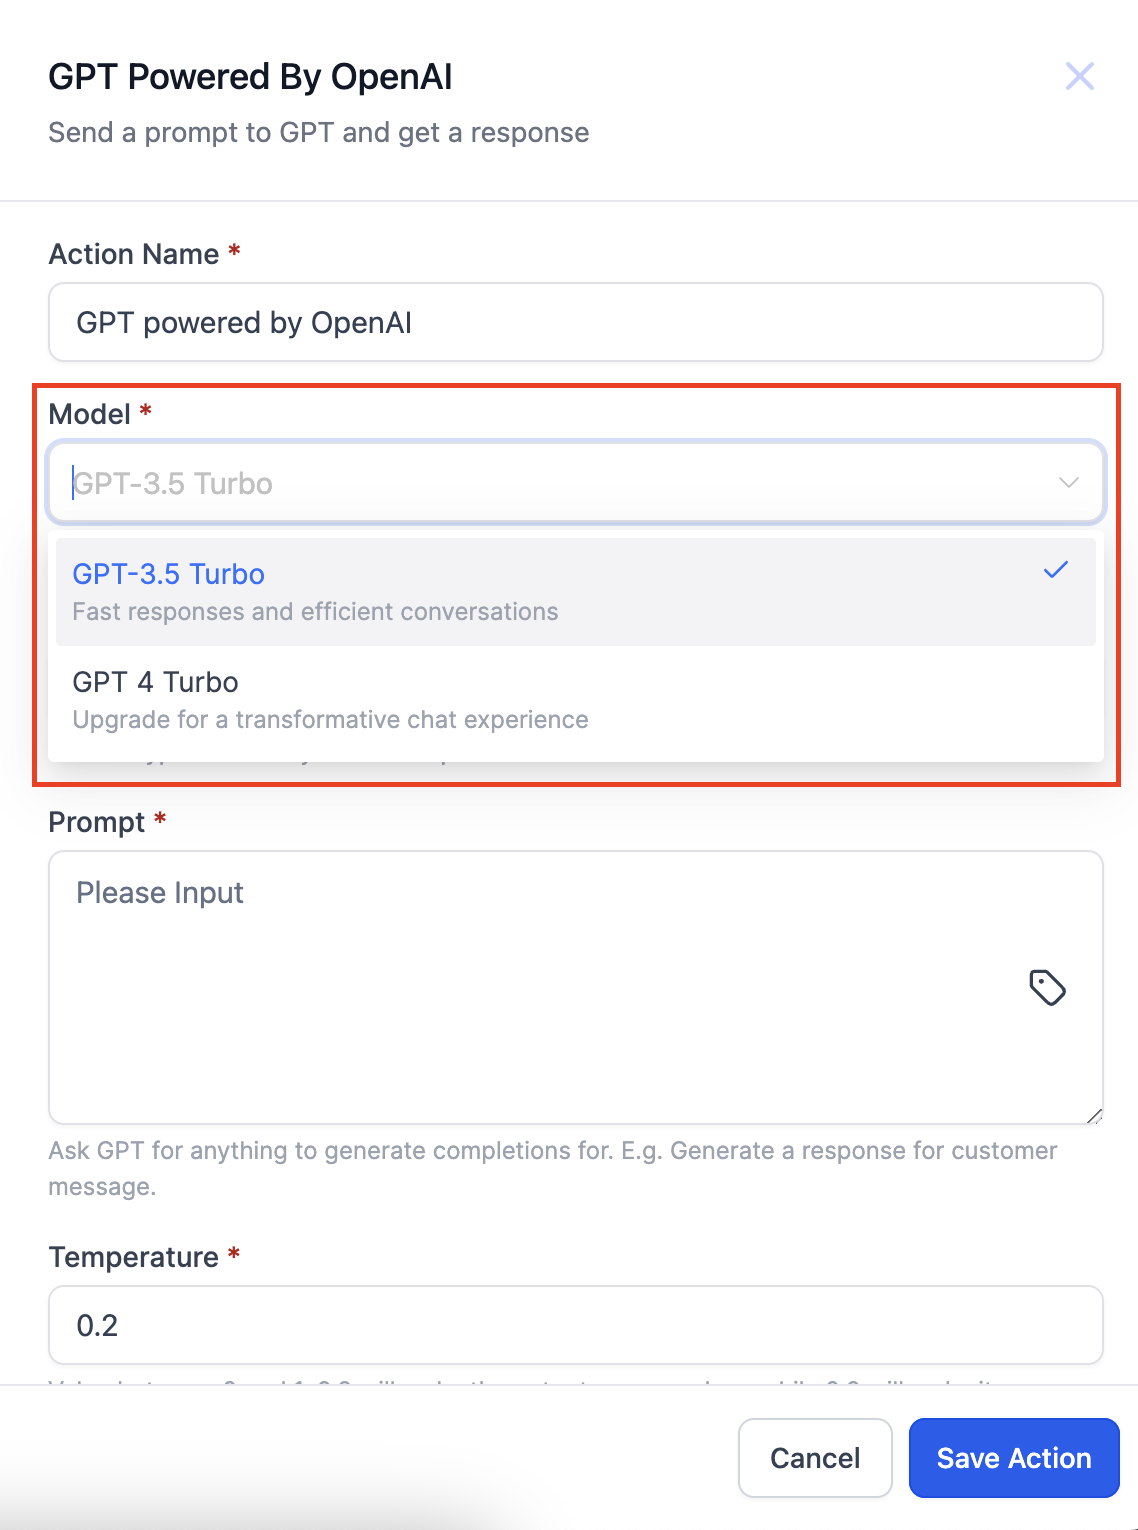
Select Model
- Users will be able to select from a "Model" to select from. By default GPT 3 Turbo will be selected but the users will have the option to select GPT 4 Turbo from the dropdown.
Select Action Type
- Don't know what prompt to use, try some of our pre made action types. The prompt will auto populate and the action can be used based on that. Below options are available to select from.
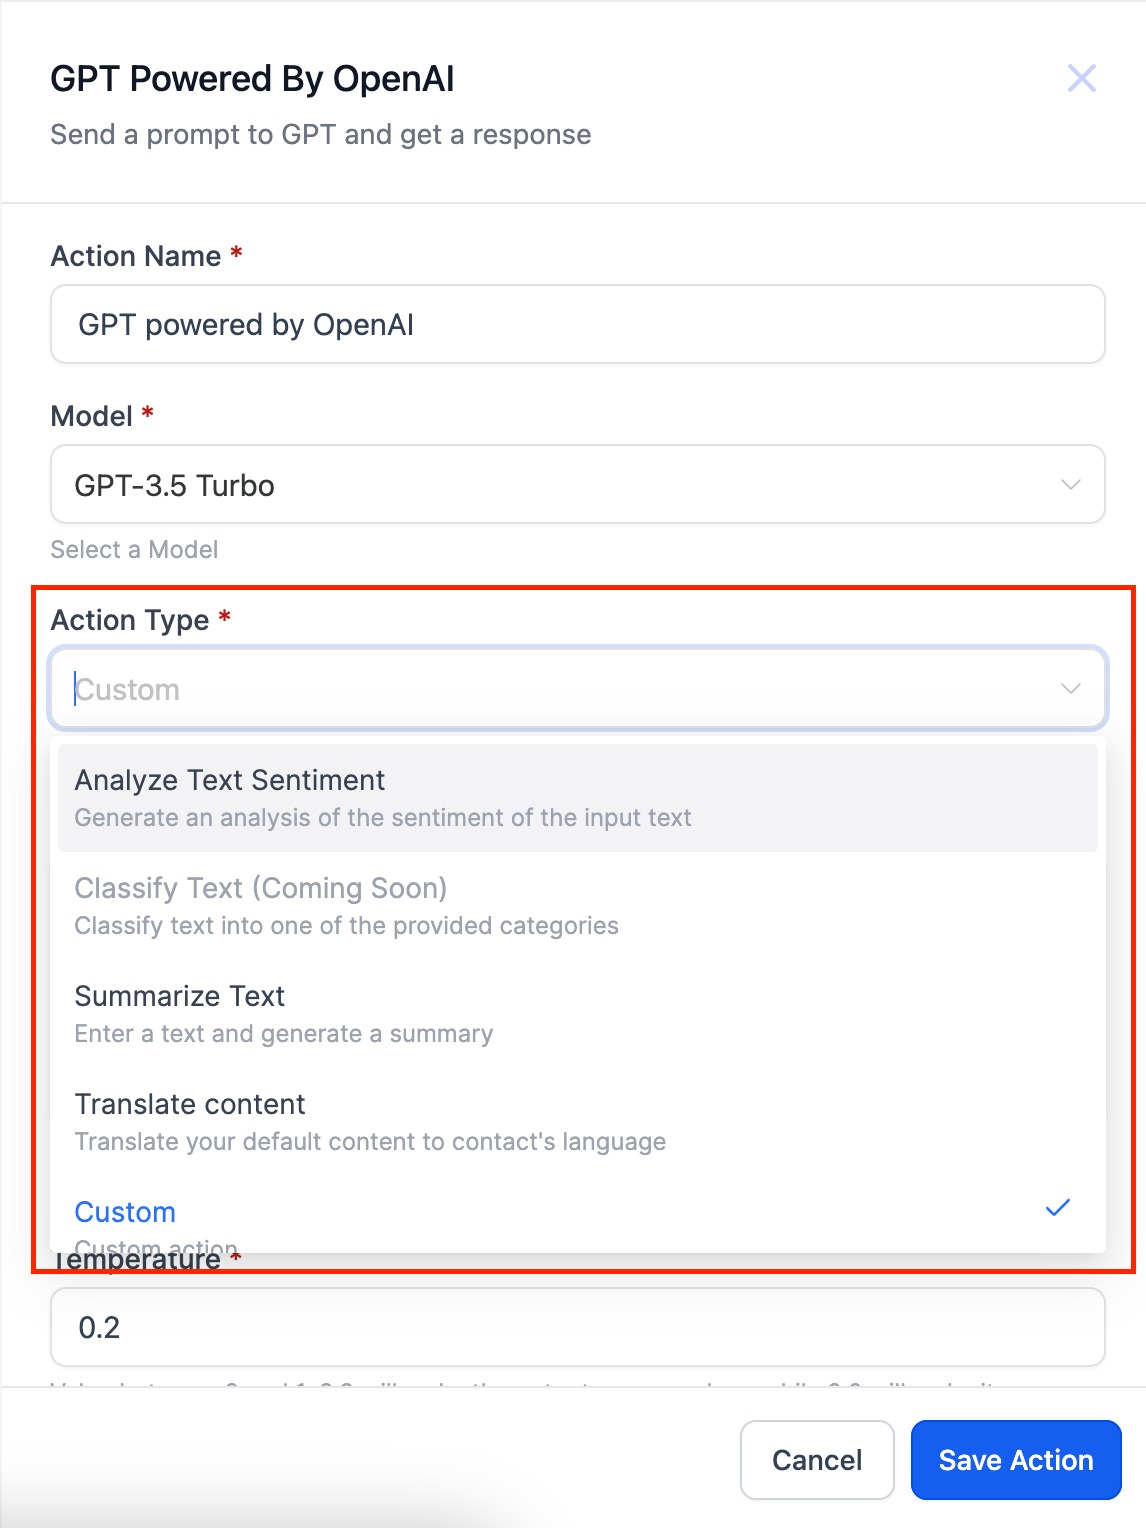
- Analyze Text Sentiment
- Summarize Text
- Translate
- Custom
How to use this feature?
- Click the "+" icon and search for "GPT powered by OpenAI"
- Select the Model
- Use Custom action type if you want to write the prompt
- Use Any other Action type to get pre populated prompts
Pricing
- GPT 4 Turbo - $0.03 per execution
- GPT 3.5 Turbo - $0.015 per execution
Load More
→